
Delivery Management
The big picture
If you deliver, three things usually happen by hand: working out what to charge, jotting the day's drop-offs on a scrap of paper, and messaging each customer to say it's on the way. Delivery Management does all three:
Set your zones and fees once → open the dispatch board for a day → run your drops in order, mark them delivered, and let the customer emails send themselves.
1. Turn on delivery and set your fees
Click Delivery in the sidebar, then open the Settings tab. Turn on Enable delivery to switch the feature on.
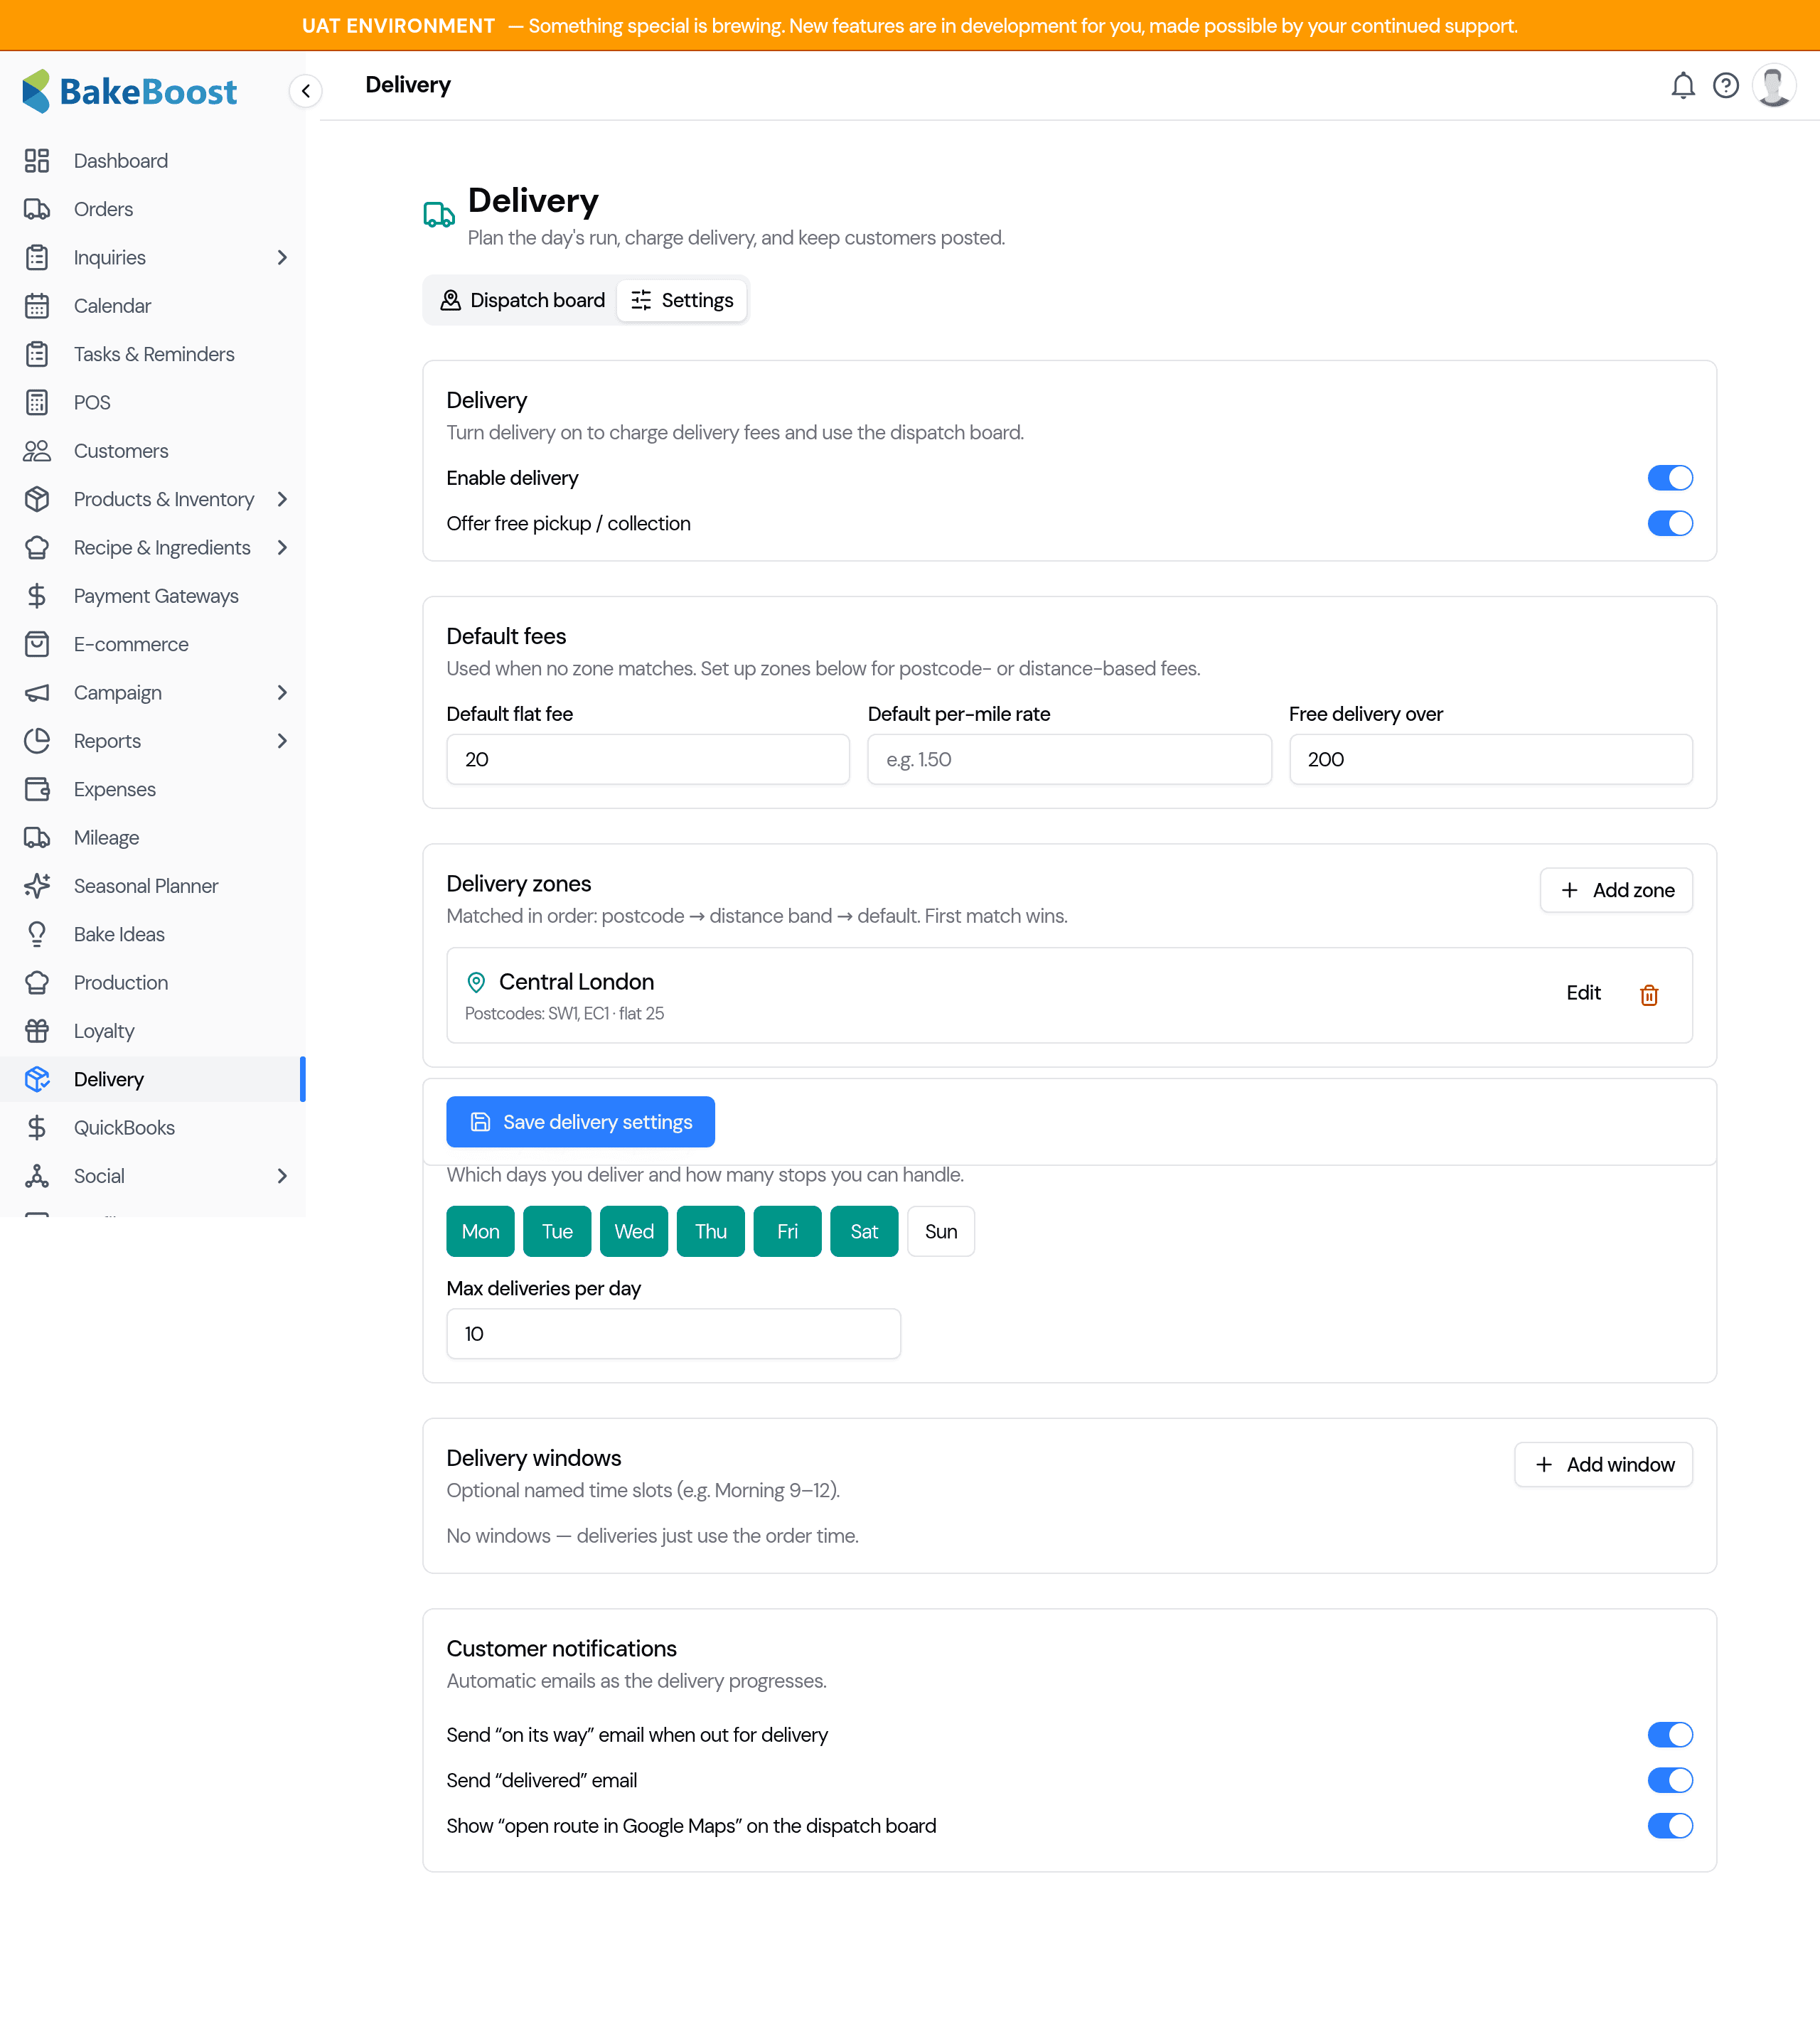
Under Default fees, set the fee to use when no zone matches:
- Default flat fee — a single charge for any delivery (e.g. £20).
- Default per-mile rate — charge by distance instead.
- Free delivery over — orders at or above this amount get free delivery.
You can also turn on Offer free pickup / collection so customers always have a no-charge option.
2. Add delivery zones
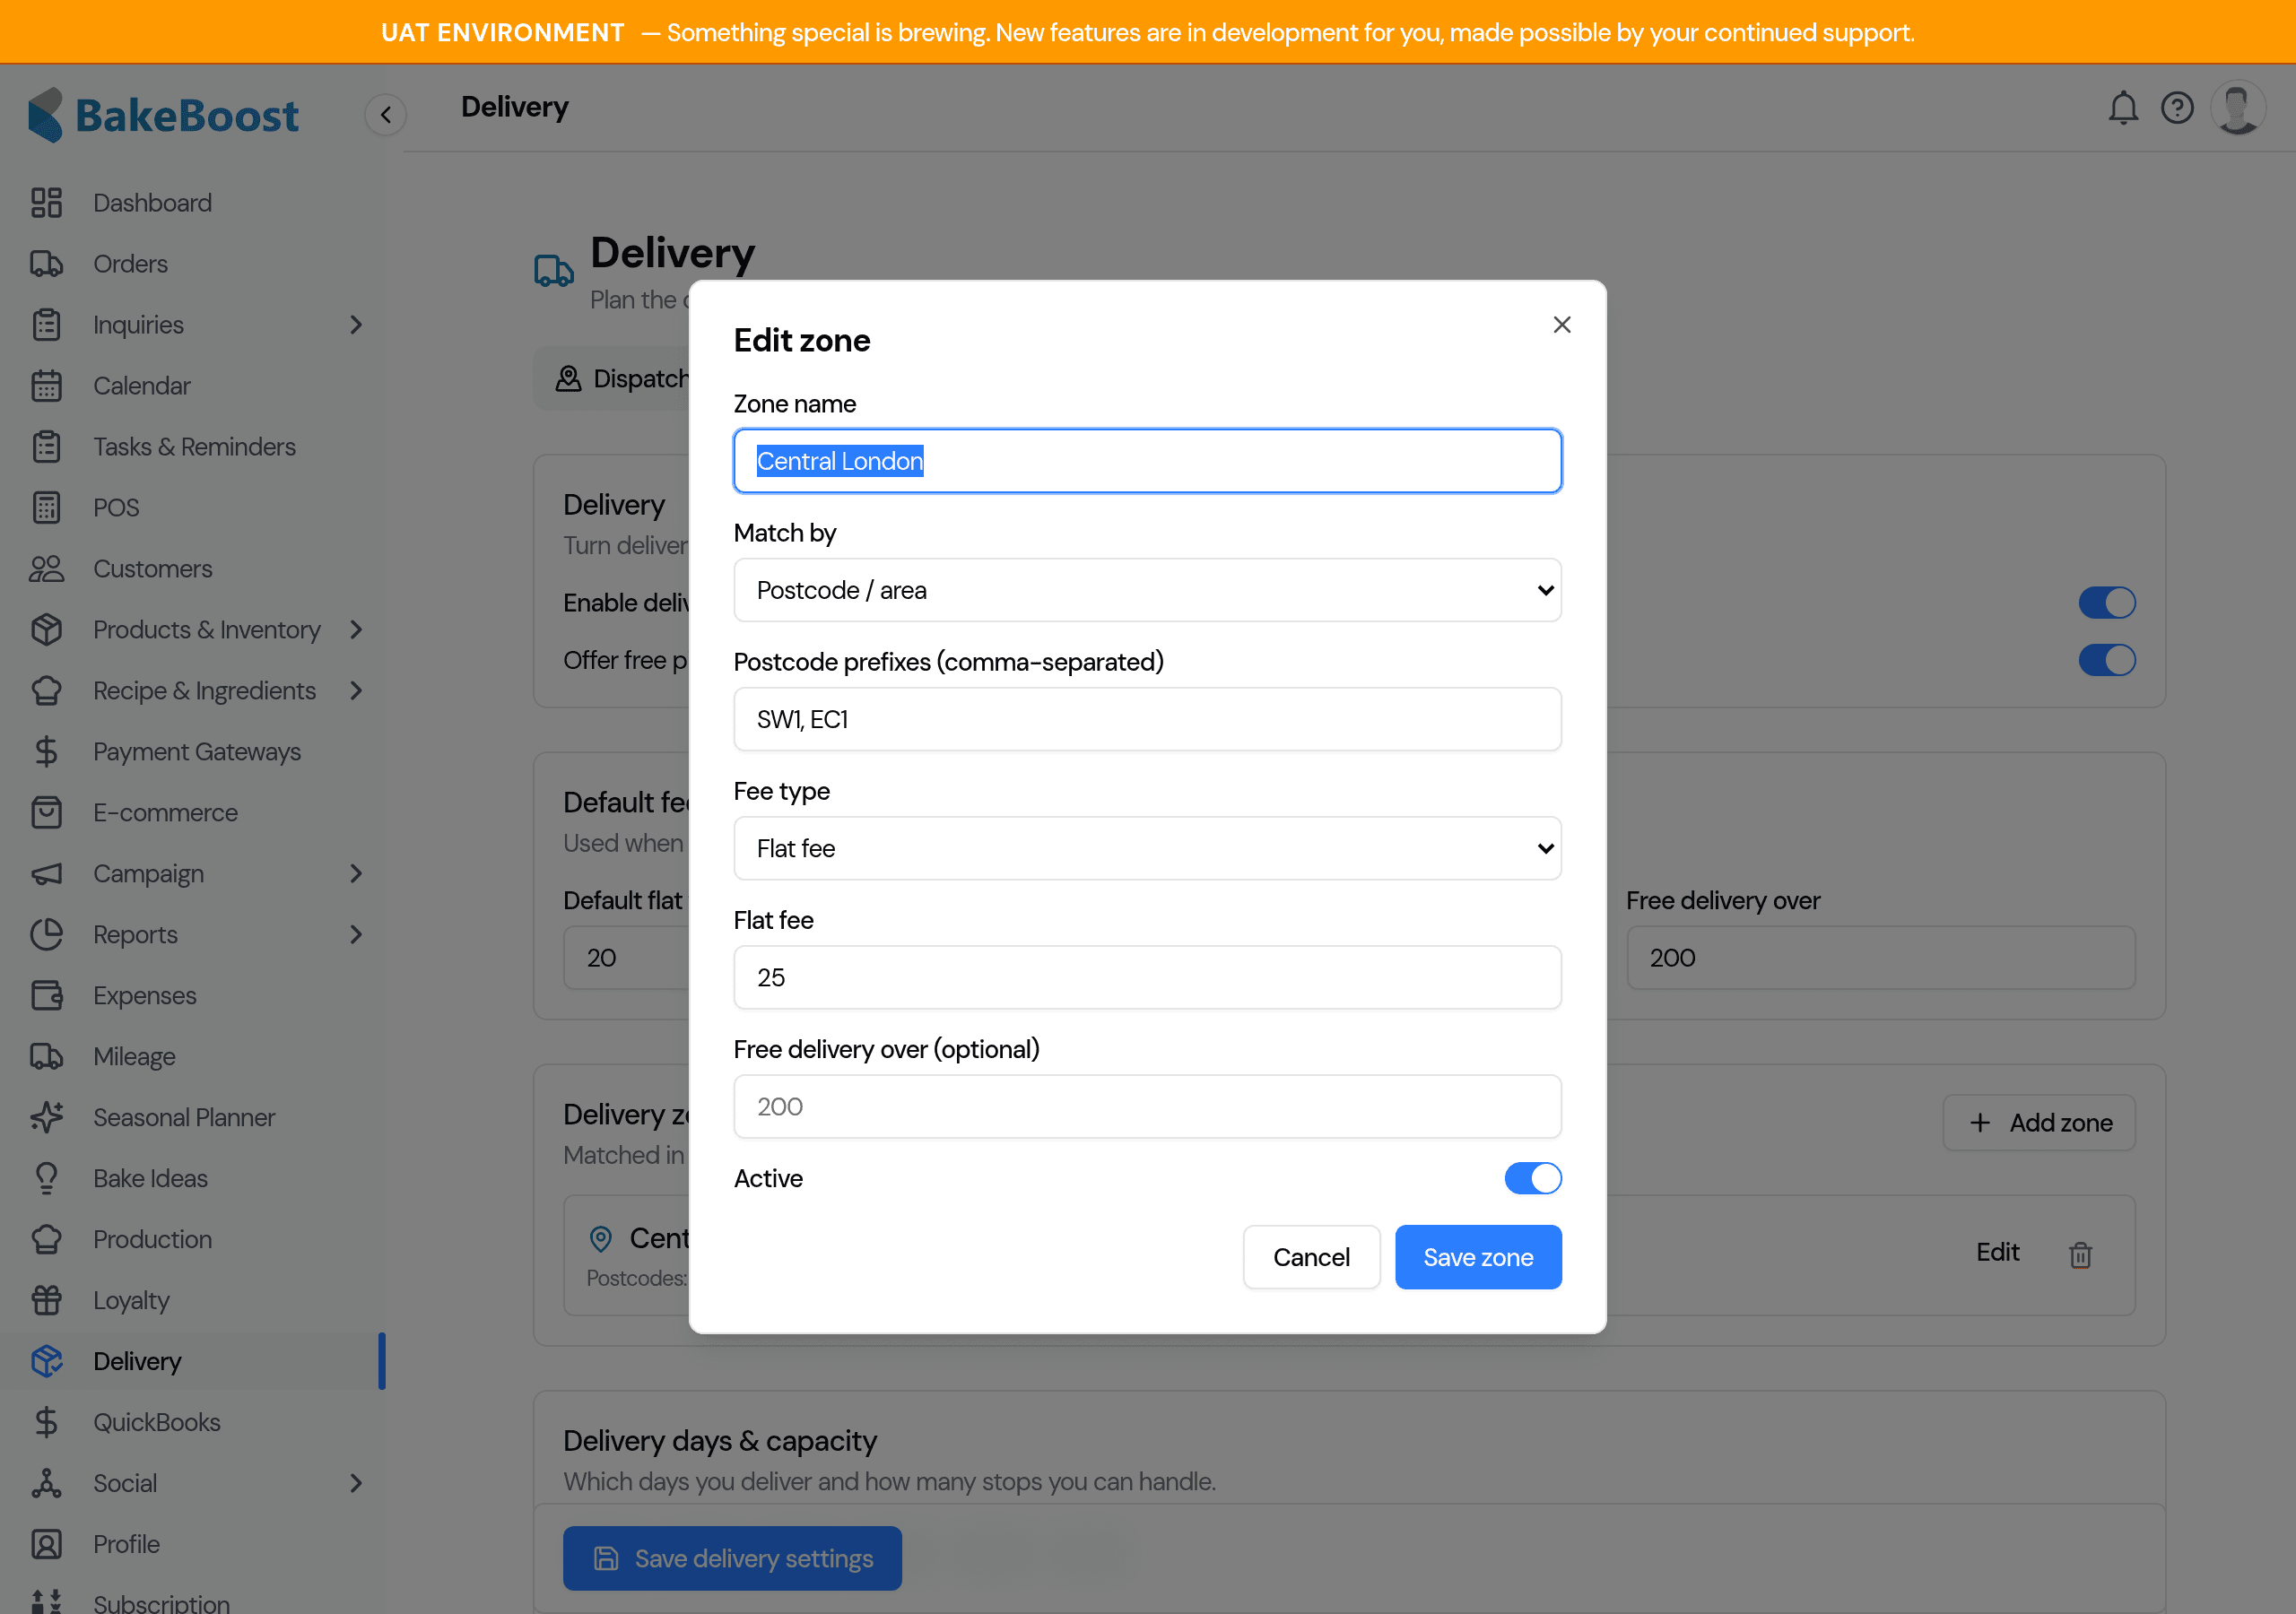
Zones let you charge different amounts for different areas. Click Add zone and choose how it's matched:
- Postcode / area — enter the postcode prefixes it covers (e.g.
SW1, EC1). - Distance band (miles) — a from–to range, e.g. 0–10 miles.
- Everywhere else (default) — a catch-all for anything your other zones don't cover.
Then set the fee — a flat fee, or a per-mile rate with an optional base fee — and, if you like, a free-delivery amount just for that zone.
3. Set your delivery days and windows
Tell Bake Boost which days you deliver and how many stops you can handle:
- Delivery days — tap the days you deliver on.
- Max deliveries per day — a gentle cap; the dispatch board warns you when a day goes over it.
- Delivery windows (optional) — named time slots like "Morning 9–12" with their own cap.
Click Save delivery settings when you're done — everything on this tab saves together.
4. Work the dispatch board
The Dispatch board is your run sheet for a day. Pick a date and you'll see every delivery due that day — collections, quotes and cancelled orders are left off automatically.
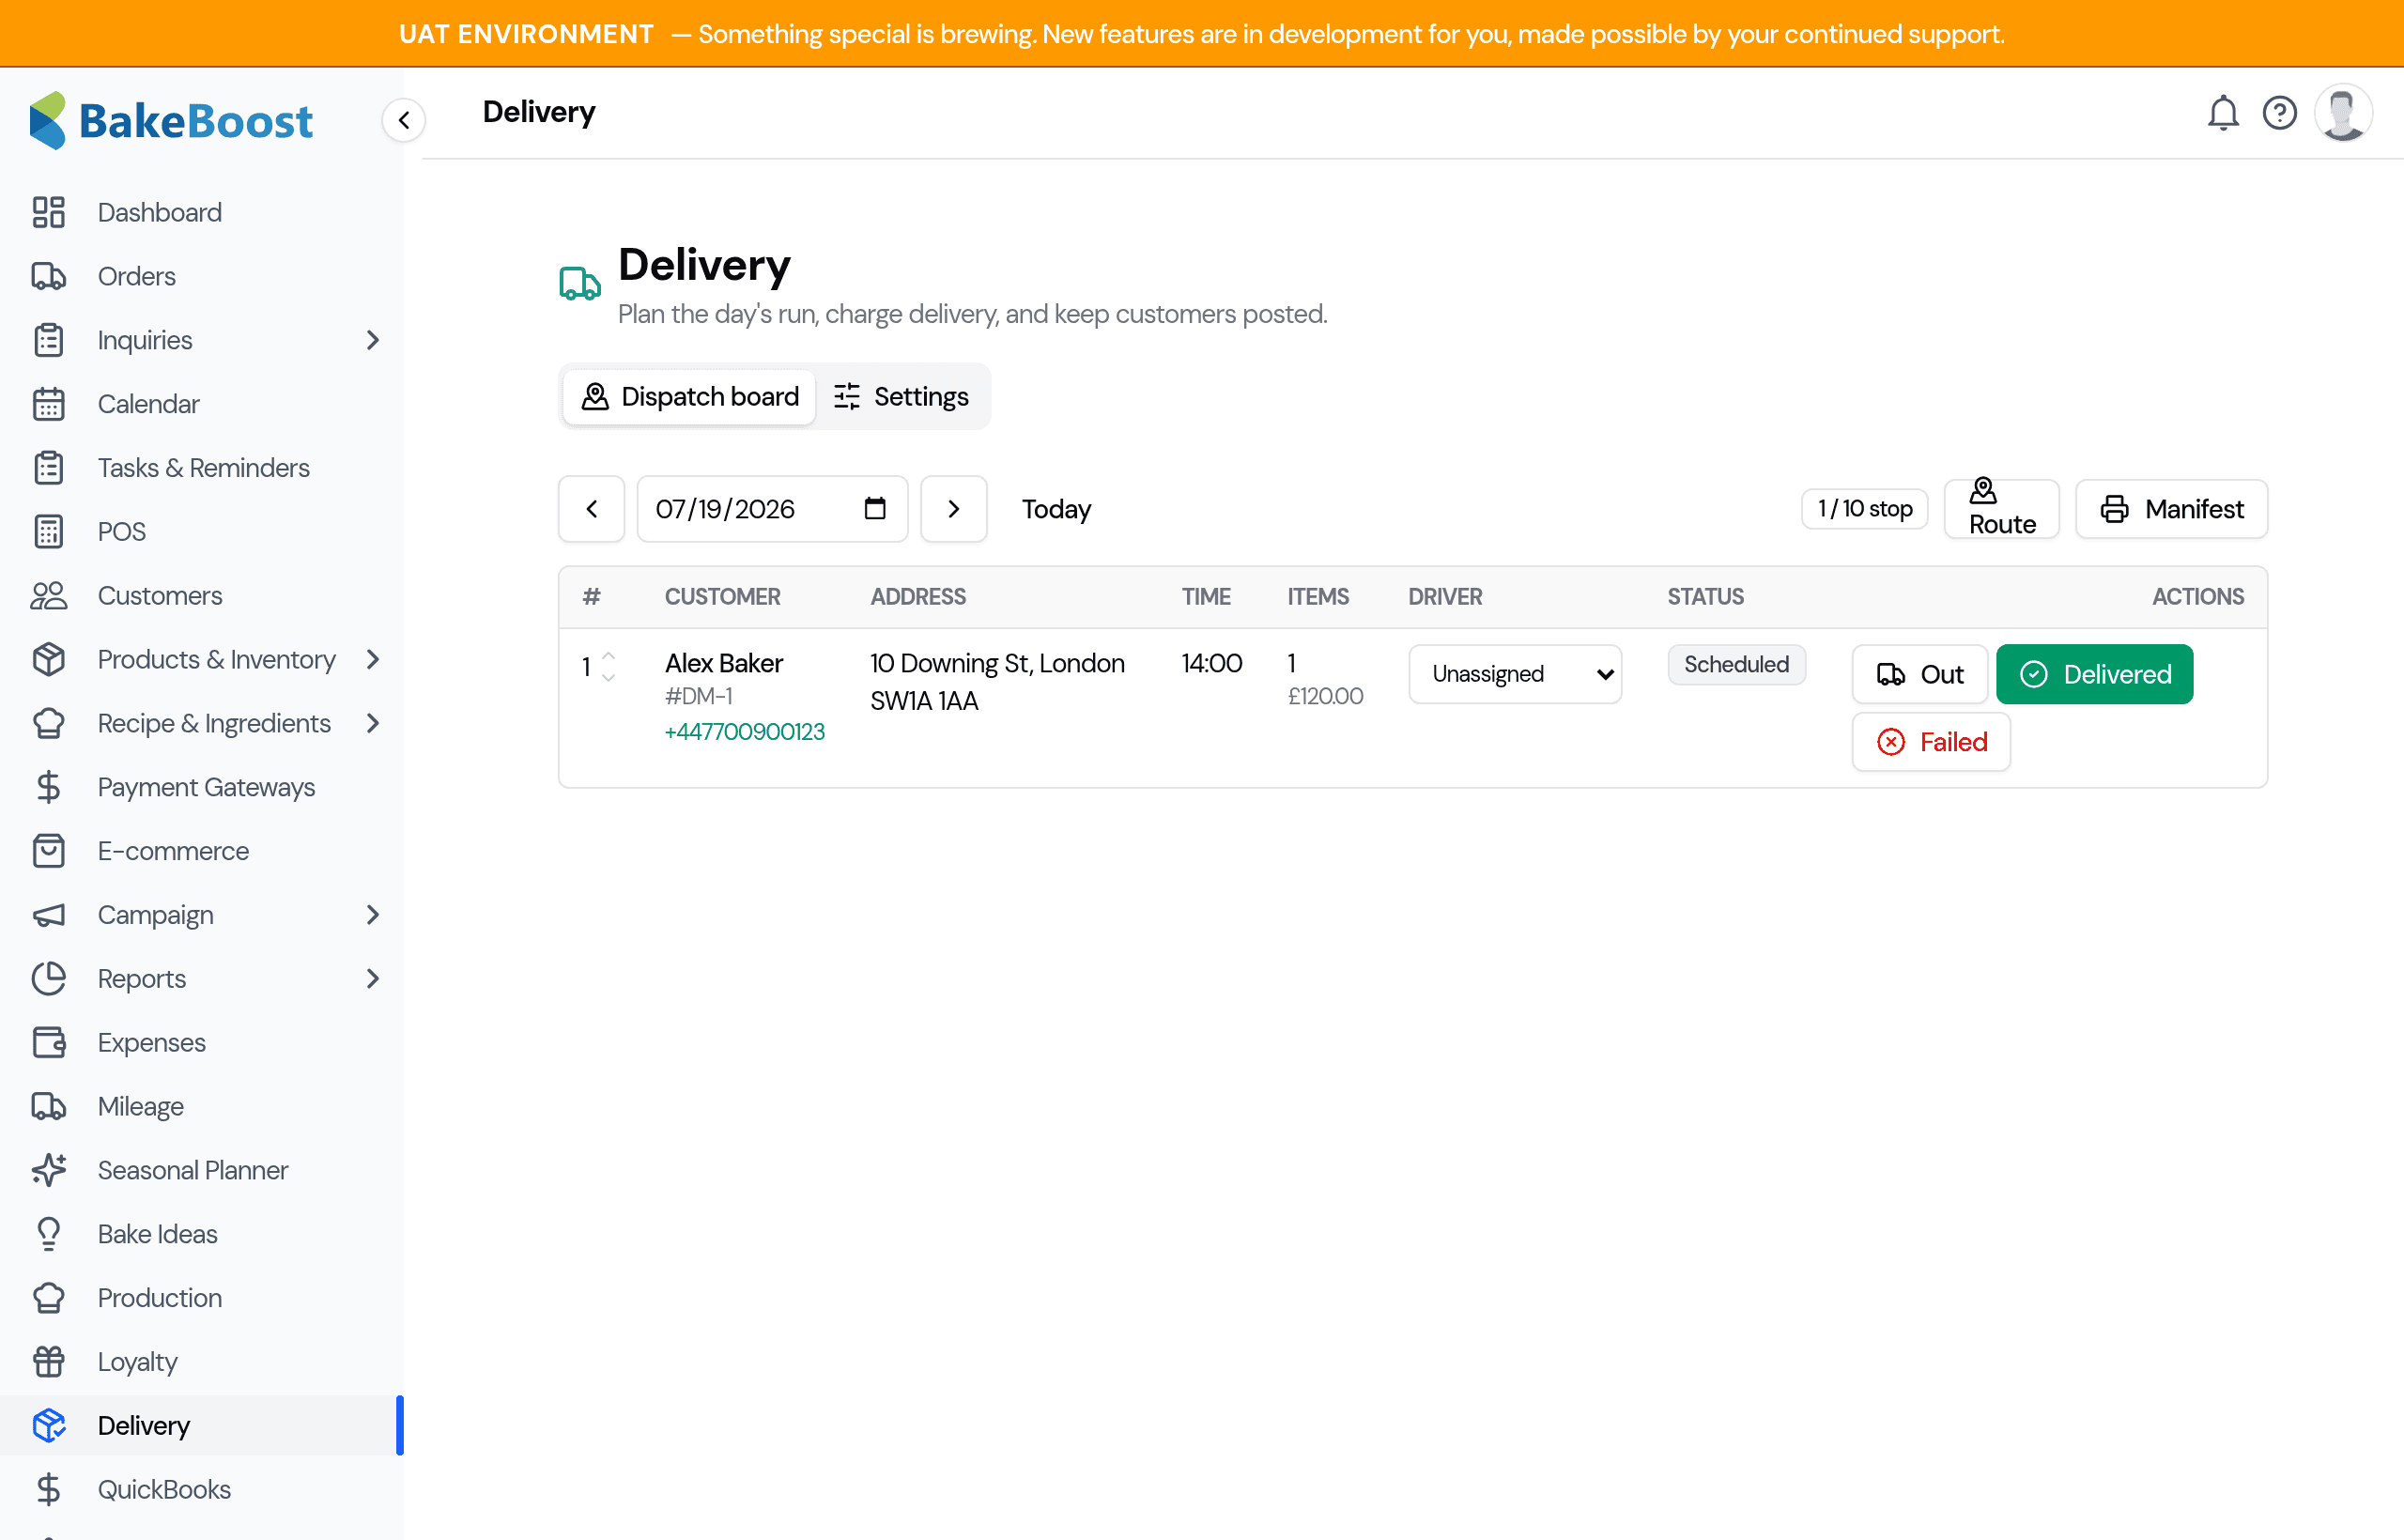
For each stop you can:
- Put it in driving order — use the up/down arrows to sequence your drops.
- Assign a driver — pick yourself or a team member from the dropdown.
- Open the whole run in Google Maps — the Route button opens every stop, in order, as one set of directions.
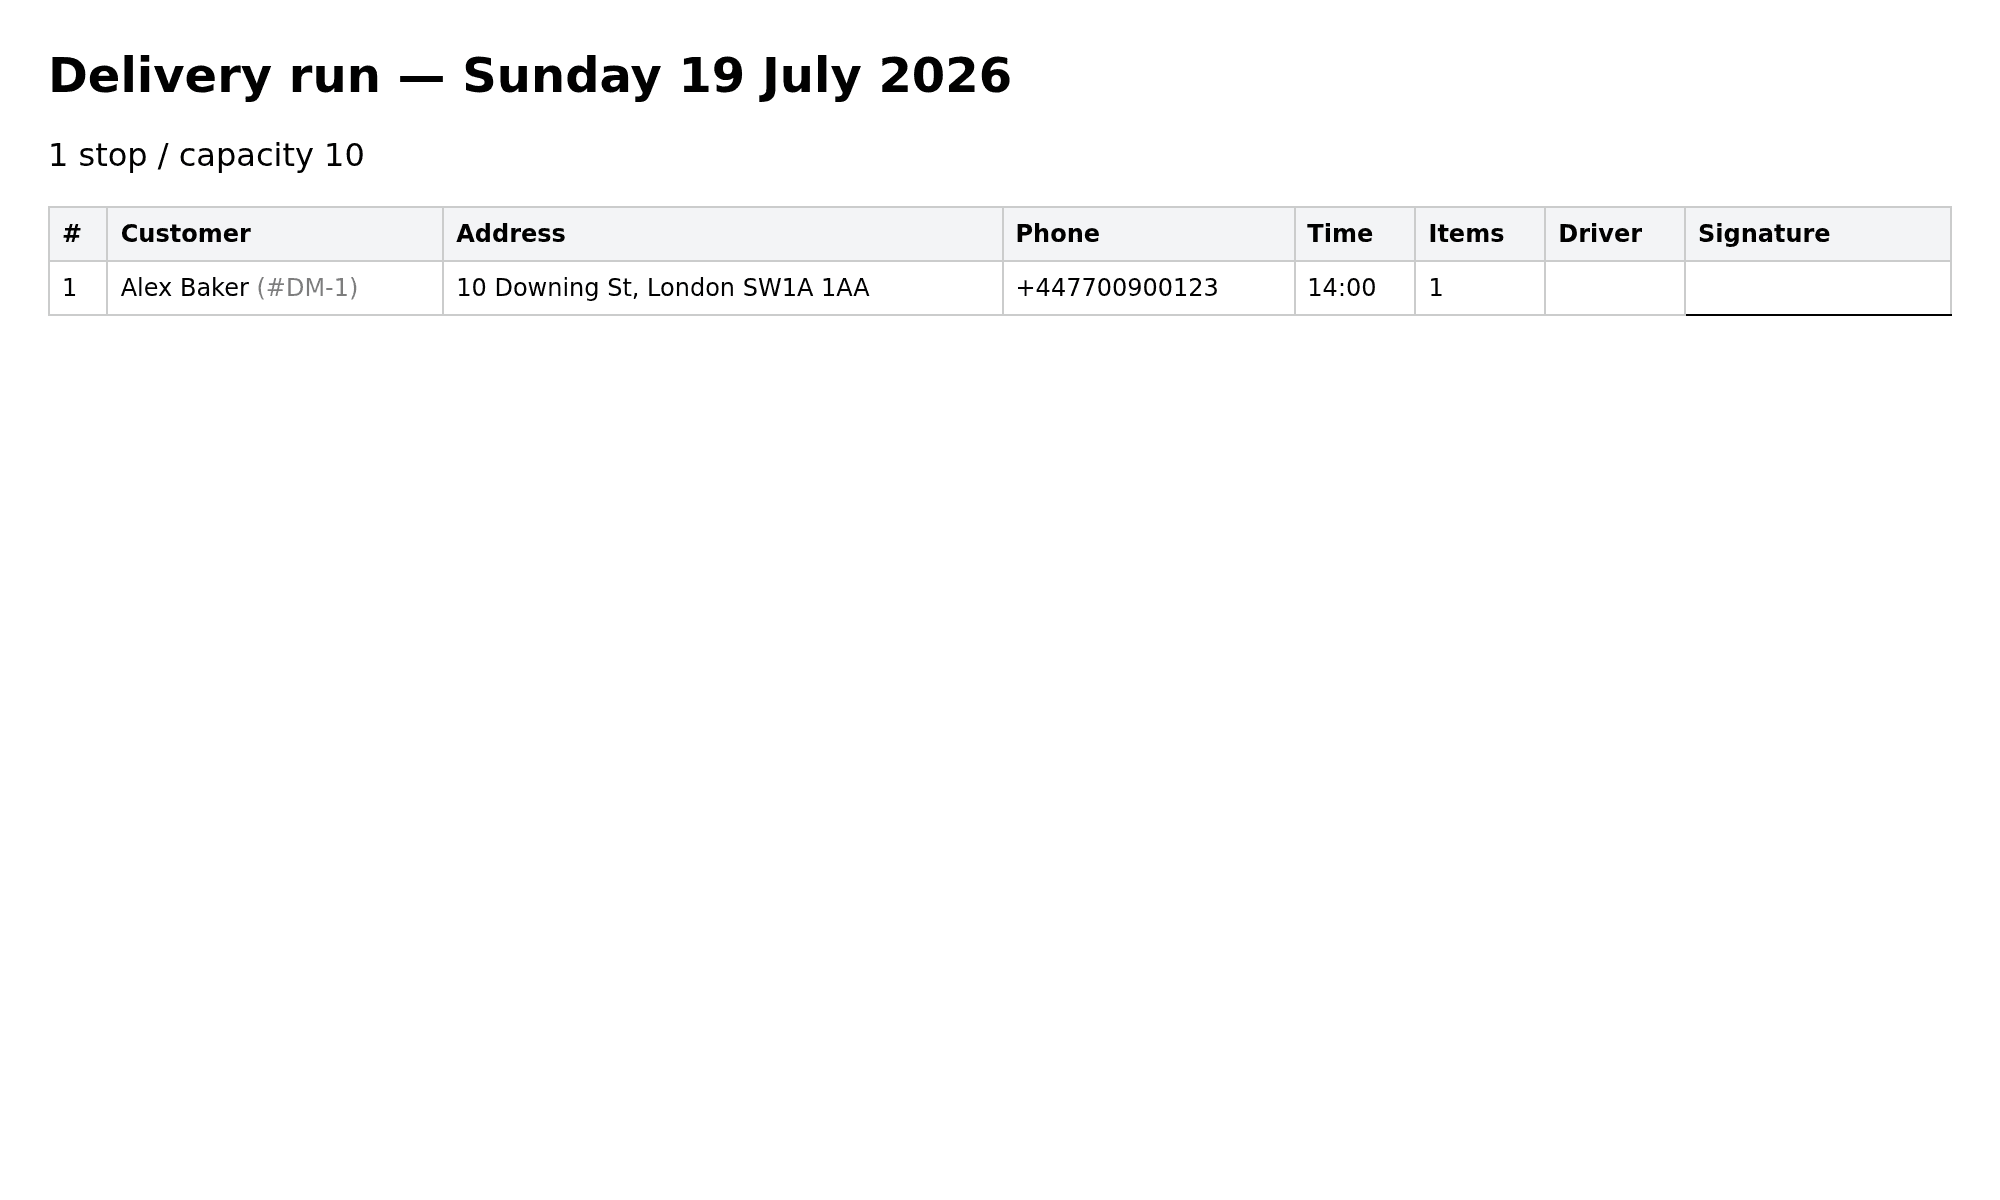
- Print a run sheet — Manifest prints a paper list with addresses, phone numbers and a signature column for the driver.
The count at the top (e.g. 1 / 10 stops) shows how full the day is against your daily cap.
5. Mark deliveries as they happen
Move each stop along as you go:
- Out — marks it out for delivery (and emails the customer, if turned on).
- Delivered — opens a quick proof-of-delivery box.
- Failed — record a reason if a drop couldn't be completed.
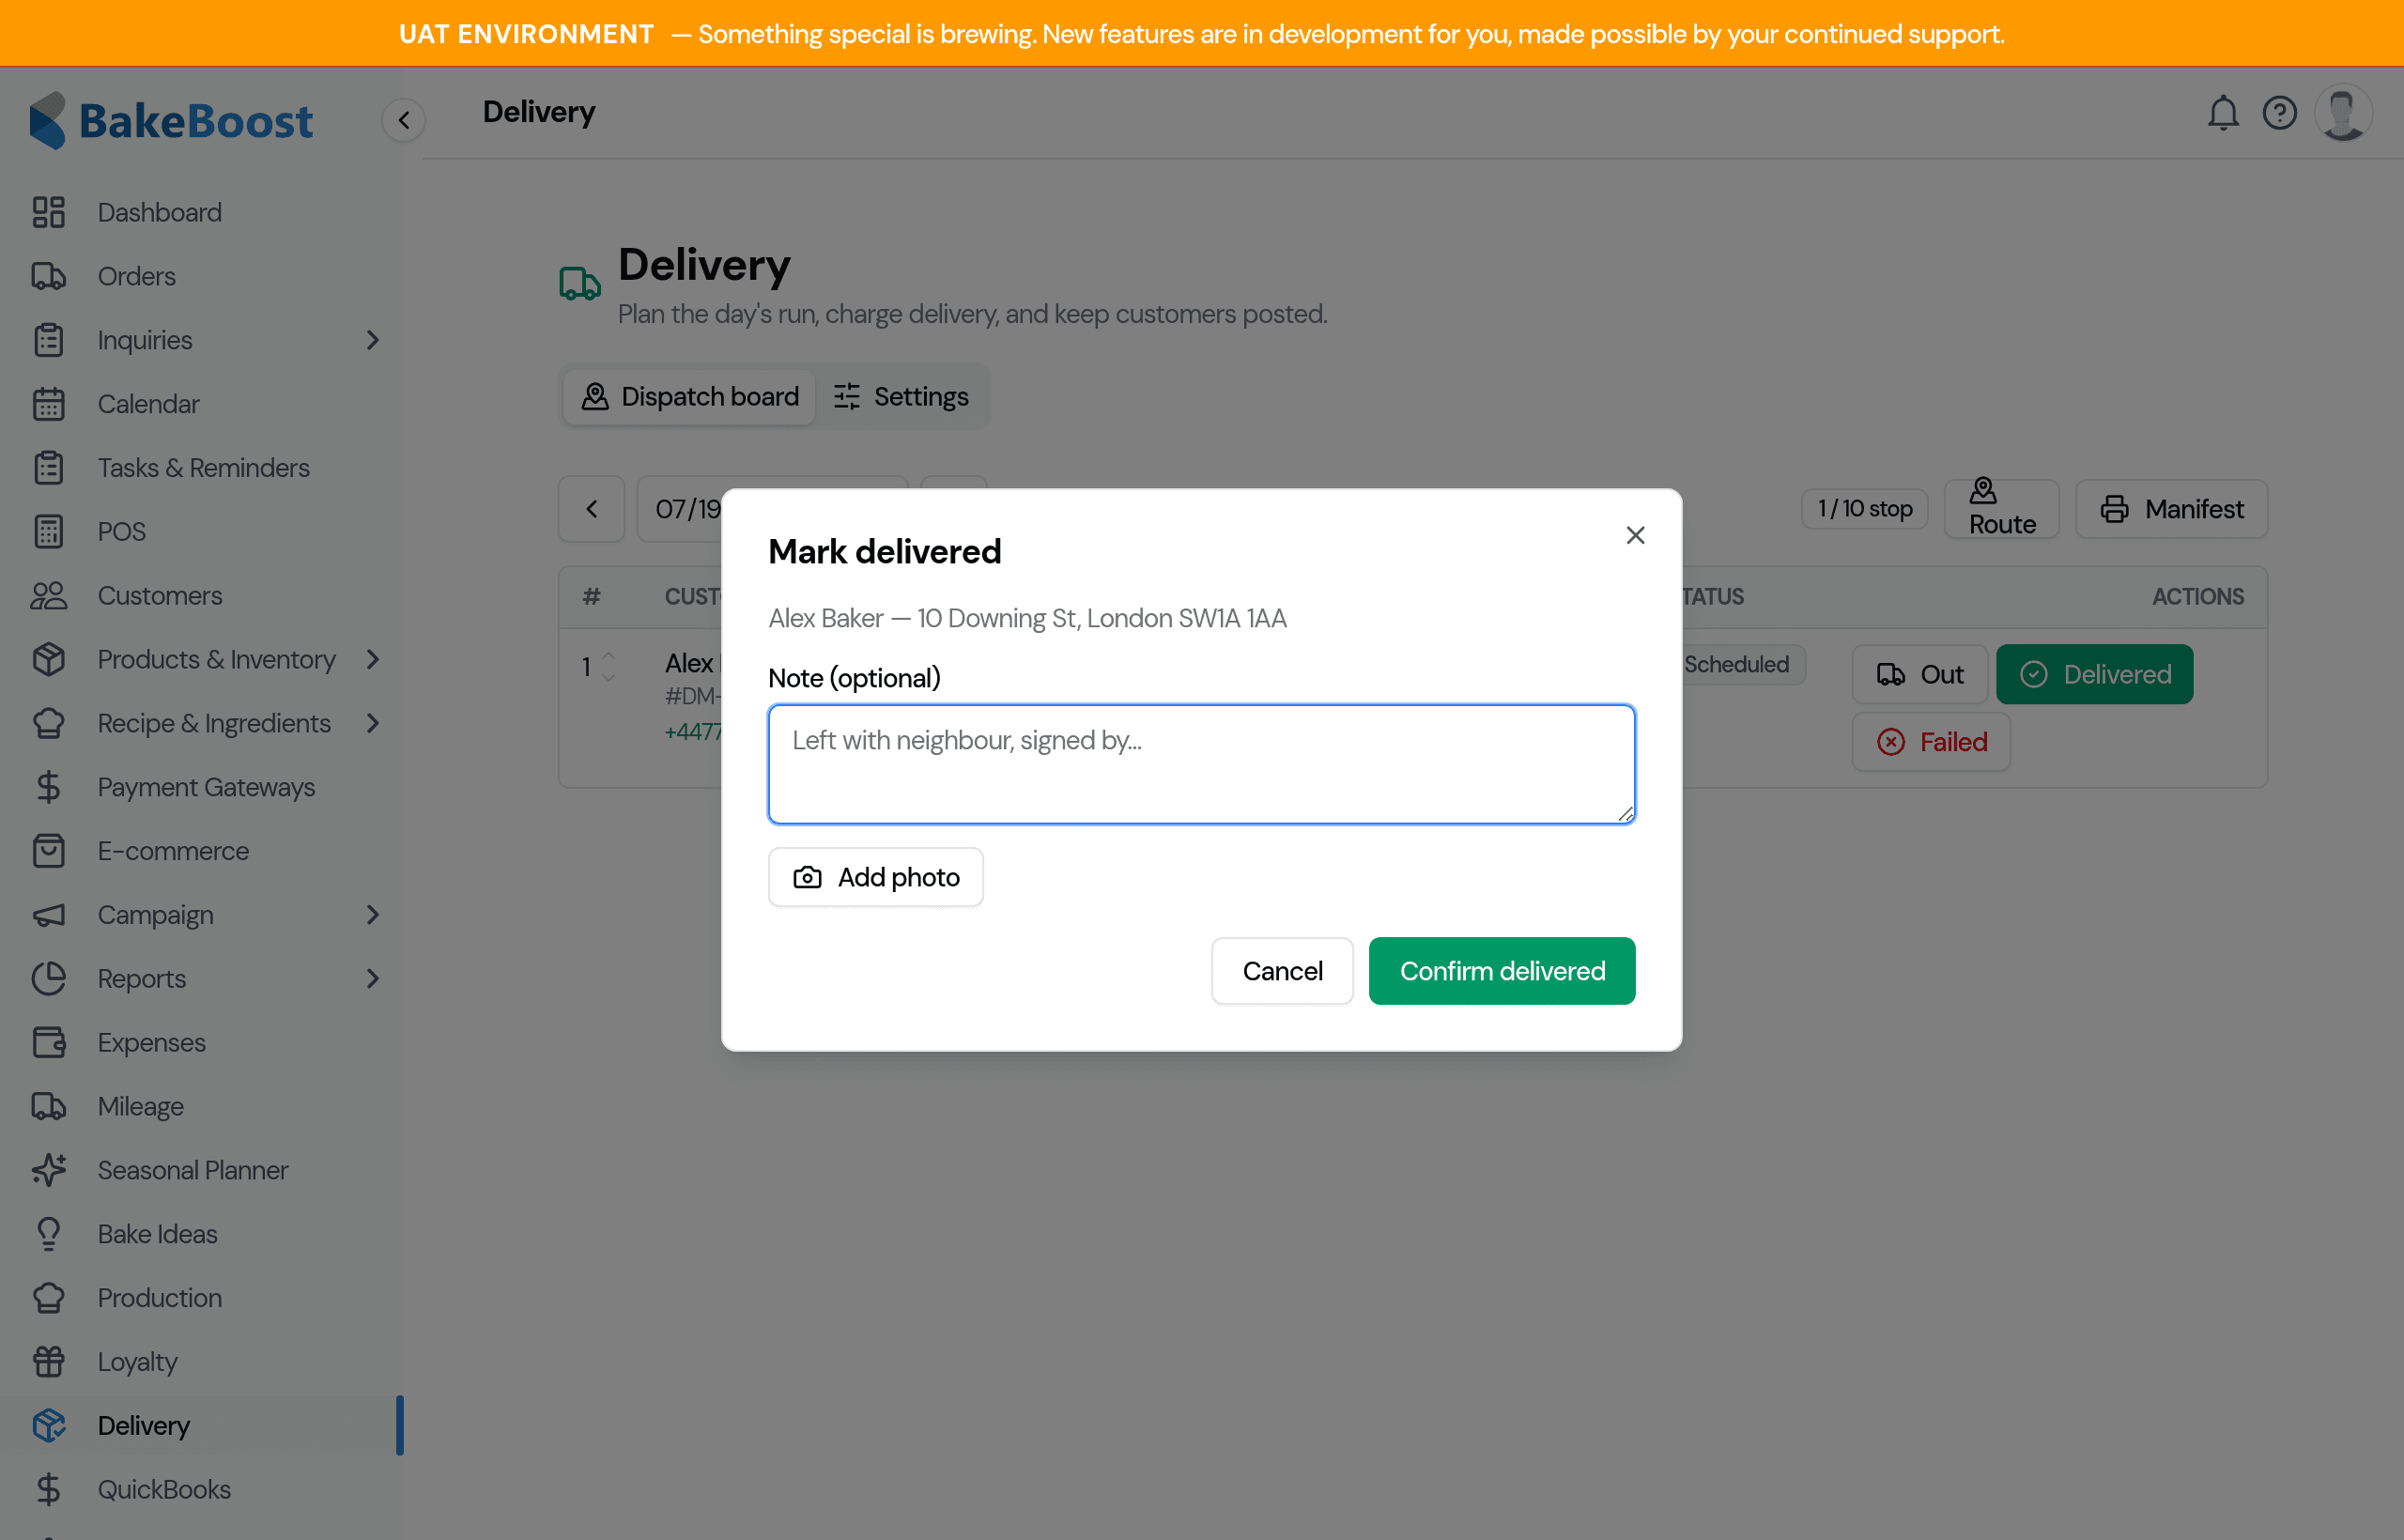
When you mark a stop Delivered you can add a short note (e.g. "left with neighbour") and a photo as proof — handy from your phone, where the button opens the camera.
6. On your phone
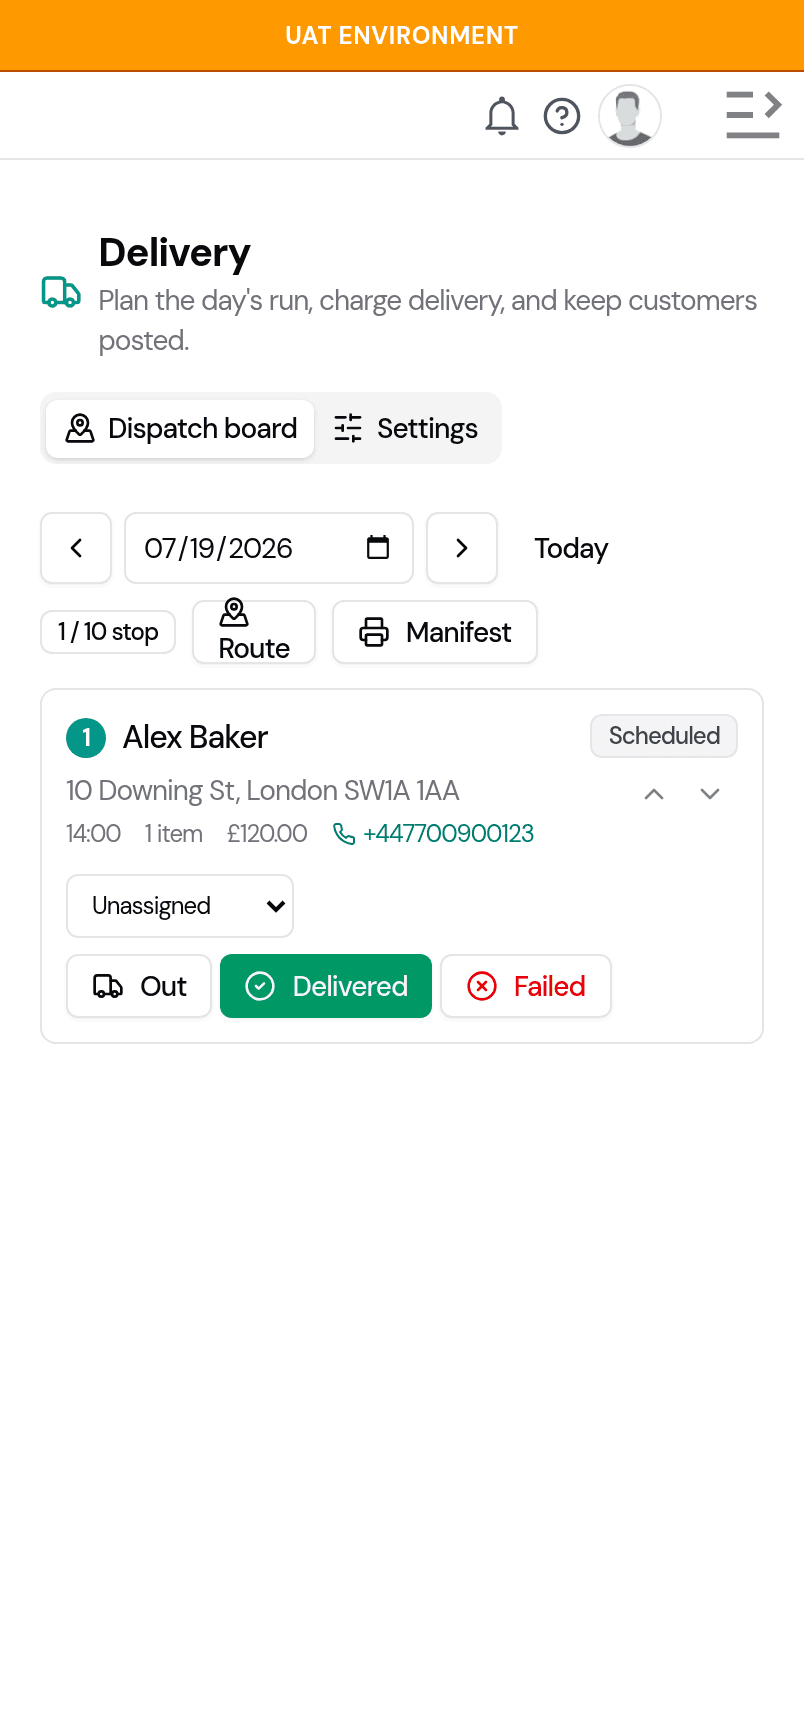
The board is built for the van: on a phone each stop becomes a tap-friendly card with the address, a tap-to-call number, the driver picker and the status buttons all to hand.
7. Customer emails
Under Customer notifications on the Settings tab you can turn on two automatic emails:
- On its way — sent when you mark an order out for delivery.
- Delivered — sent when you mark it delivered.
Both use your business name and can be edited under Settings → Email templates. They only ever go out for delivery orders, never for pickups.
Charging delivery on an order
The fee you set up here is added to the order's delivery / shipping charge, so it flows into the order total and the customer's invoice like any other charge. Set the order's type to Delivered (rather than Collected) and it appears on the dispatch board for its delivery date.
Tips
- Start with a default flat fee and a free-delivery amount — that alone covers most bakers. Add zones later if different areas need different prices.
- Keep a default zone so a delivery to an unexpected area still gets a sensible charge.
- Each delivery morning, open the board on Today, drag your stops into driving order, hit Route, and go.
- Add a customer's postcode when you take their details so postcode zones can match automatically.
- Turn on the on its way email — it's the message customers most want and the one most often forgotten.
Last updated July 19, 2026