
Creating and managing orders
Every cake you make can live as an order: a phone booking, a walk-in, a market pre-order, or an inquiry you've converted. Once it's in Bake Boost it flows through to your calendar, your baking lists, your job sheets and your reports — so you only ever type the details once.
1. The Orders list
Go to Orders in the sidebar. Every order is here, newest first, with its customer, order number, event date, amount, and how much is still owed.
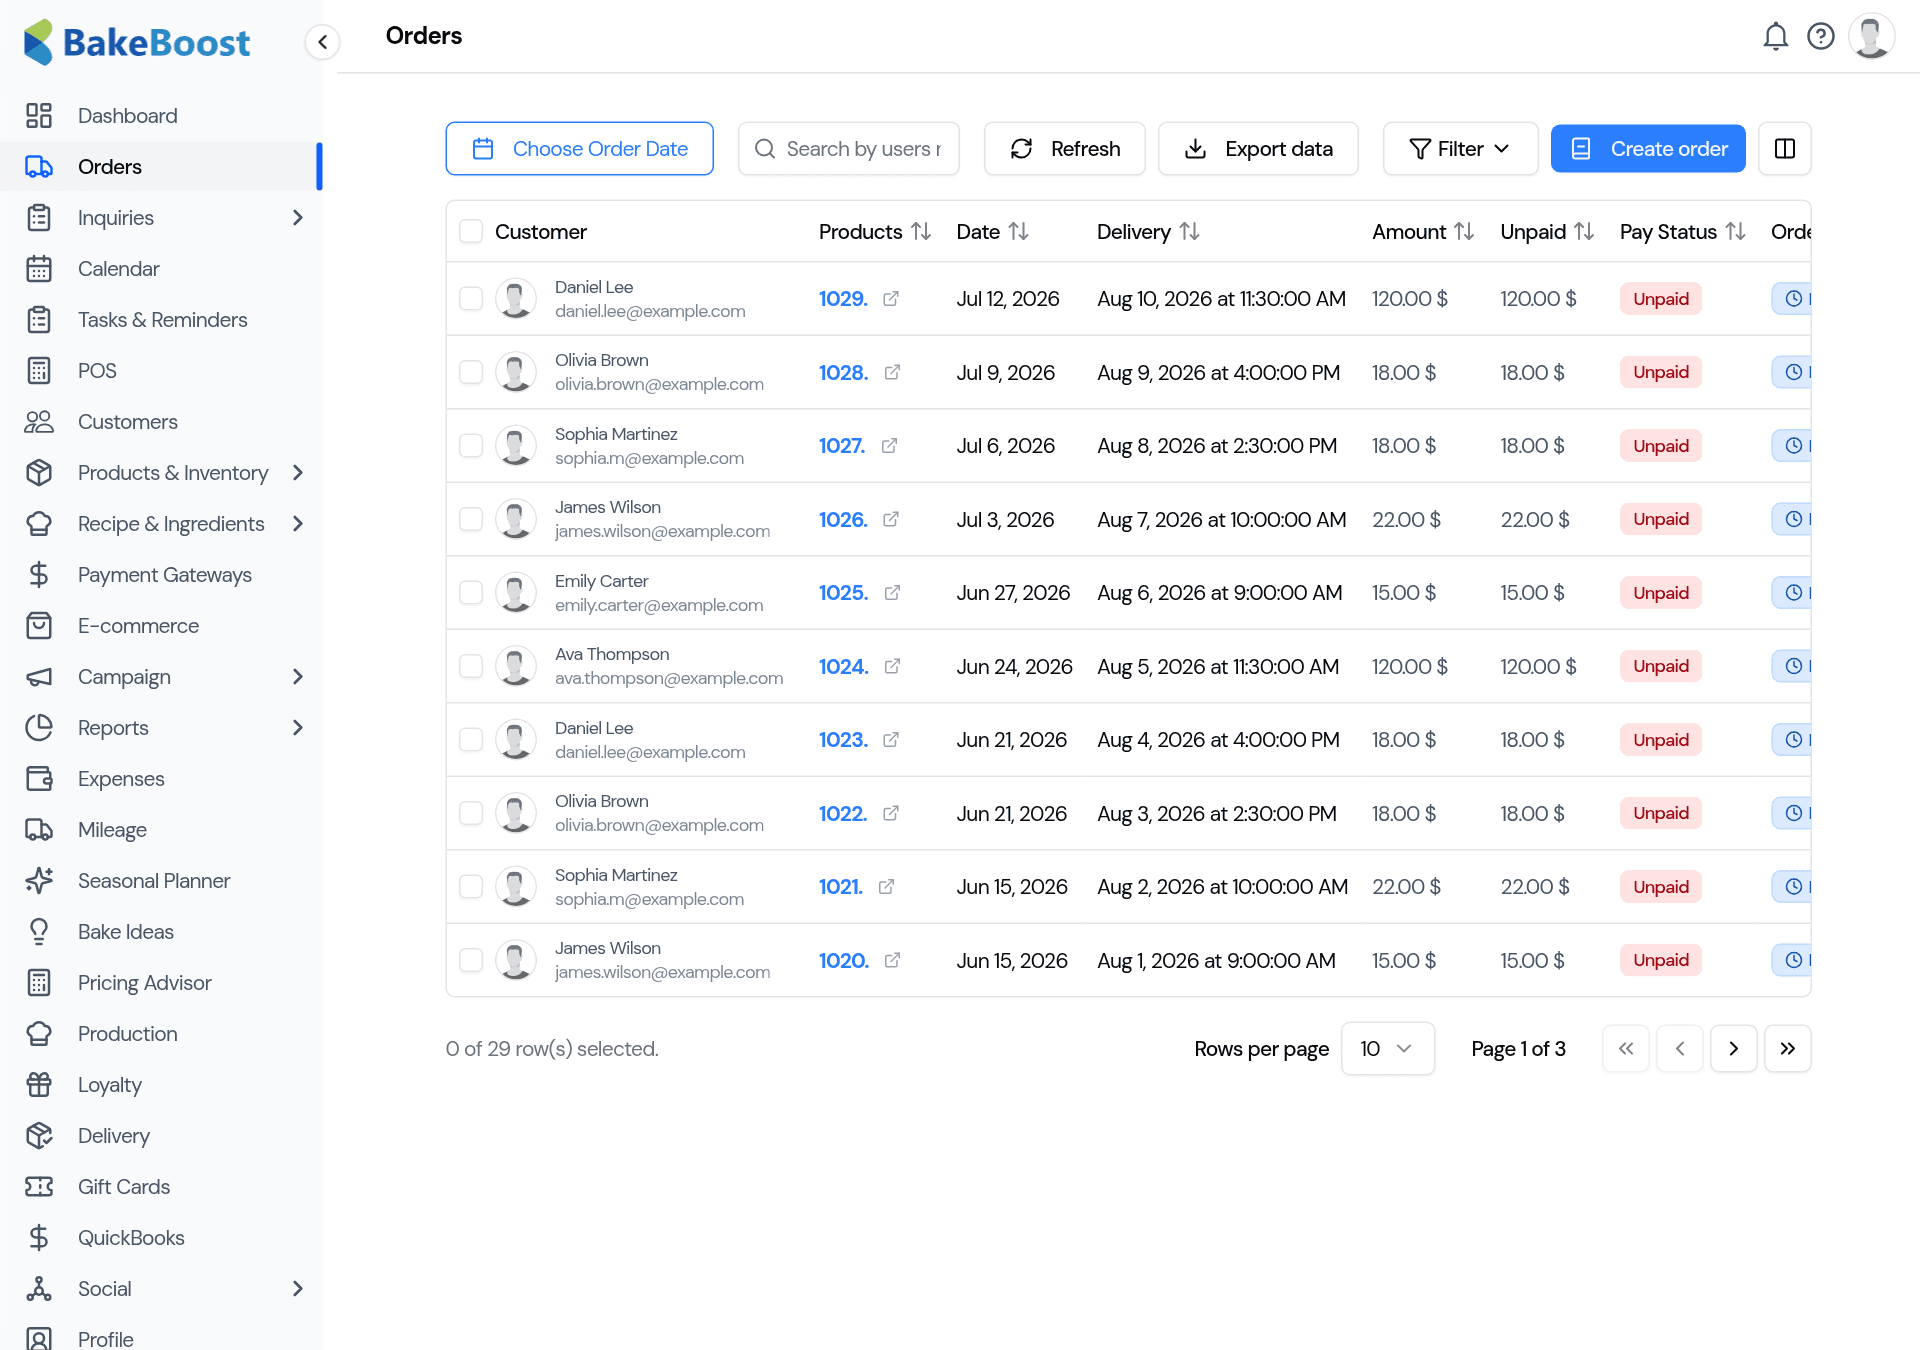
- Search by customer or order number, or use Filter to narrow by status or date.
- The Pay Status badge shows at a glance whether an order is paid, part-paid, or unpaid.
- Use Choose Order Date and Export data to pull a slice of orders out to a spreadsheet.
2. Create an order
Click Create order (top-right). The new-order form has everything on one page.
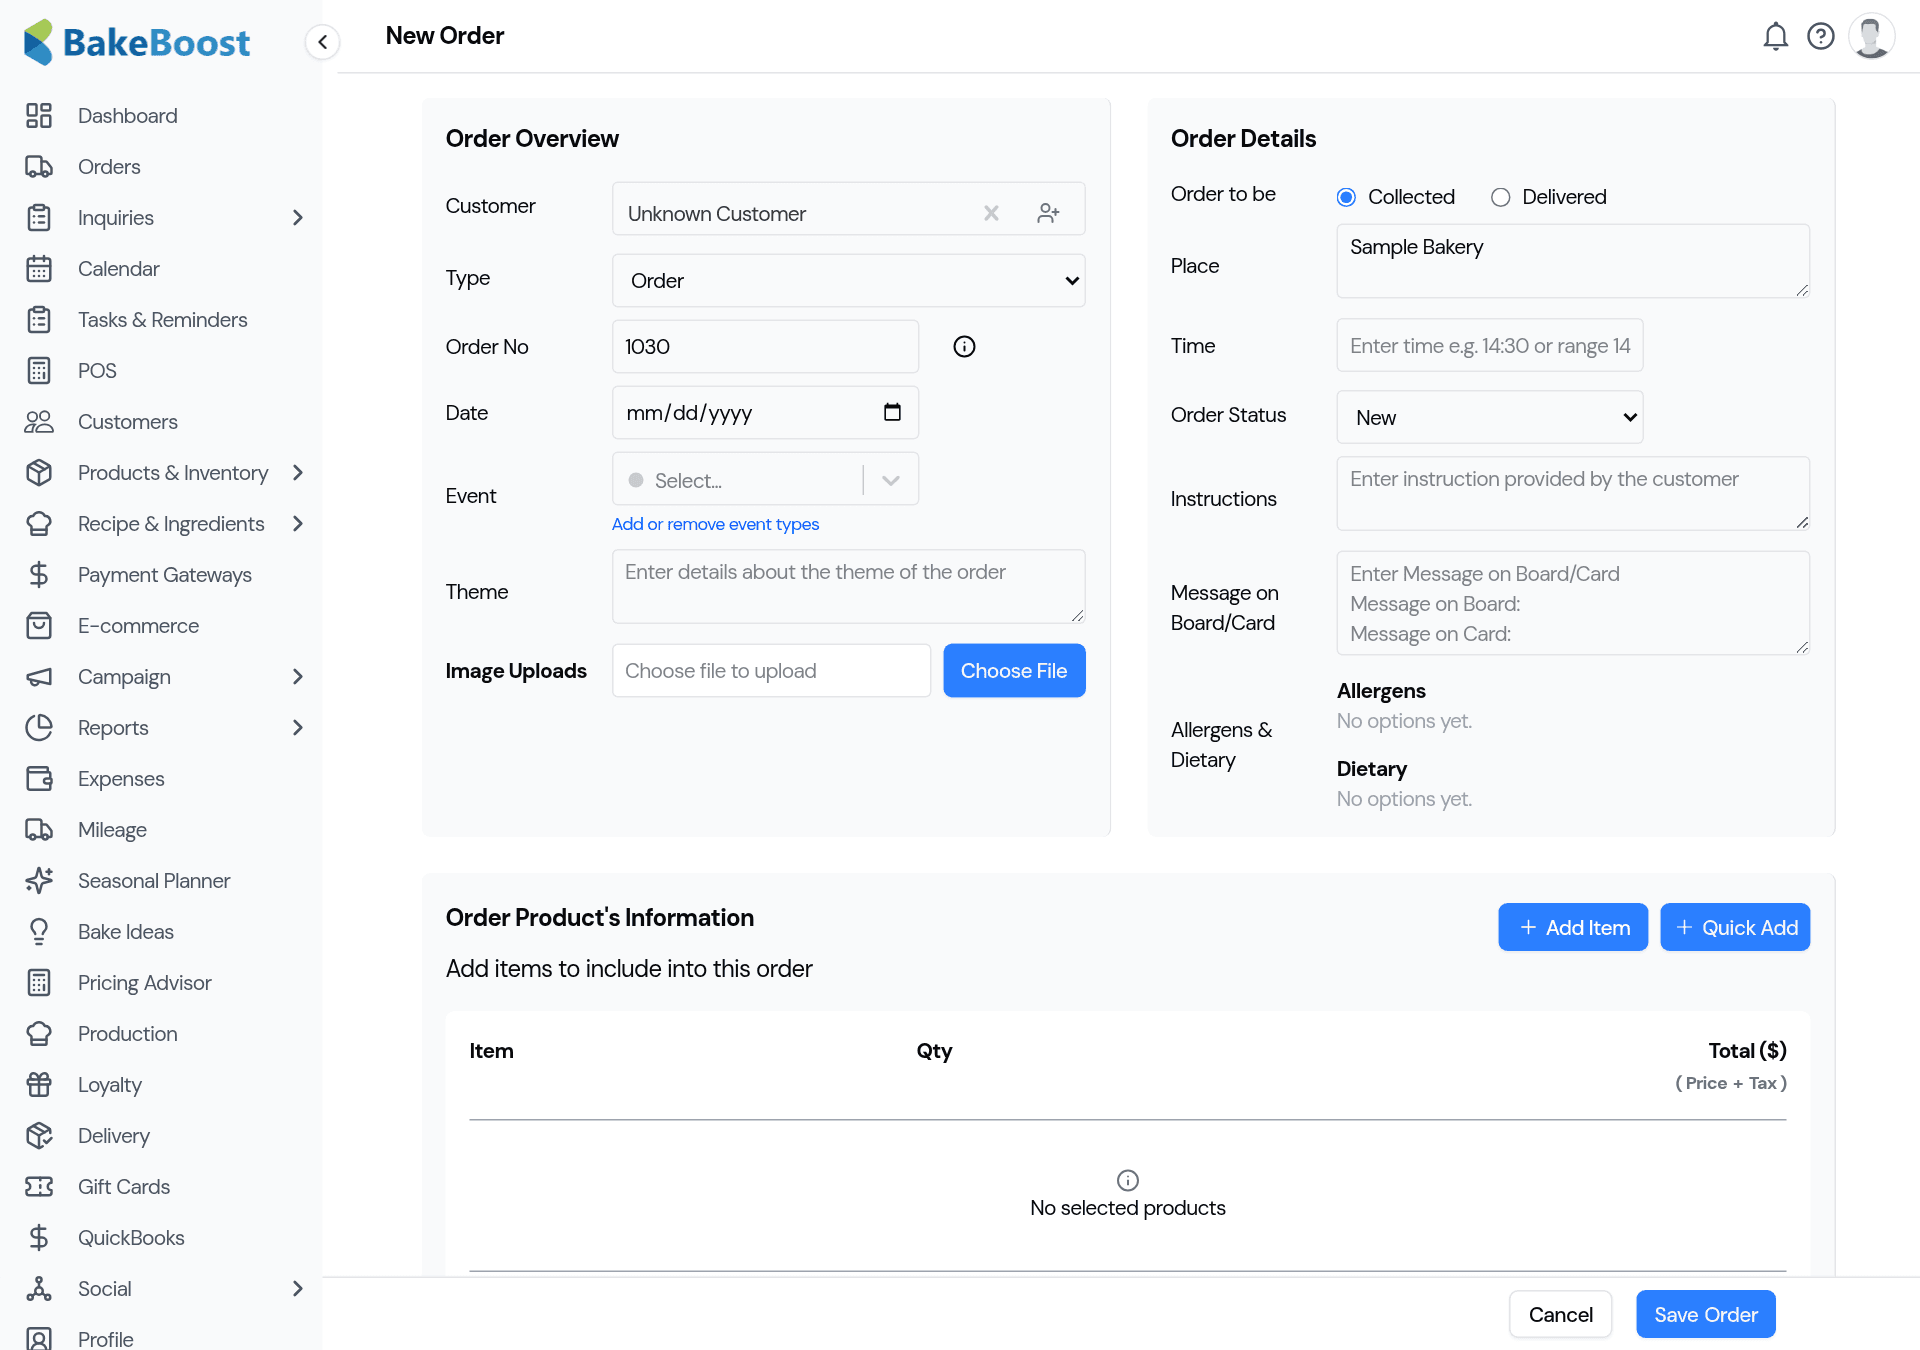
Work top to bottom:
- Choose the customer. Pick an existing customer, or add a new one right here without leaving the form — their details are saved for next time.
- Add products. Search your catalogue and add each item with its quantity. The price comes from the product, and the order total updates as you go. You can adjust a price or add a one-off custom line if this order is a little different.
- Set the event details. The event date is when the cake is needed — this is what shows on your calendar and baking lists. Add a delivery or collection choice, a time, and an address if you're delivering.
- Add the finishing touches. Message on the board, allergen and dietary notes, special instructions, and a reference photo can all go on the order so nothing gets lost between the booking and the bake.
Click Save and the order gets its own number automatically.
3. Take a deposit and track the balance
Most custom orders are paid in two parts — a deposit to confirm, and the balance before collection. Bake Boost keeps the running total for you.
- Record what the customer has paid, and the remaining balance is worked out automatically.
- The order's Pay Status updates to part-paid or paid — and you can see the outstanding amount straight from the Orders list.
- Use Mark as paid from the list's action menu when the balance is settled.
4. Open and update an order
Click an order to open it. The View Order screen shows the customer, the products, the event and delivery details, the payment position, and the current status.
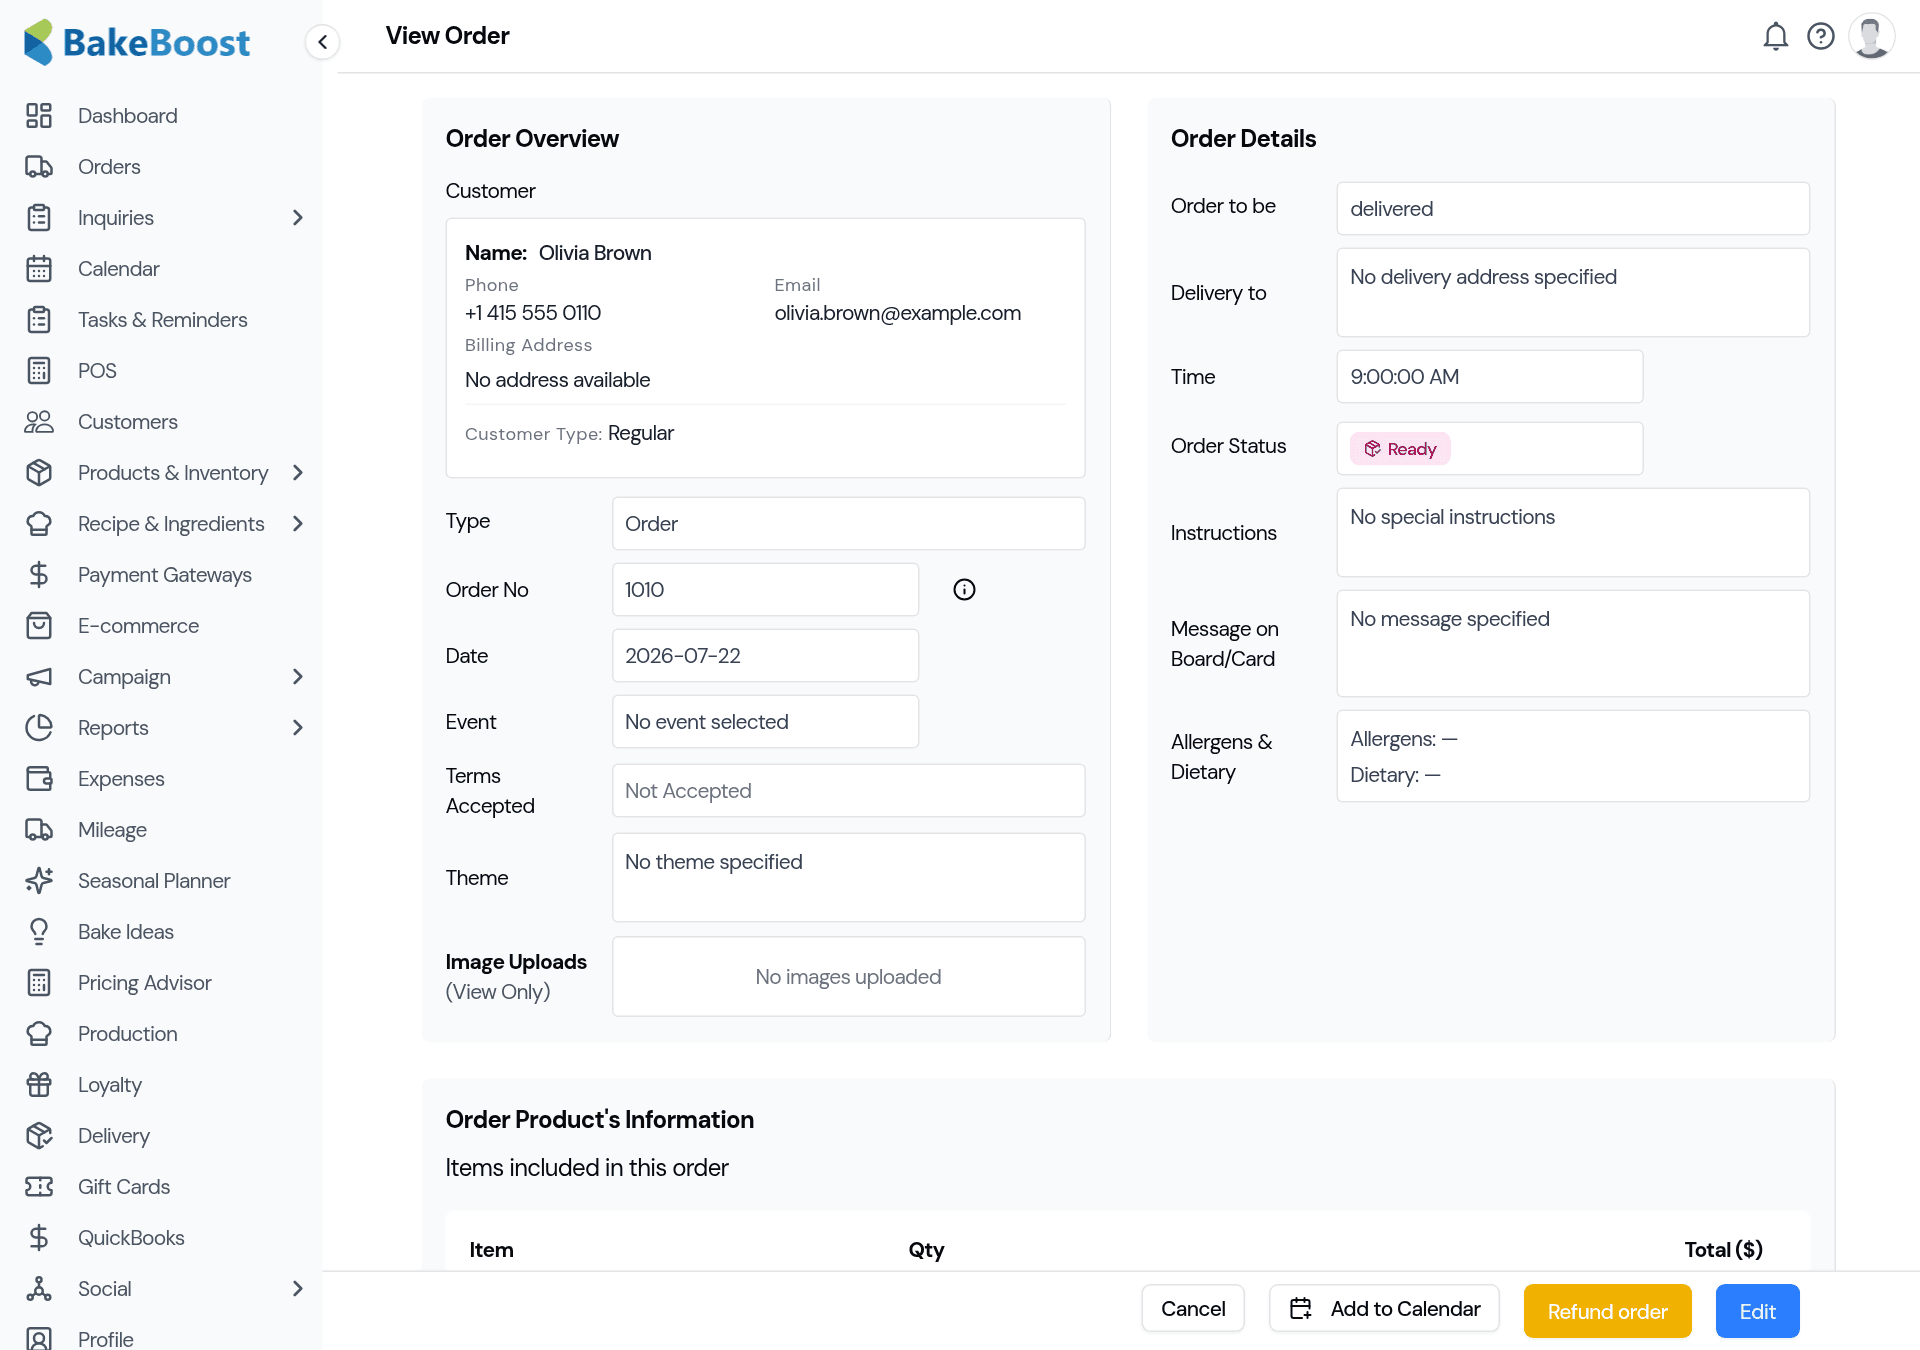
From here you can:
- Edit the order to change products, dates or details.
- Move it along its status — for example from New to Confirmed, Ready and Complete — so your team and your dashboard always know where each cake is.
- Add it to your calendar, print the job sheet, allergen labels or a delivery note, and download the invoice or receipt.
5. Send an invoice or receipt
Every order can produce a branded PDF with your bakery's name, logo and details:
- An invoice while there's still a balance to pay.
- A receipt once it's paid in full.
Download it to send yourself, or email it to the customer straight from the order. The document uses your business details and reply-to address, so it looks like it came from you — not from Bake Boost.
Good to know
- Order once, use everywhere. The event date, products and totals flow into your calendar, baking lists, job sheets and reports automatically.
- The event date is the due date. It's what drives your calendar and daily baking lists — not the day the order was placed.
- Deposits and balances are tracked for you. Record what's paid and Bake Boost keeps the outstanding amount up to date.
- Add a customer without leaving the form. New customers are saved to your list for next time.
- Invoices and receipts are branded. They carry your business name, logo and reply-to address.
- Not sure on servings or price? Work out portions with the Cake Servings guide, and price with How much should I charge for a cake?
Last updated July 23, 2026