
Production planning
The big picture
Most bakers rebuild the same to-do list every morning — reading through each order, working out what to bake, and hoping nothing slips. The Production planner does that for you, straight from the orders you already have:
Pick a week → see each day's items grouped together → work through them, mark them done, and note how long they took.
There's nothing to set up and nothing to re-type. It reads your confirmed orders and leaves out quotes and cancelled orders automatically.
1. Open your week
Click Production in the sidebar. You'll land on the current week, Monday to Sunday.
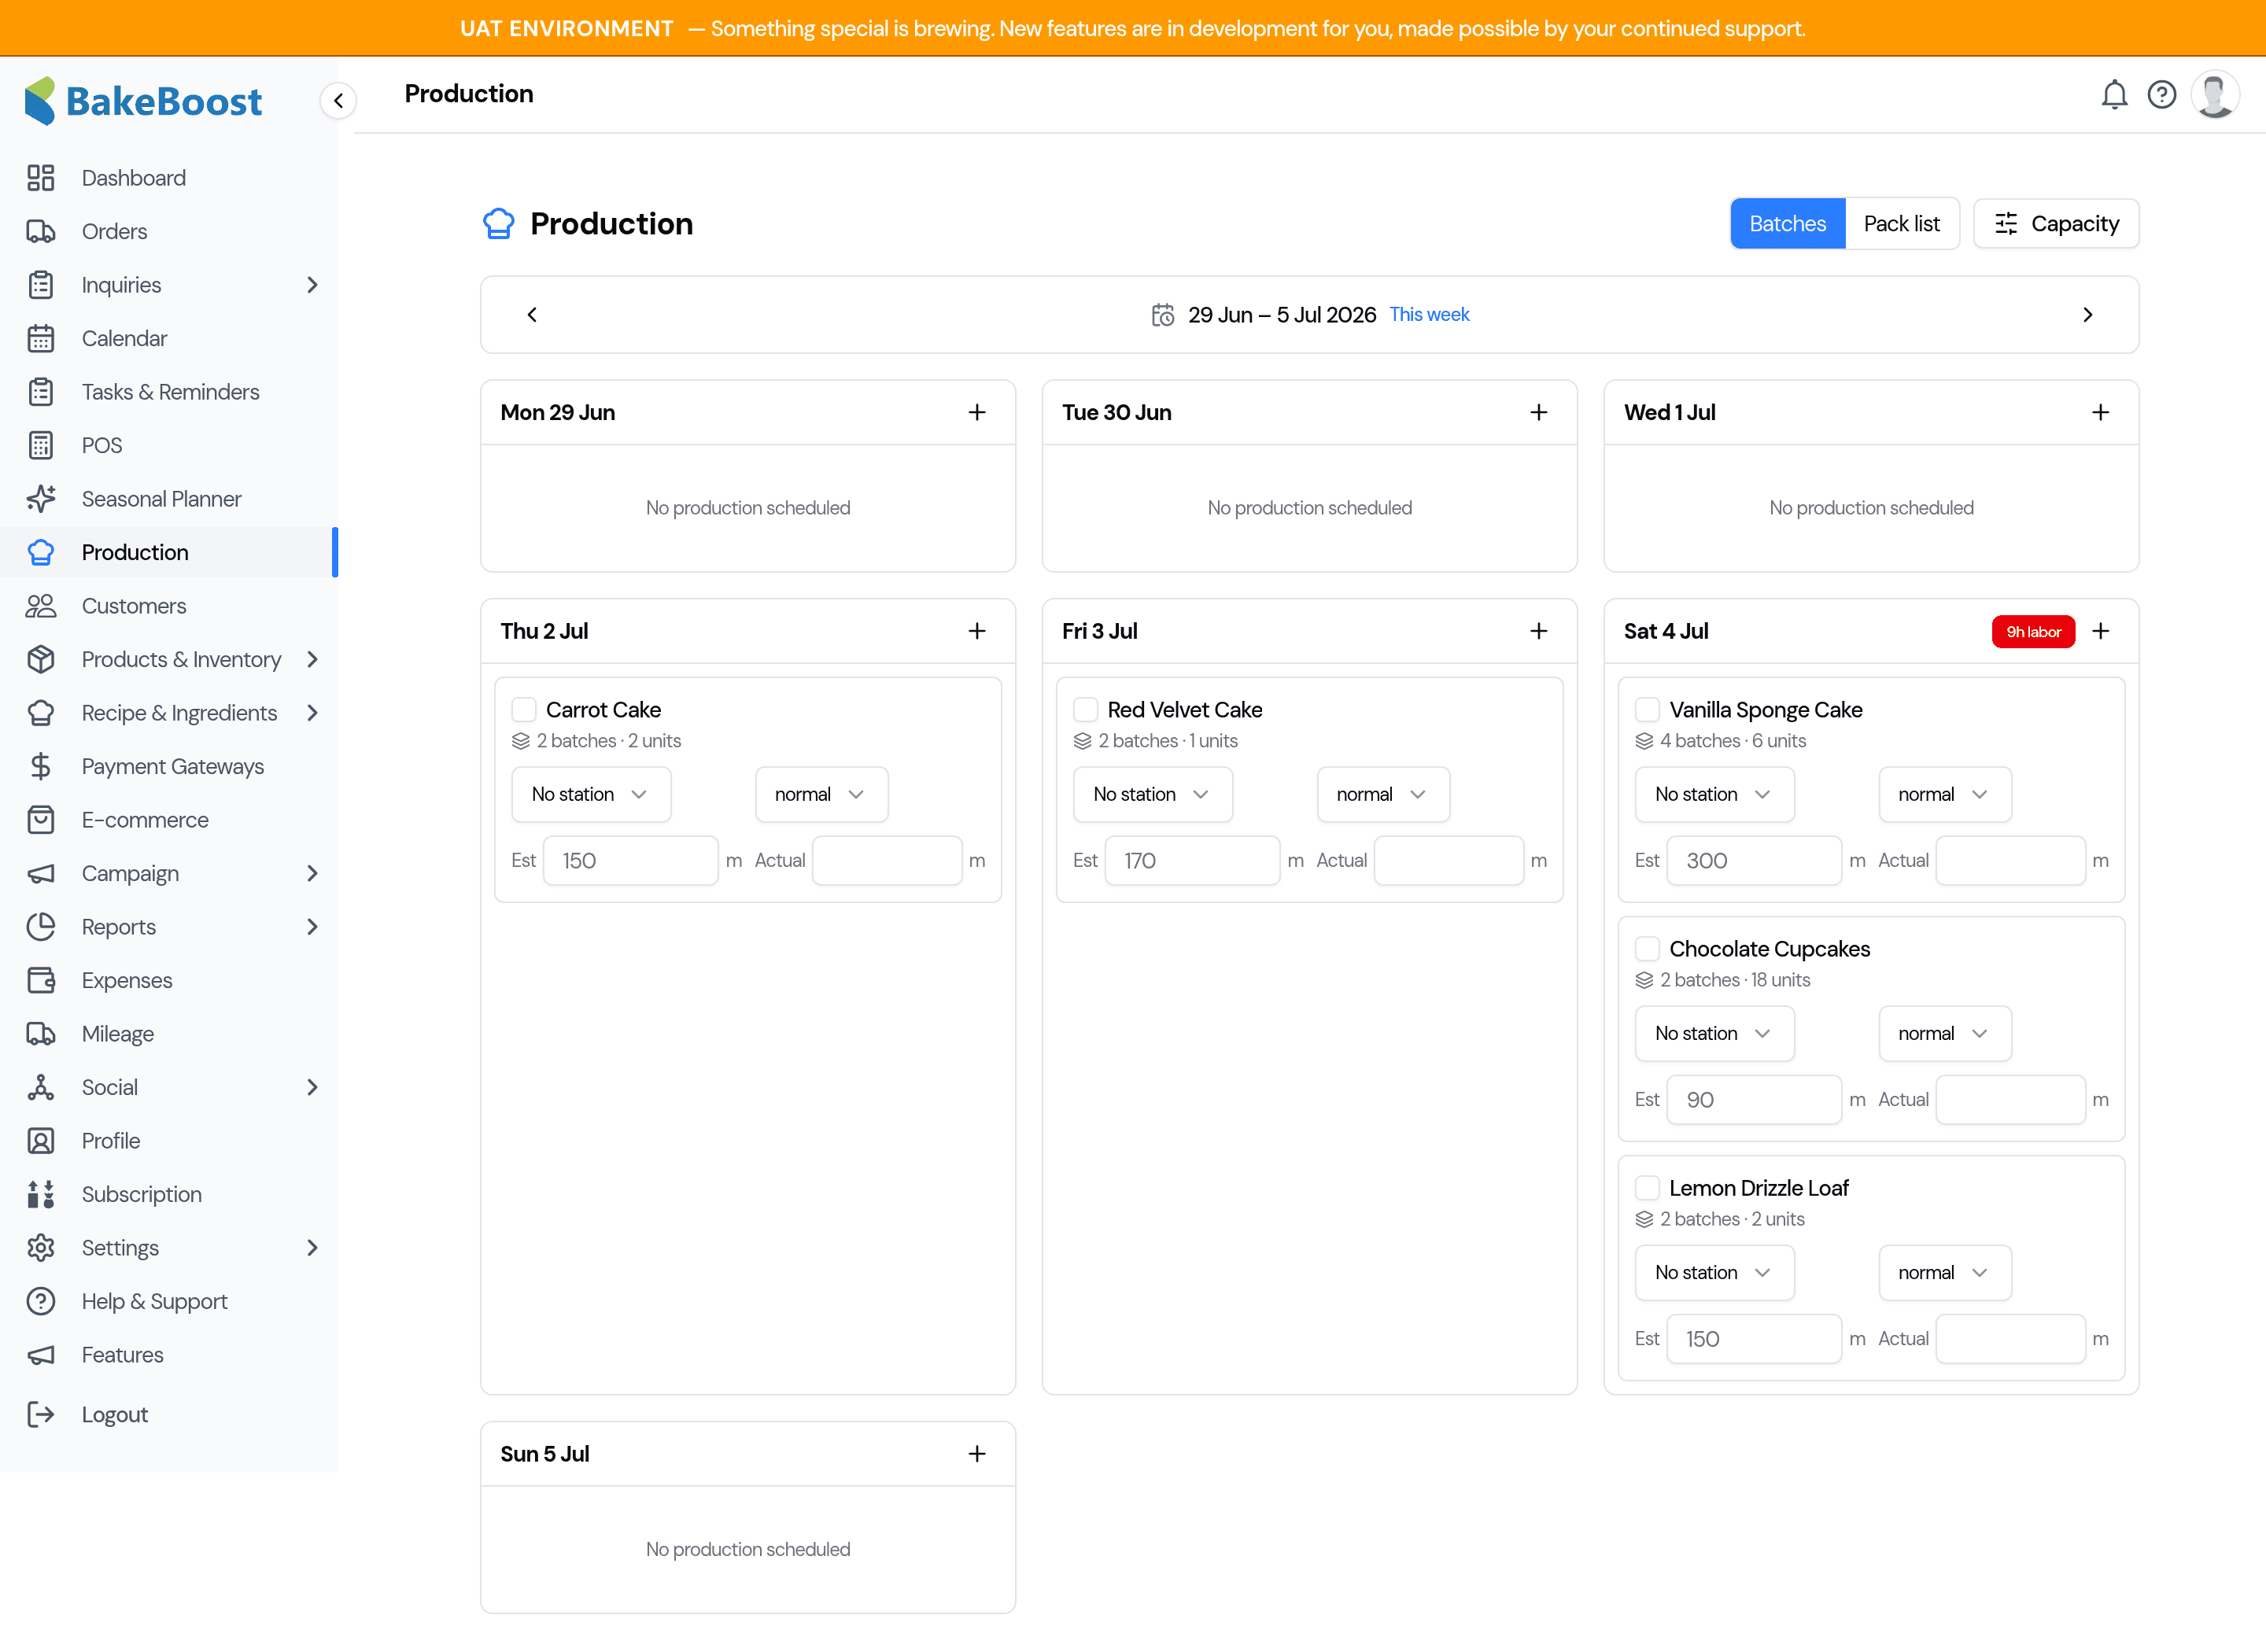
- Use the arrows to move between weeks, or This week to jump back.
- Each day is a card listing everything to make that day, drawn from the orders due then.
2. The bake sheet (what to make)
The default Batches view is your bake sheet. For each day, every order's items are gathered up and the same item is combined onto one line — so eight orders that all want a vanilla sponge show as a single line with the total to make, not eight separate entries.
Each line shows:
- The item, with how many batches to make once you've set a batch size (see the next section) — otherwise the total quantity.
- A station tag (Bake, Decorate, Pack or Prep) so you can split the day by task.
- A priority, and a tick box to mark it done as you go.
3. Set your batch sizes
By default the sheet shows the total quantity to make. Tell it how many one batch makes and it does the maths for you — combining every order and showing how many batches to mix. Click Batch sizes at the top of the page.
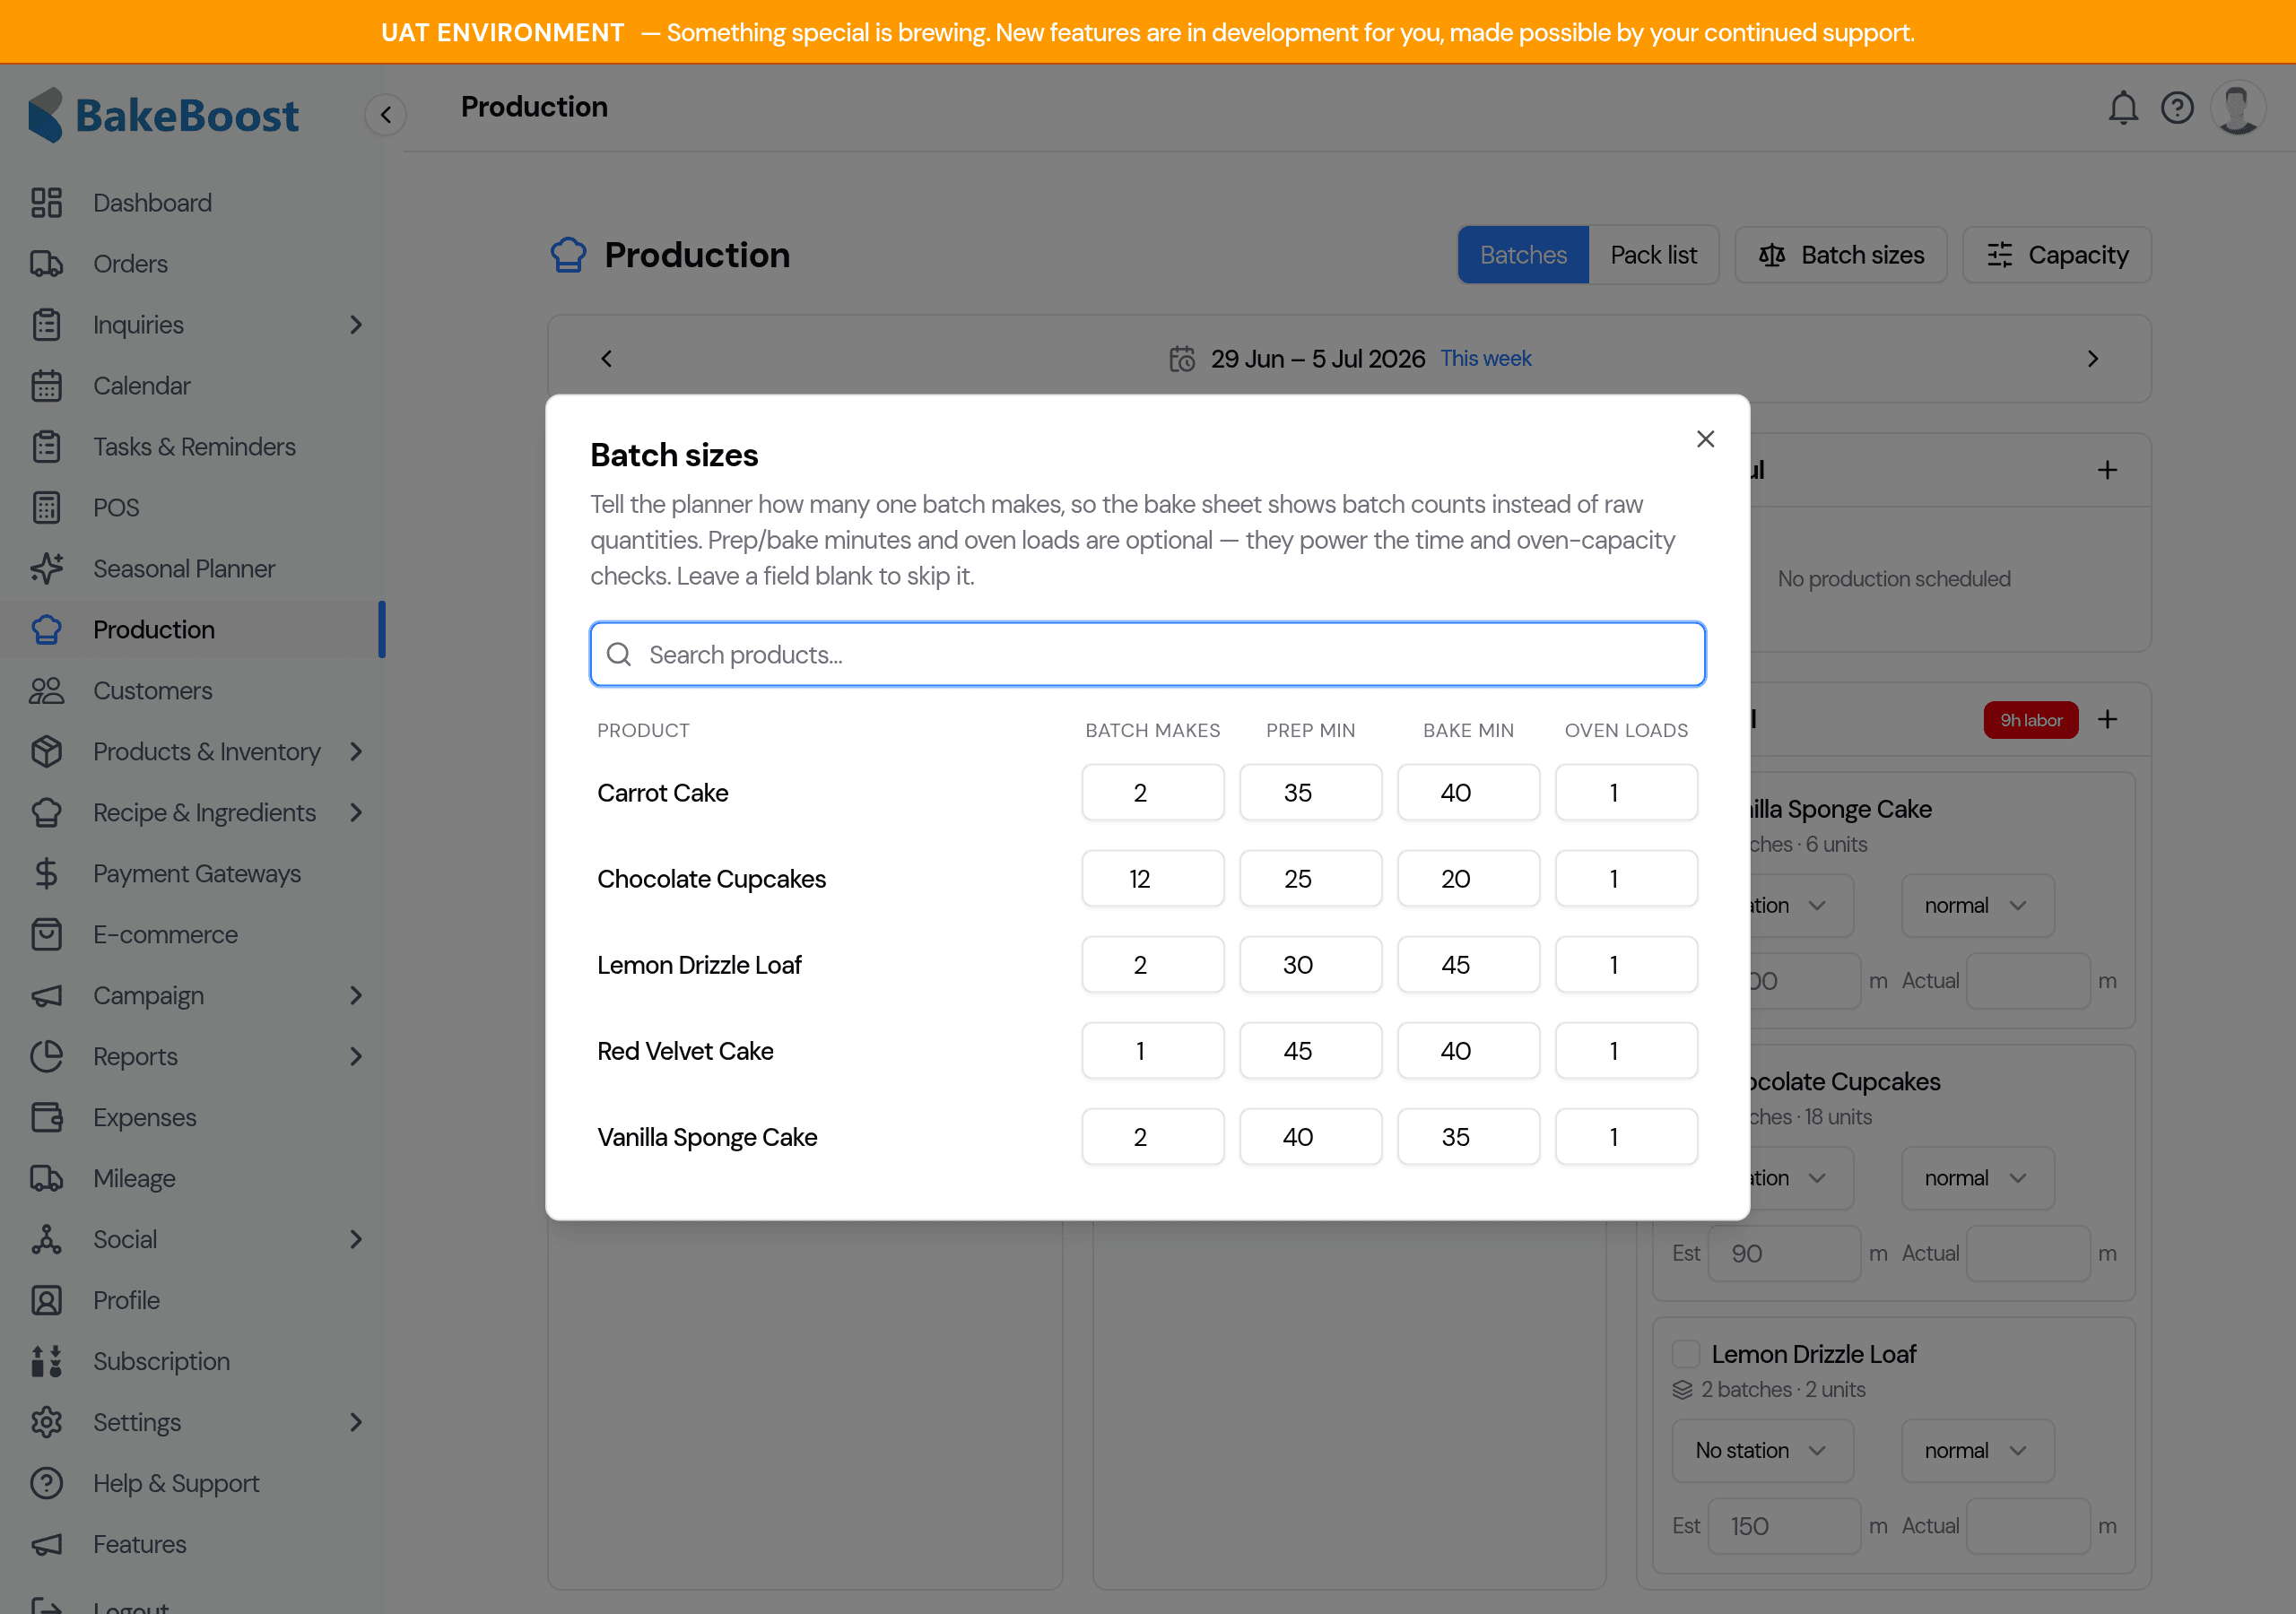
You'll see the products from your orders. For each one you can set:
- Batch makes — how many the recipe yields per batch (e.g. 12 cupcakes). The sheet then shows batches, not raw counts.
- Prep min and Bake min (optional) — how long a batch takes. When set, each line's Estimated time fills in automatically.
- Oven loads (optional) — how much oven space a batch needs, for the oven-capacity check.
4. The pack list (who gets what)
Switch to Pack list and pick a day to flip the sheet around: instead of "what to make", you get "who gets what" — one card per order, with the customer, order number, delivery time, and their items.
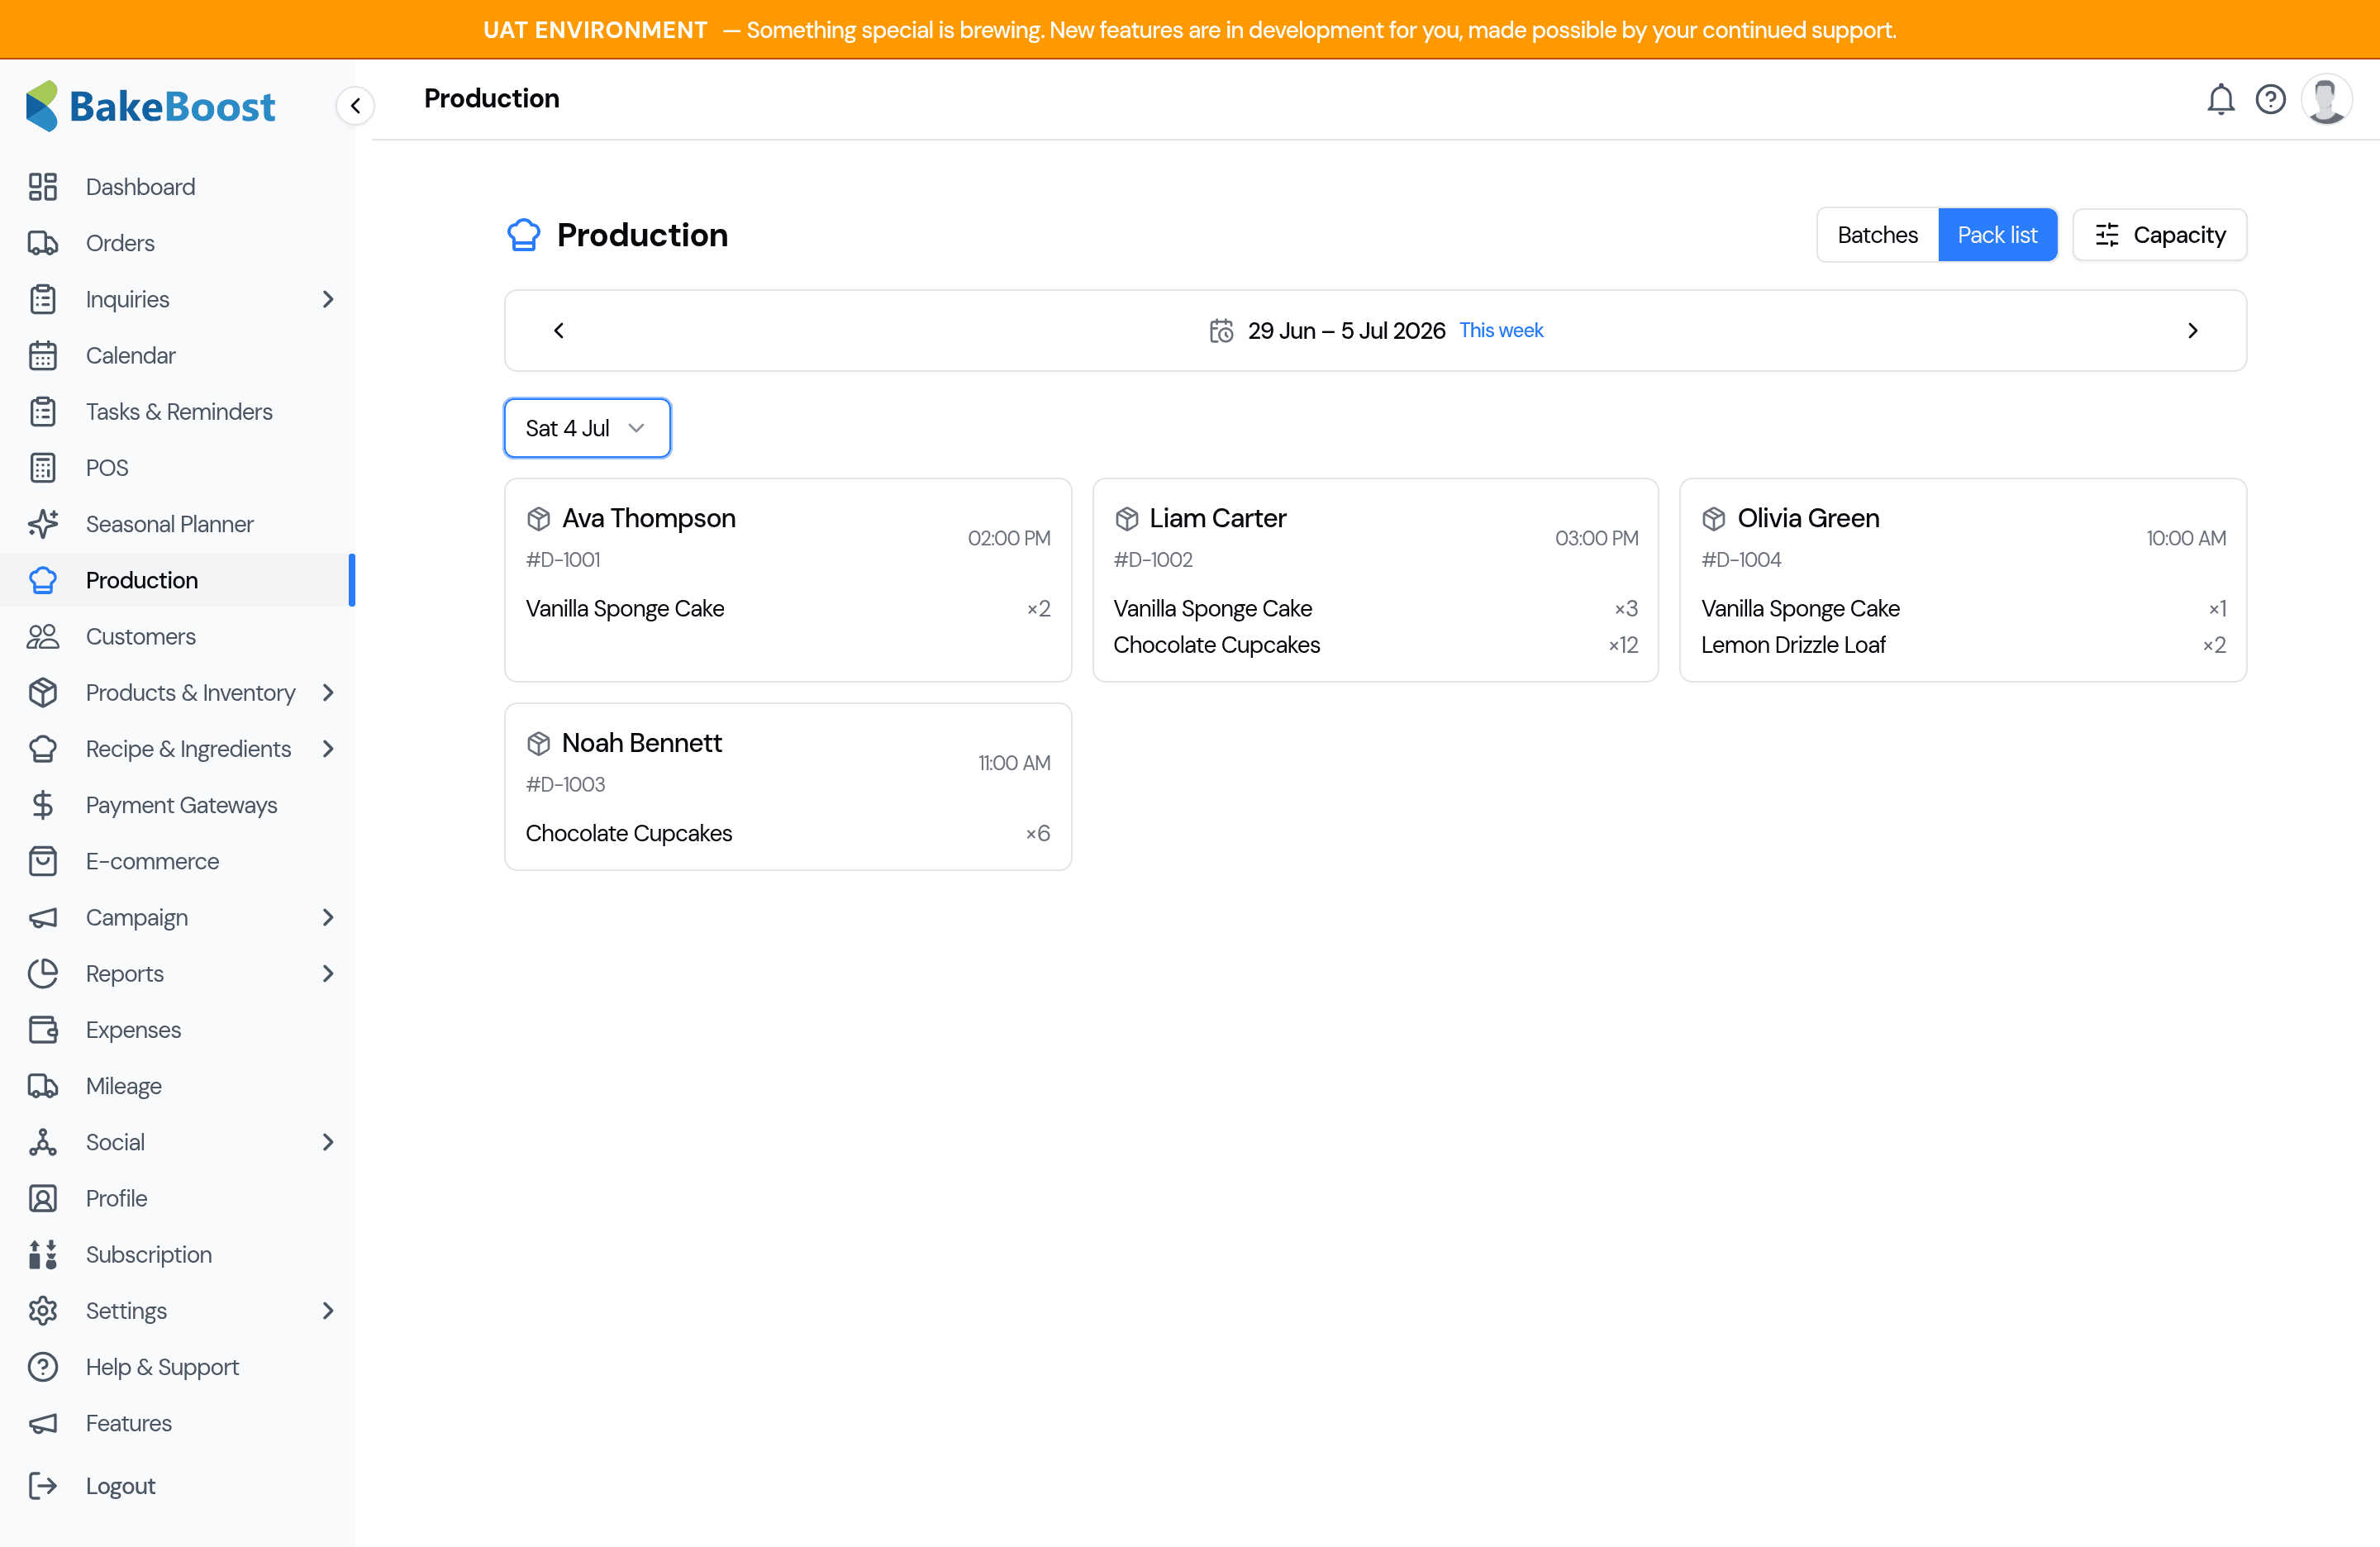
Bake from the Batches view, then pack from the Pack list view — the same orders, shown the two ways your kitchen actually needs them.
5. Add your own items
Not everything comes from an order — batch prep, stock for the counter, a cleaning task. Click the + on any day to add your own item.
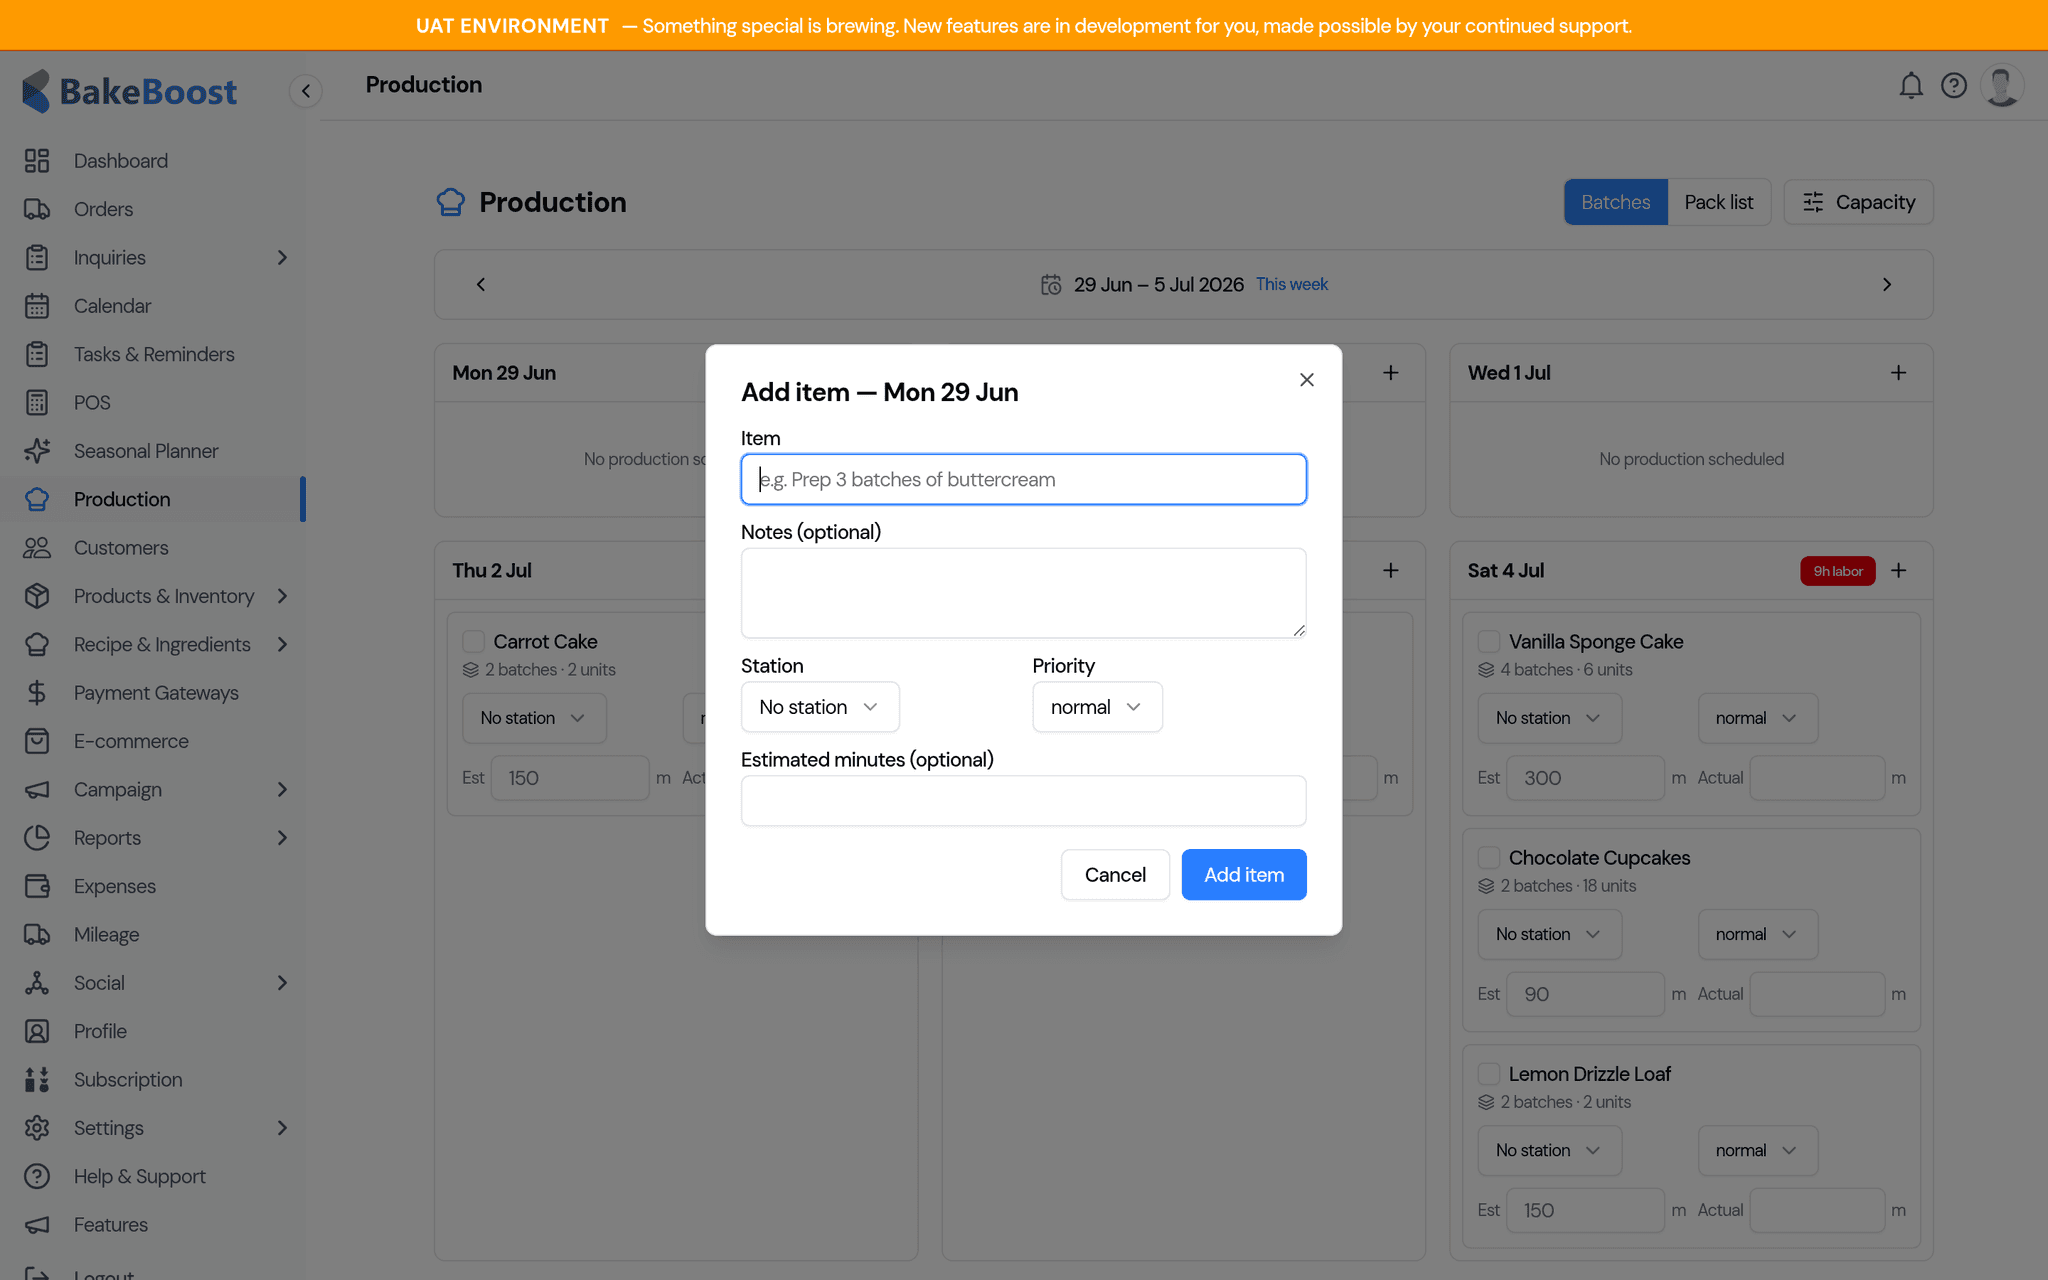
Give it a name, and optionally a station, priority and an estimated time. Your own items sit alongside the order items on that day and can be ticked off the same way. Remove one any time with the bin icon.
6. Track how long things take
On each line you can note an Estimated time and, once it's done, the Actual time it took. (If you've set prep and bake times in Batch sizes, the estimate is already filled in for you.)
- Estimated minutes feed the day's workload, so the capacity check (next) knows how full the day is.
- Actual minutes are your record of how long things really take — useful for pricing and for planning future weeks more accurately.
If you have team members, you can also assign a line to a person so everyone knows what's theirs.
7. Set your capacity
A day can look fine on paper and still be impossible in the kitchen. Click Capacity to tell the planner your daily limits.
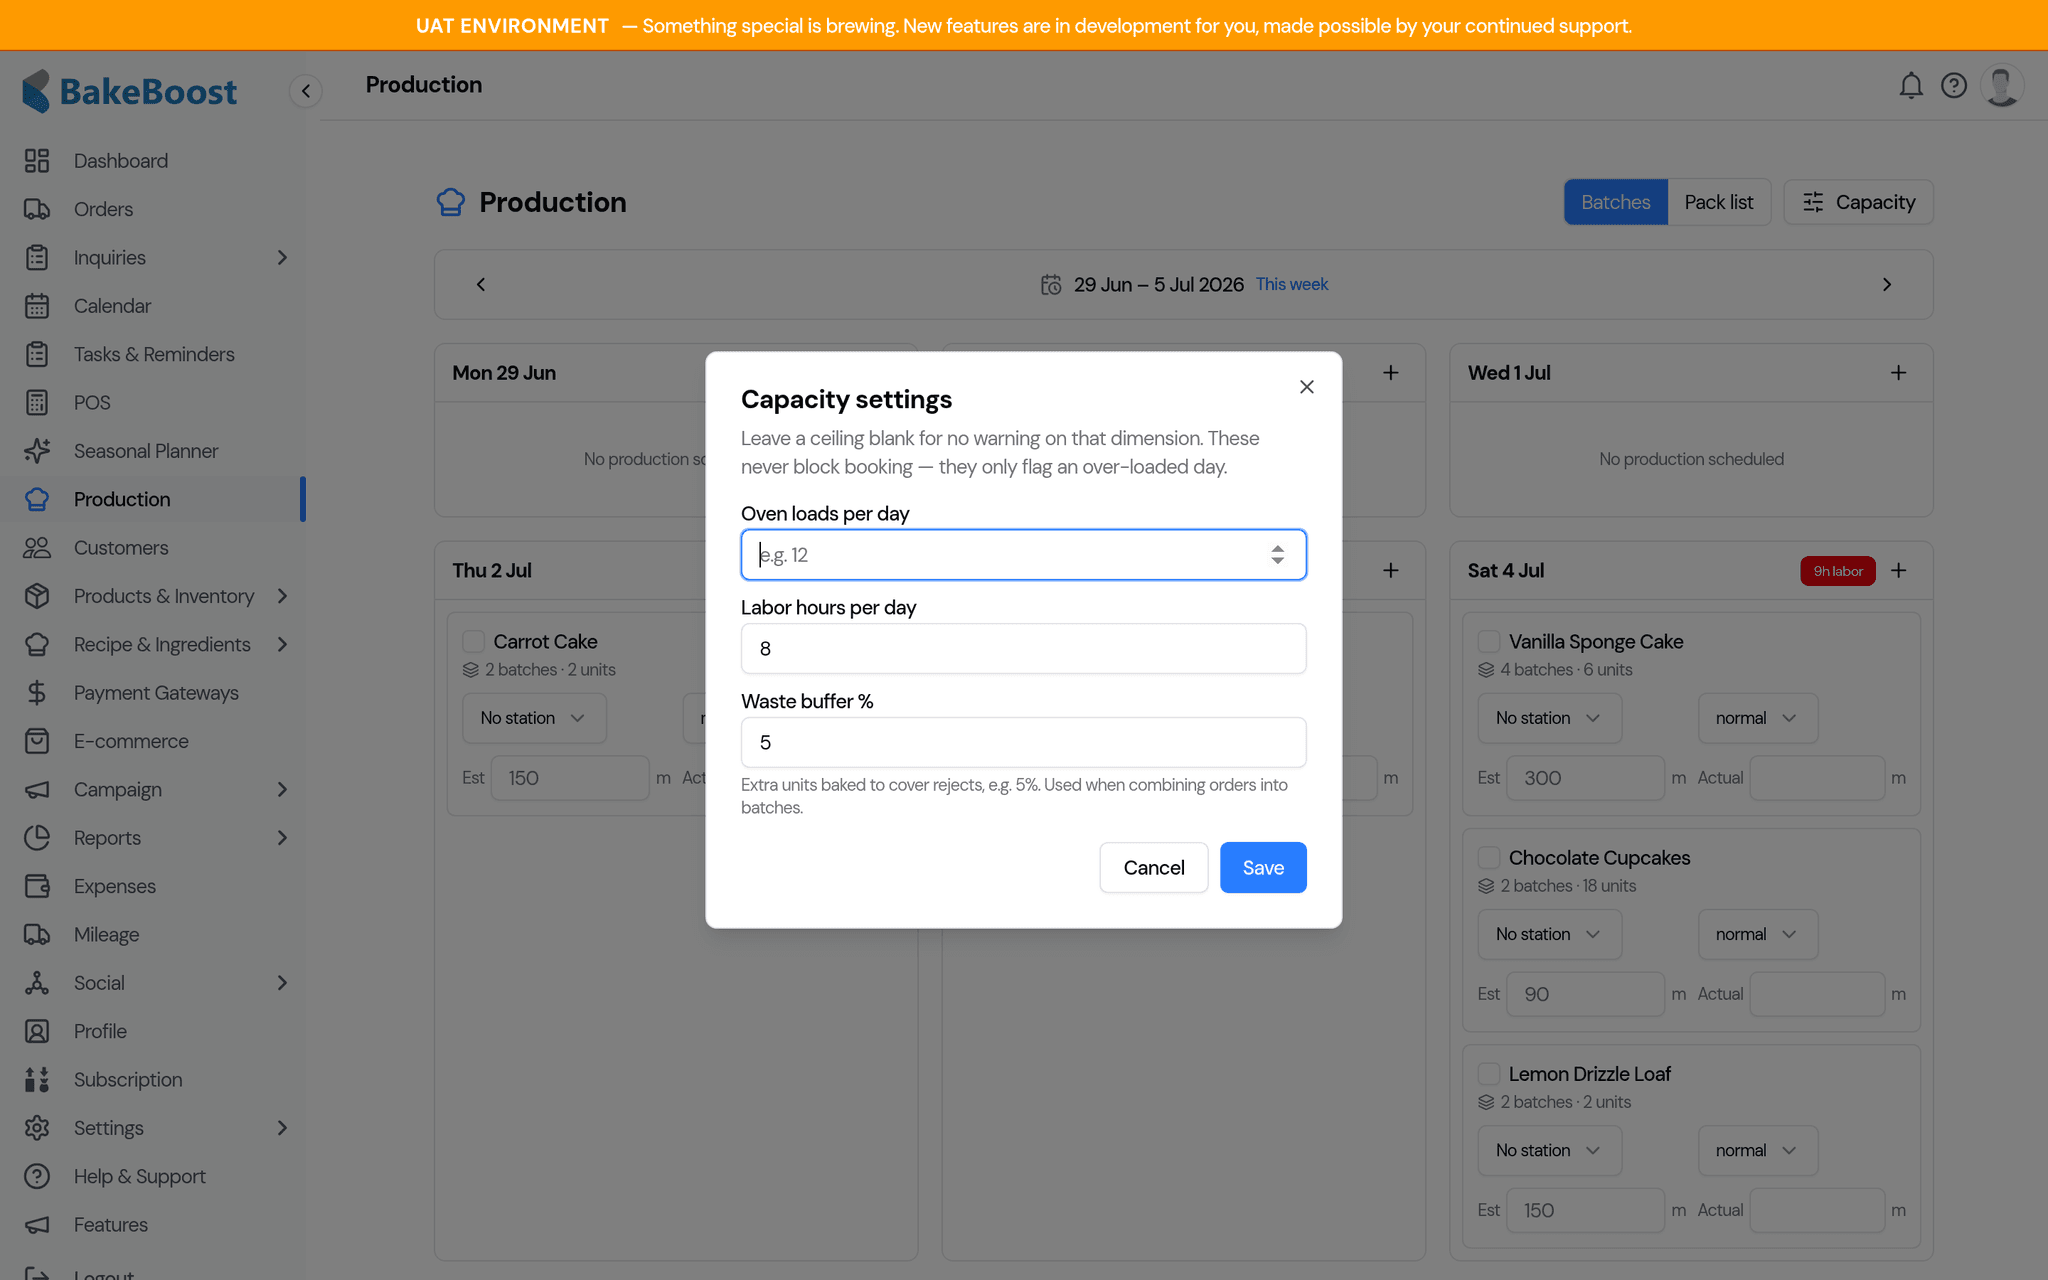
- Labor hours per day — when the estimated times for a day add up to more than this, the day is flagged as over capacity.
- Oven loads per day — the same, for oven space, using the oven loads you set in Batch sizes.
- Waste buffer % — the little extra baked to cover rejects (5% by default), used when working out how much to make.
Tips
- Set a batch size for your regular items once — the sheet then works out the batches for you every week.
- Start each morning on This week and work the day cards top to bottom.
- Tag lines by station (Bake / Decorate / Pack) so a busy Saturday is easy to divide up.
- Jot the Actual time on a few items each week — it quietly builds a picture of what really takes the longest.
- Set a realistic Labor hours limit so the over-capacity flag means something for your shop.
- Remember the split: Batches to bake, Pack list to send out.
Last updated July 3, 2026