
Products and your catalogue
This guide covers adding a product, the four different product types, setting your price and markup, and the switches that decide where each product appears. To bring a whole catalogue in at once, see Import products from a spreadsheet instead.
1. Your product list
Go to Products & Inventory → Products. Each product shows its name, code, price, stock status and category.
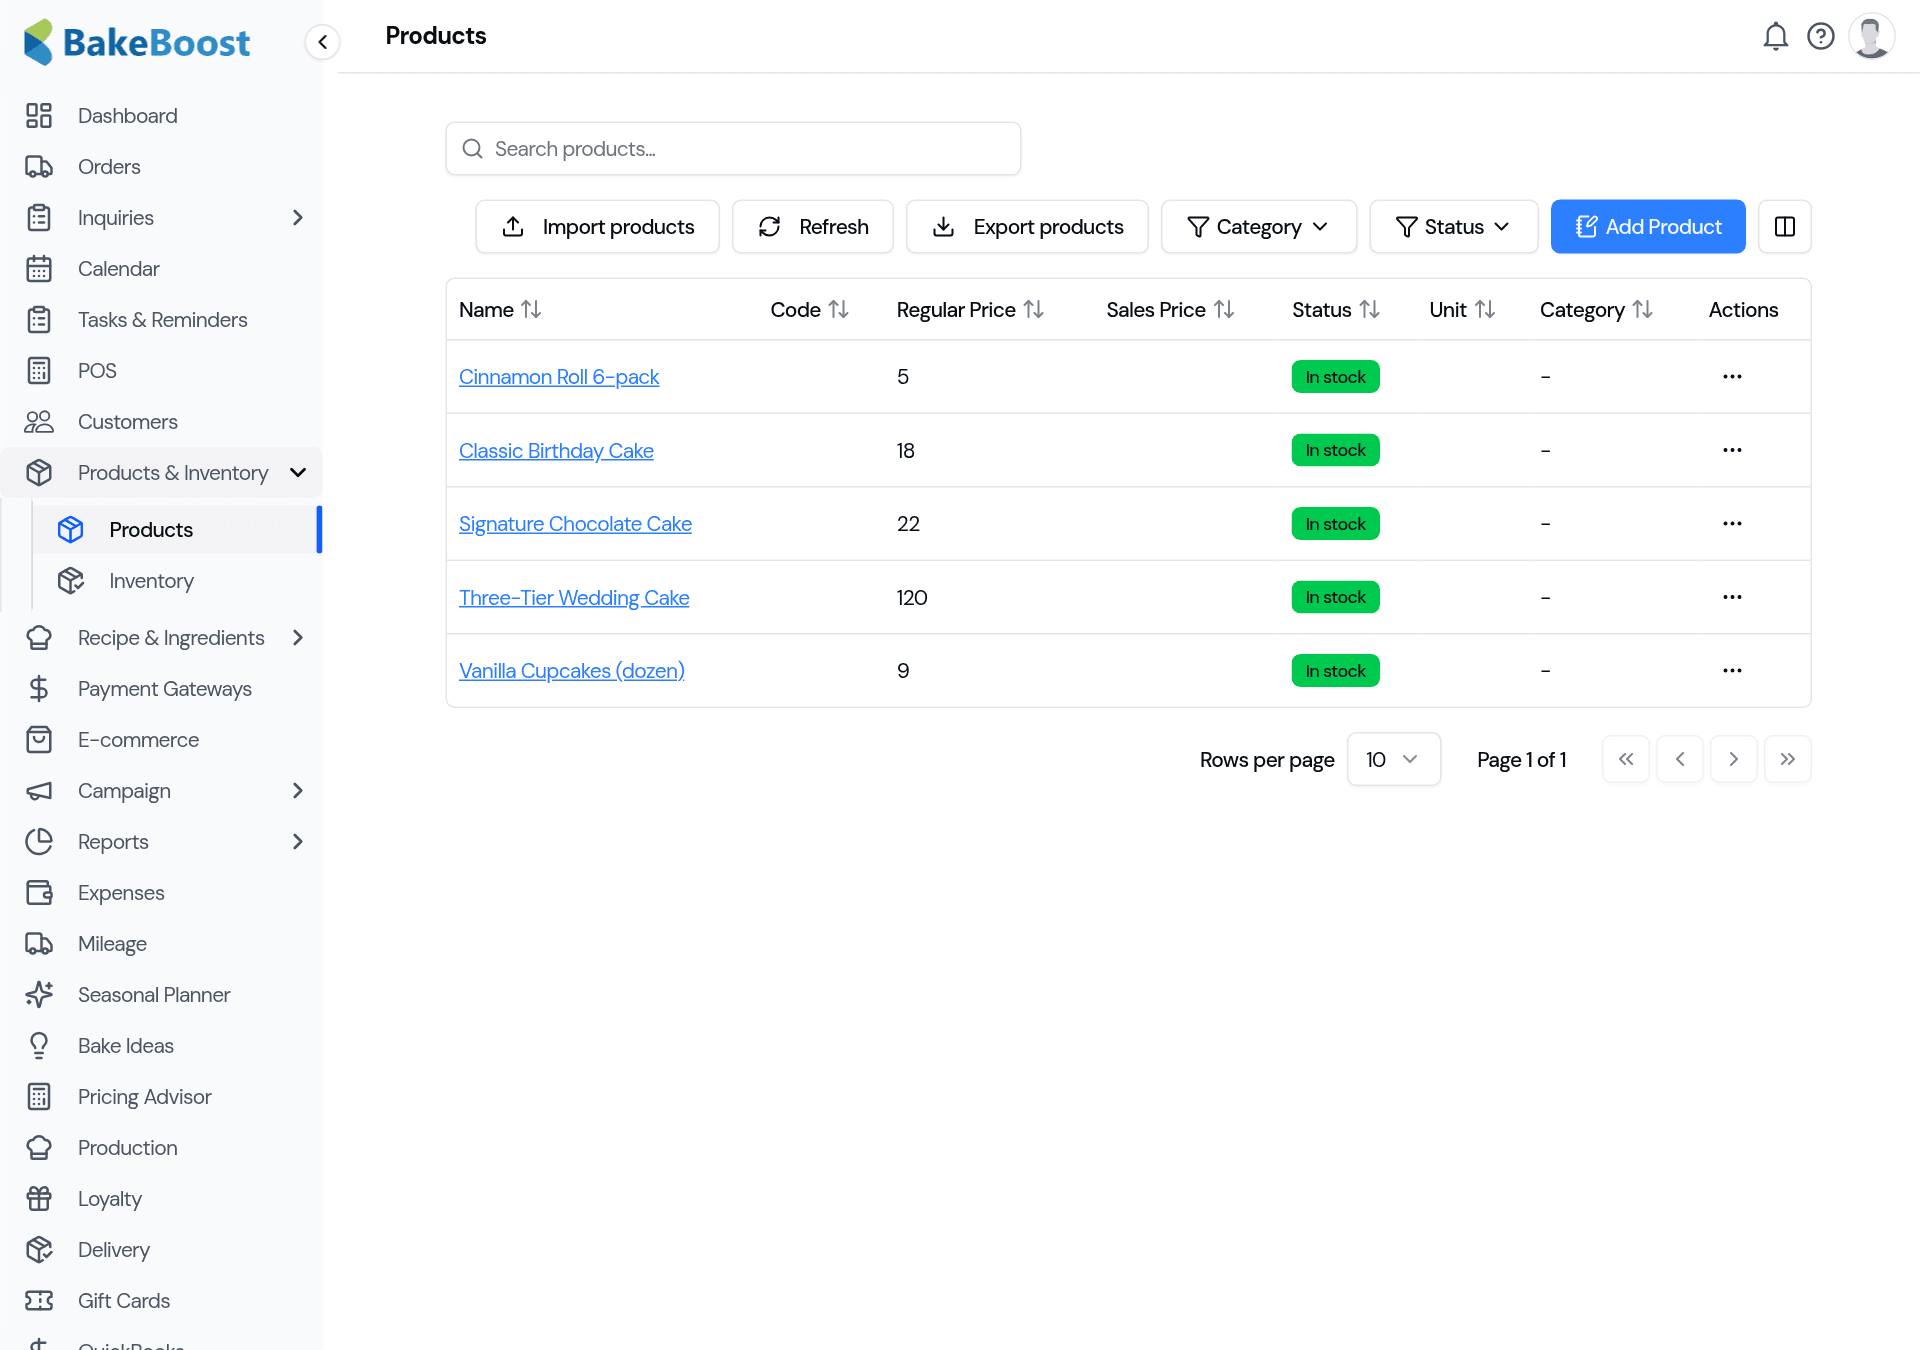
Use Add Product to create one, the search box to find one, or the ⋯ menu on a row to edit, duplicate or delete it. Import and Export move your catalogue in and out as a spreadsheet.
2. Add a product
Click Add Product. Give it a name, and — if you like — a photo, a category and a short description. Then choose the product type across the top.
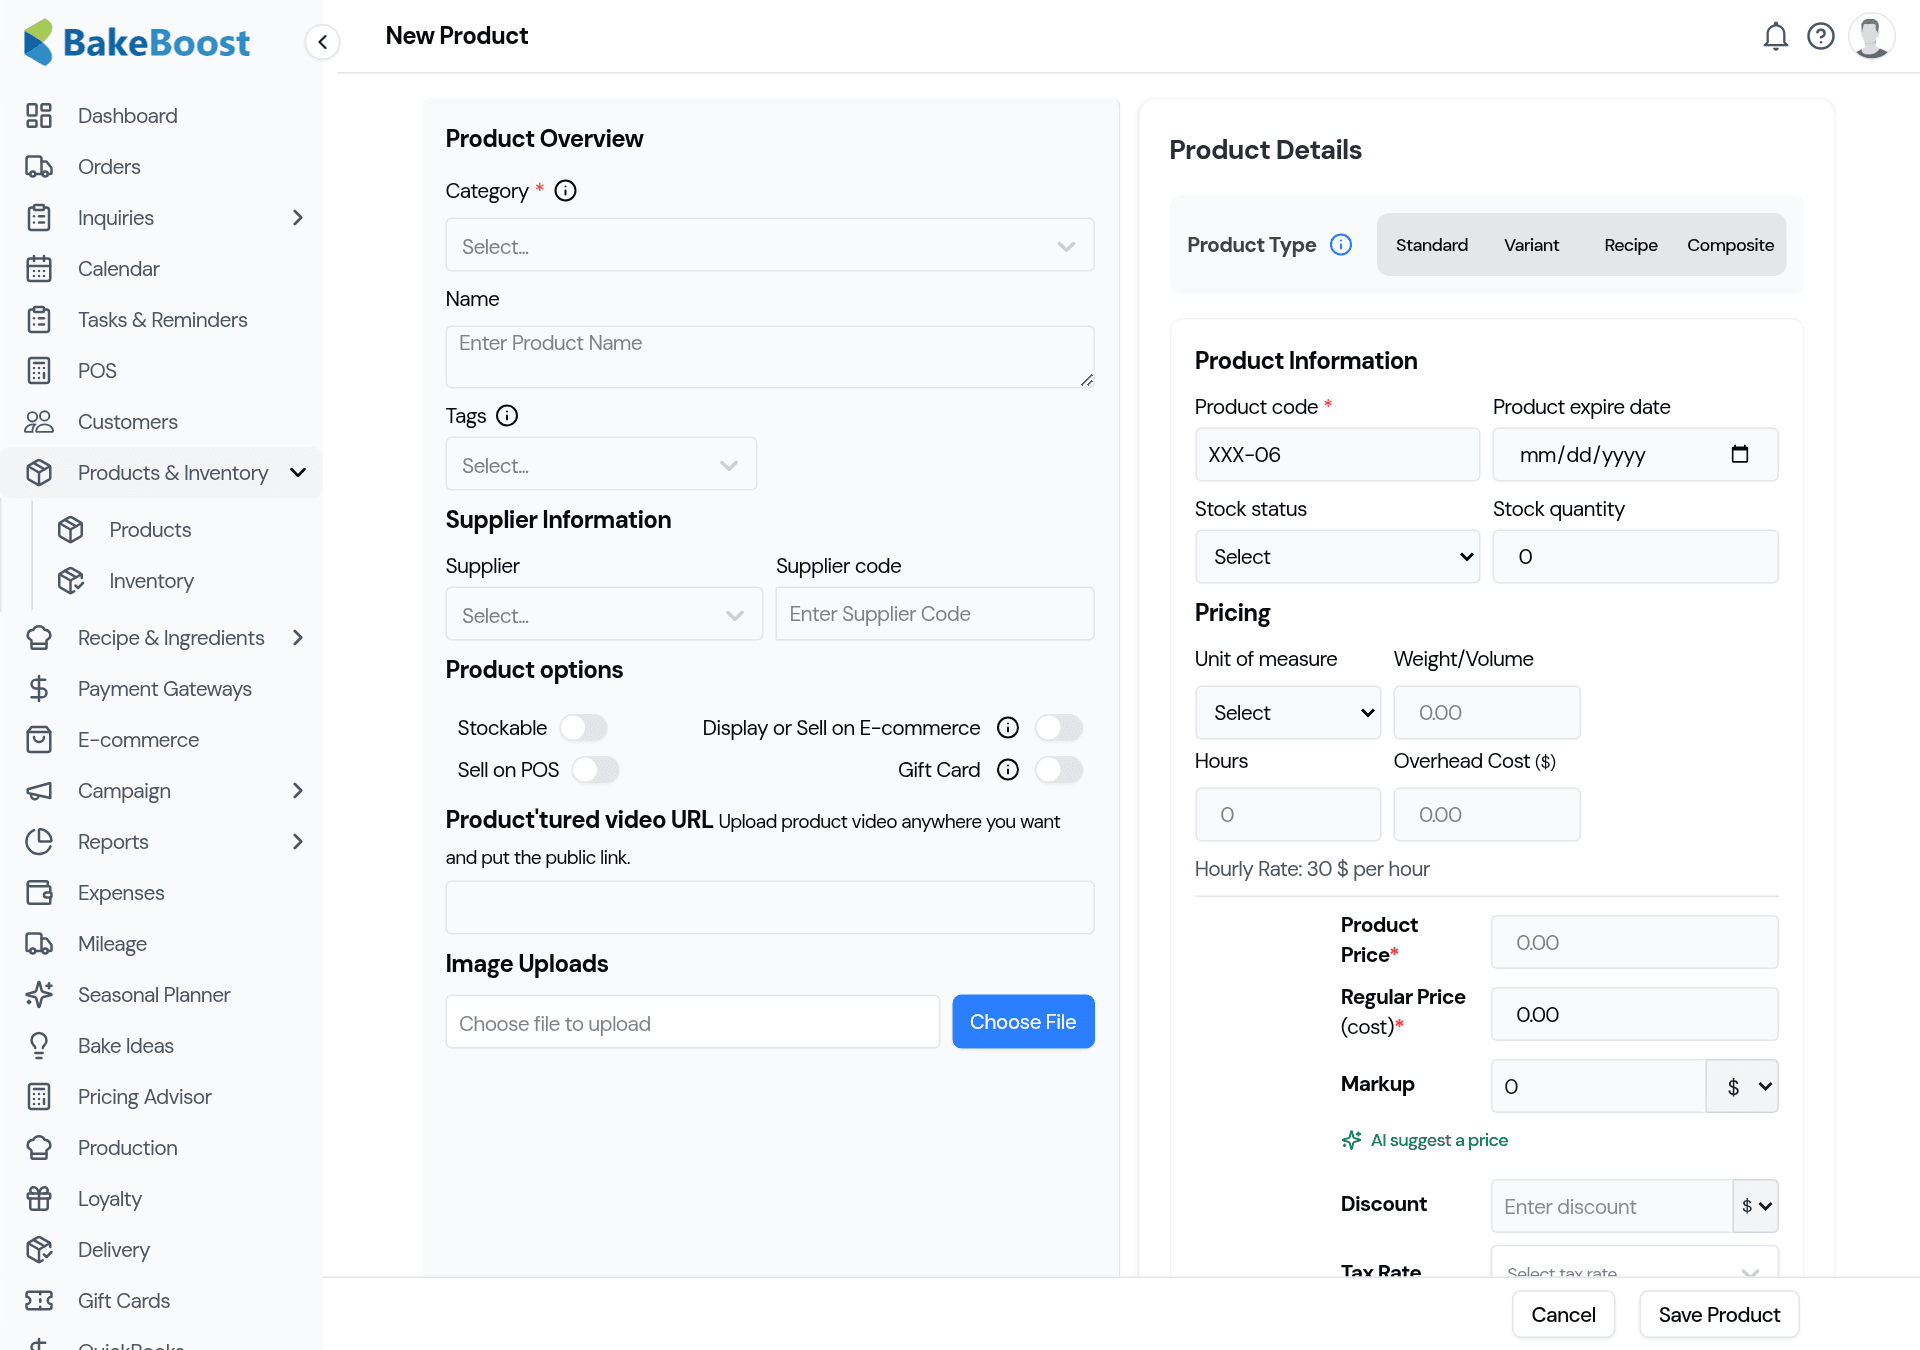
The four product types
- Standard — a single, straightforward product with one price. A classic birthday cake, a box of cupcakes, a loaf. This is the one you'll use most.
- Variant — one product sold in a few versions, each with its own price. Think a cake offered in 6", 8" and 10", or a flavour that comes in three sizes. Customers pick the variant they want.
- Recipe — a product priced from a recipe in your kitchen. Bake Boost reads the recipe's ingredient cost and helps you price on top of it, so your selling price stays tied to what the bake actually costs. (See Recipes, ingredients and supplies.)
- Composite — a product made up of other products, like a grazing box, a hamper, or a dessert table bundle. Pick the items it contains and Bake Boost builds the cost from them.
3. Price and markup
In Pricing you set what the product costs you and what you charge:
- Enter the cost (or, for recipe and composite products, it's built from the ingredients and items inside).
- Set the regular price — what the customer pays.
- Add a markup and Bake Boost shows the resulting price, so you can see your margin as you type.
- Optional discount and tax settings apply on top.
4. Write the description with AI
Under the product's description, use AI to draft a tempting, ready-to-use product description from just the name and a detail or two. Edit it to taste — it's a starting point, not the last word — and it's the text customers see on your storefront.
5. Decide where the product shows up
A few switches control where each product is available:
- Display or Sell on E-commerce — show it on your online storefront.
- Sell on POS — make it available at your in-store point of sale.
- Stockable — track stock for it, so quantities go down as you sell and you can be warned when it's running low.
Turn on only what fits — a made-to-order wedding cake might be POS-only, while a boxed treat sells online and in store.
Good to know
- Four types, one catalogue. Standard for most, Variant for sizes, Recipe for cost-based pricing, Composite for bundles.
- Recipe products stay honest. Their cost follows your recipe's ingredient cost, so your margin doesn't drift as ingredient prices change.
- AI helps you price and describe. Suggested prices and ready-made descriptions are a click away.
- You choose where it sells. Storefront, POS, both, or neither.
- Import in bulk. Moving from a spreadsheet or another tool? Import your products in one go.
Last updated July 23, 2026