
Recipes, ingredients and supplies
It's worth setting this up early. The cost that flows out of a recipe feeds your recipe-priced products, your margins, and your reports — and it updates itself when an ingredient price changes.
1. The ingredient library
Go to Recipe & Ingredients → Ingredients. Each ingredient records what you buy and what it costs, so a cost-per-unit can be worked out.
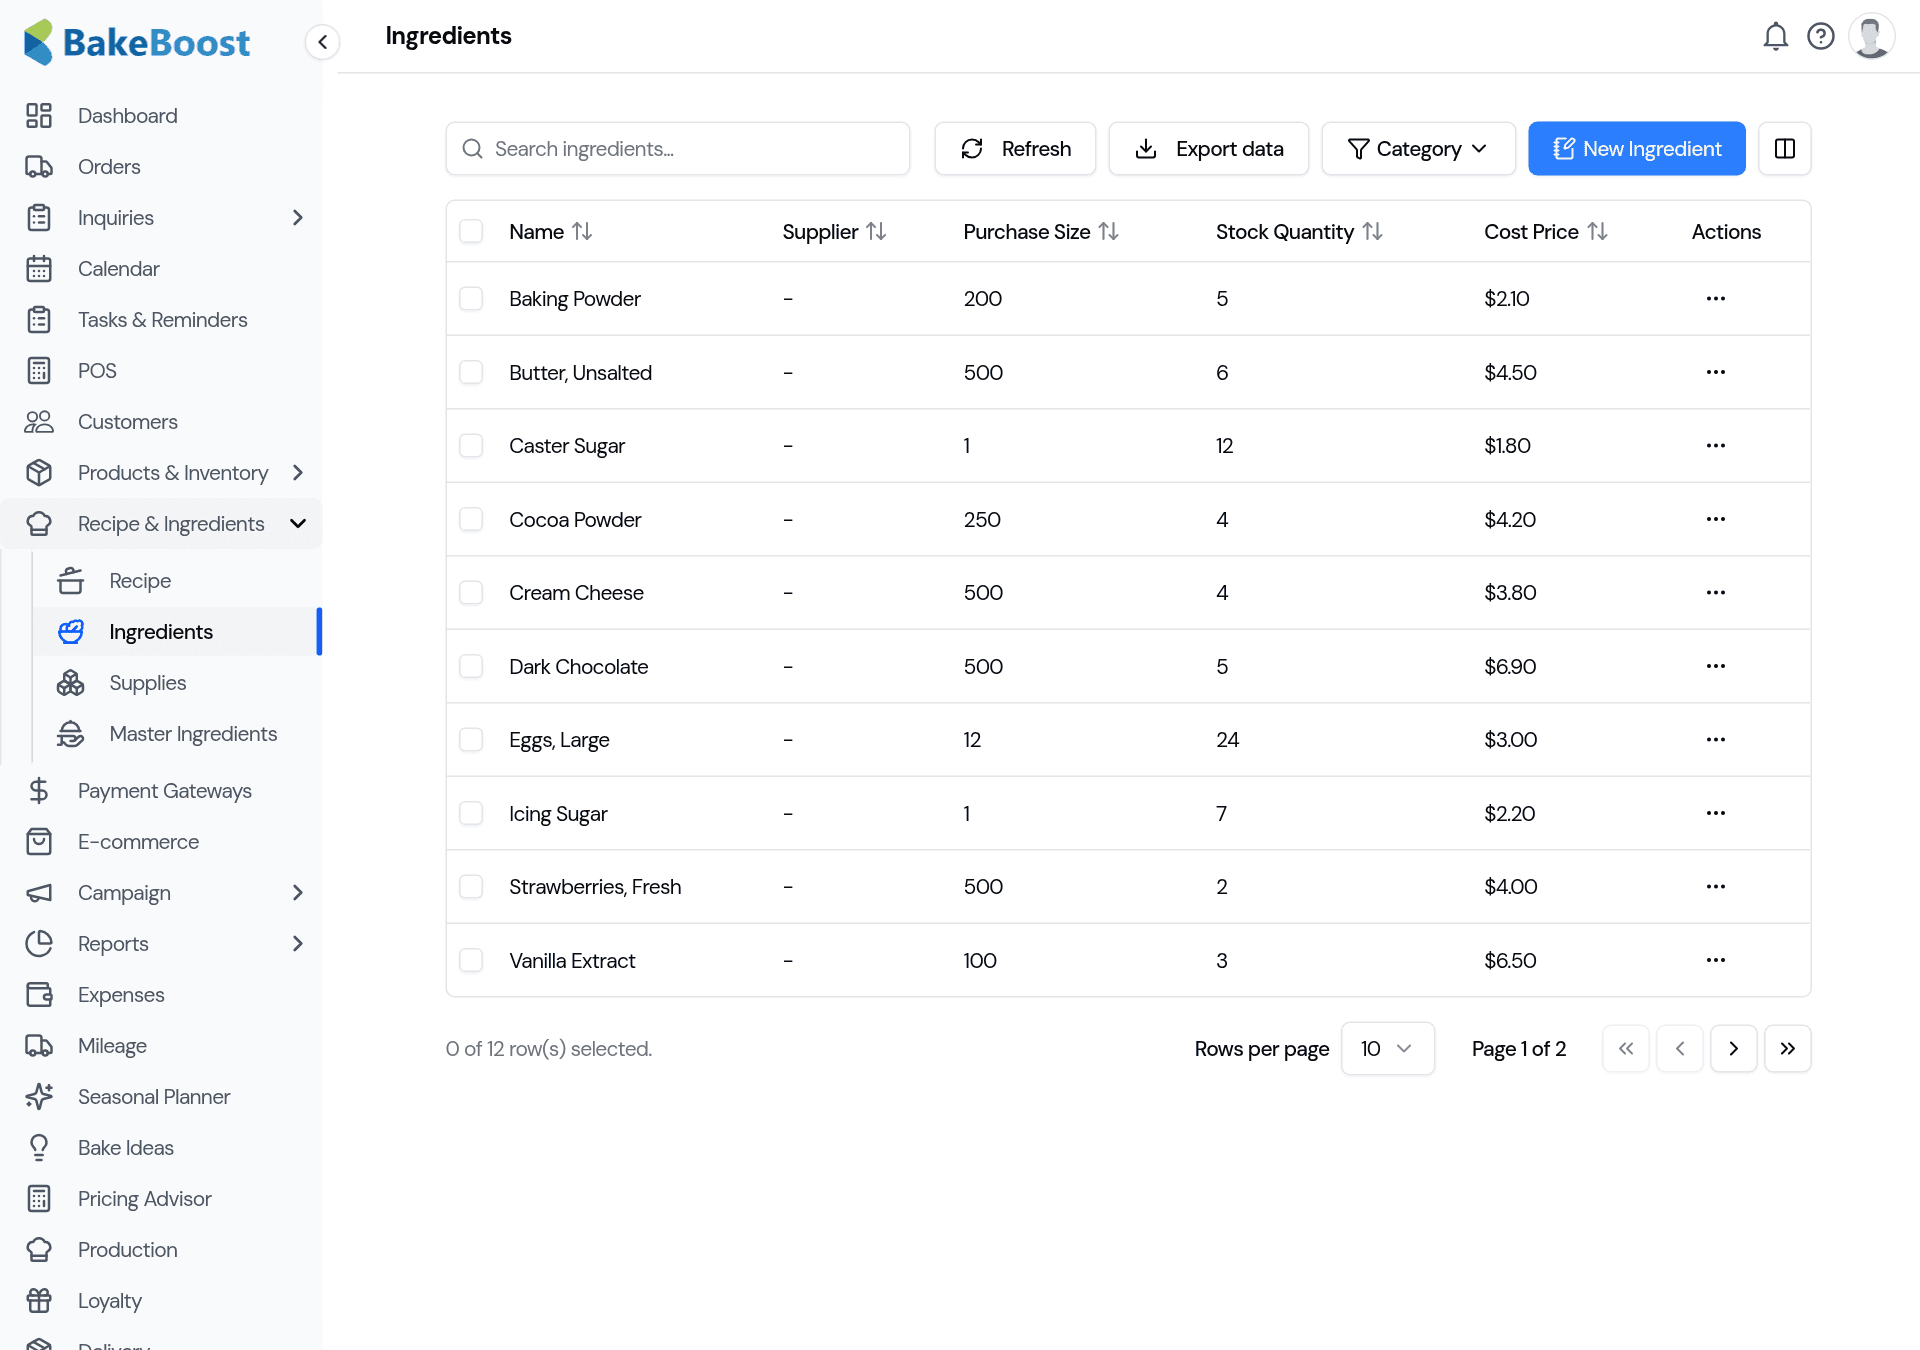
Click New Ingredient and enter:
- The name and a category (flour, dairy, flavourings, and so on).
- The purchase size and unit — how it's sold, for example a 2 kg bag of flour or a dozen eggs.
- The cost of that purchase.
- Optionally a supplier, allergens, and stock on hand.
From the purchase size and cost, Bake Boost knows the cost of a cup, a gram or an egg — so recipes can cost themselves.
2. Supplies
Recipe & Ingredients → Supplies is for the things that go around the bake rather than in it — boxes, boards, cupcake liners, ribbon, candles.
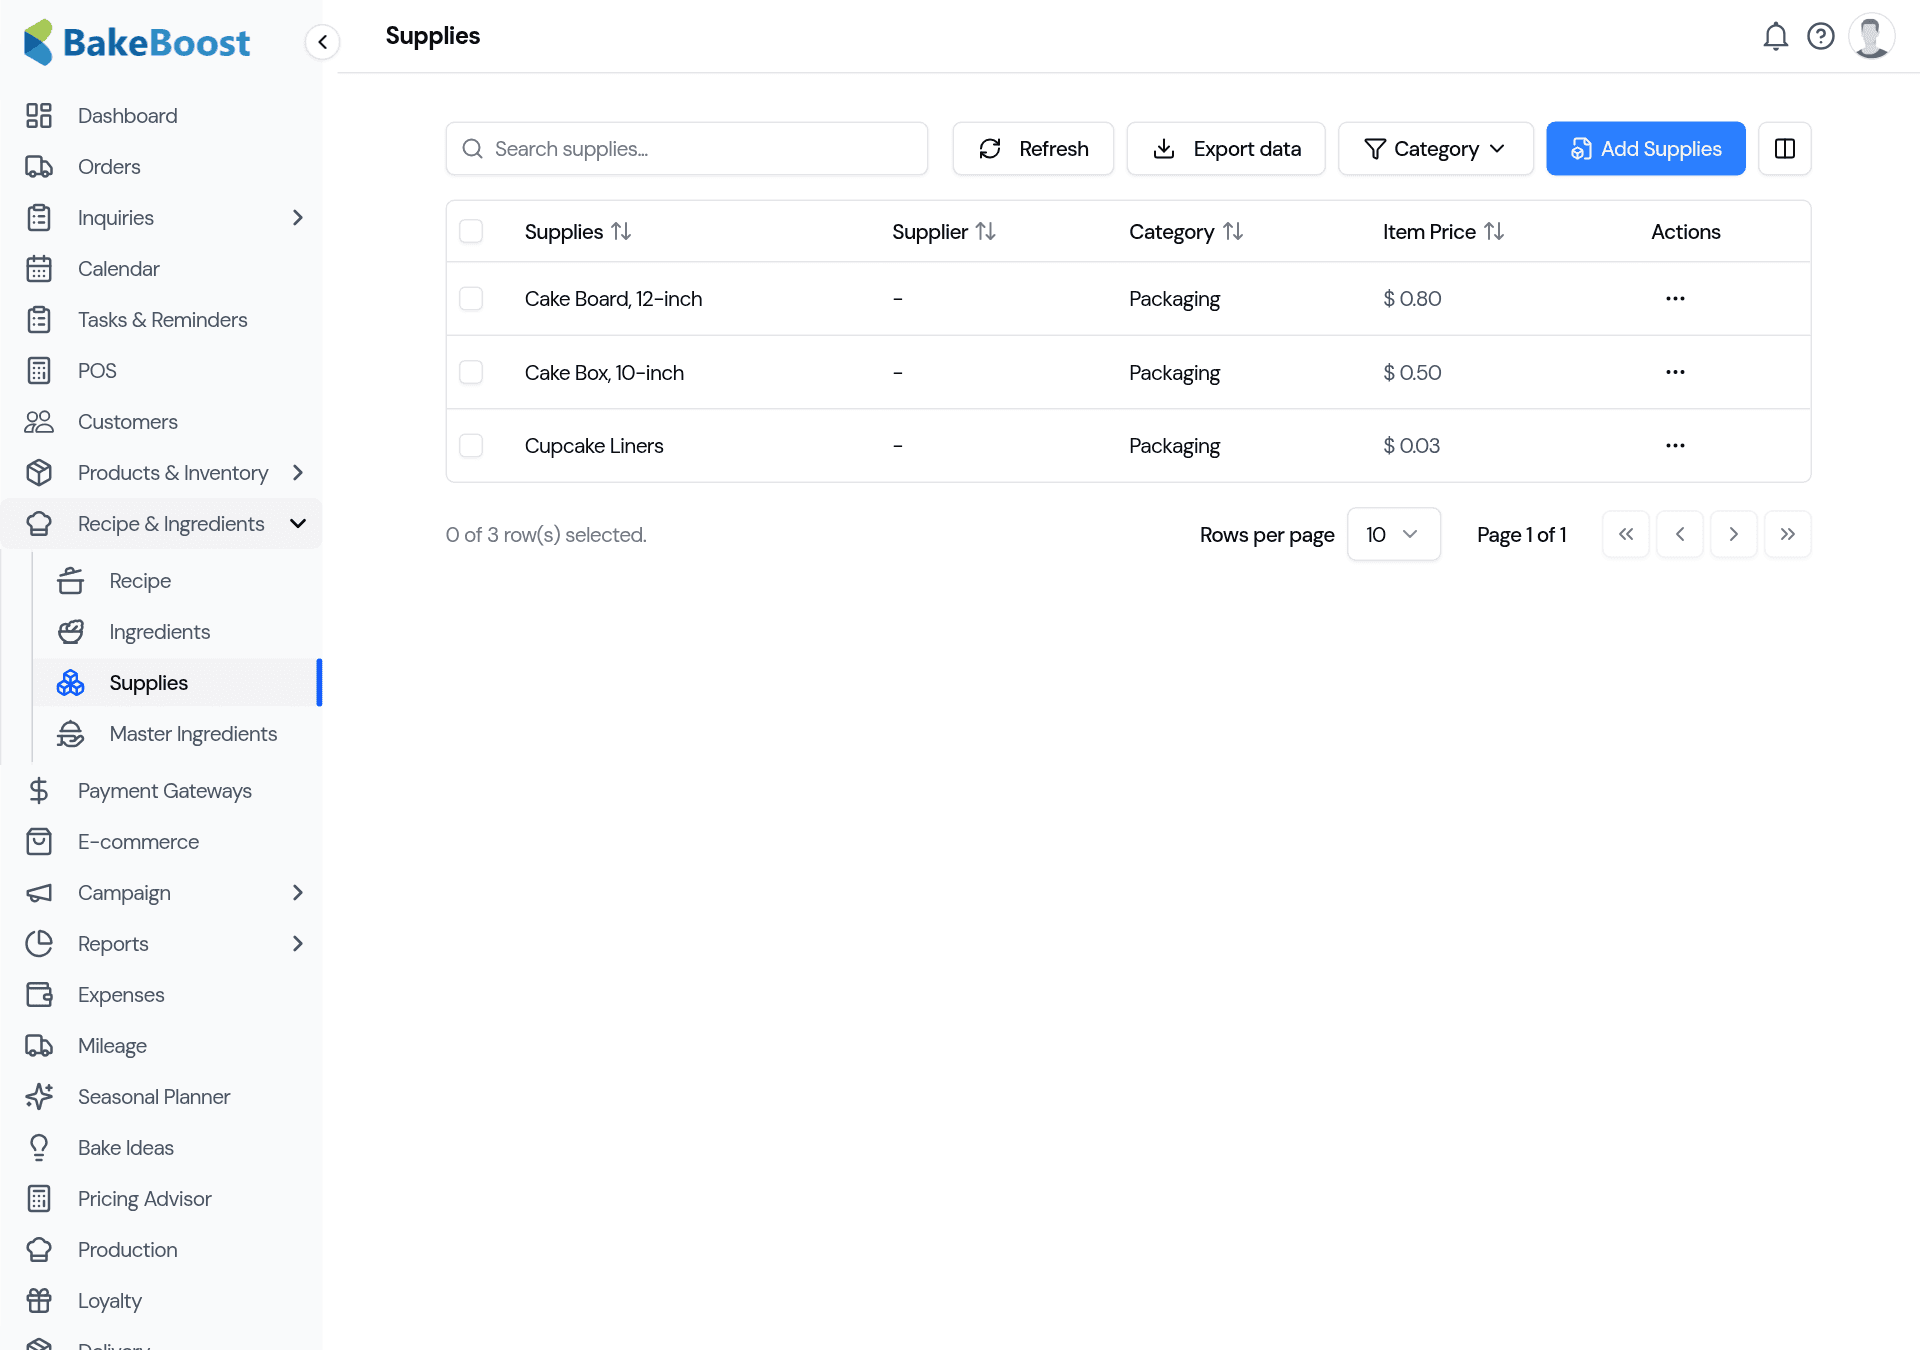
Recording them the same way — pack size and cost — means their cost can be counted into a product too, so your packaging isn't quietly eating your margin.
3. Build a recipe
Go to Recipe & Ingredients → Recipe to see your recipes, each with its serving count, its cost, and the price you'd charge.
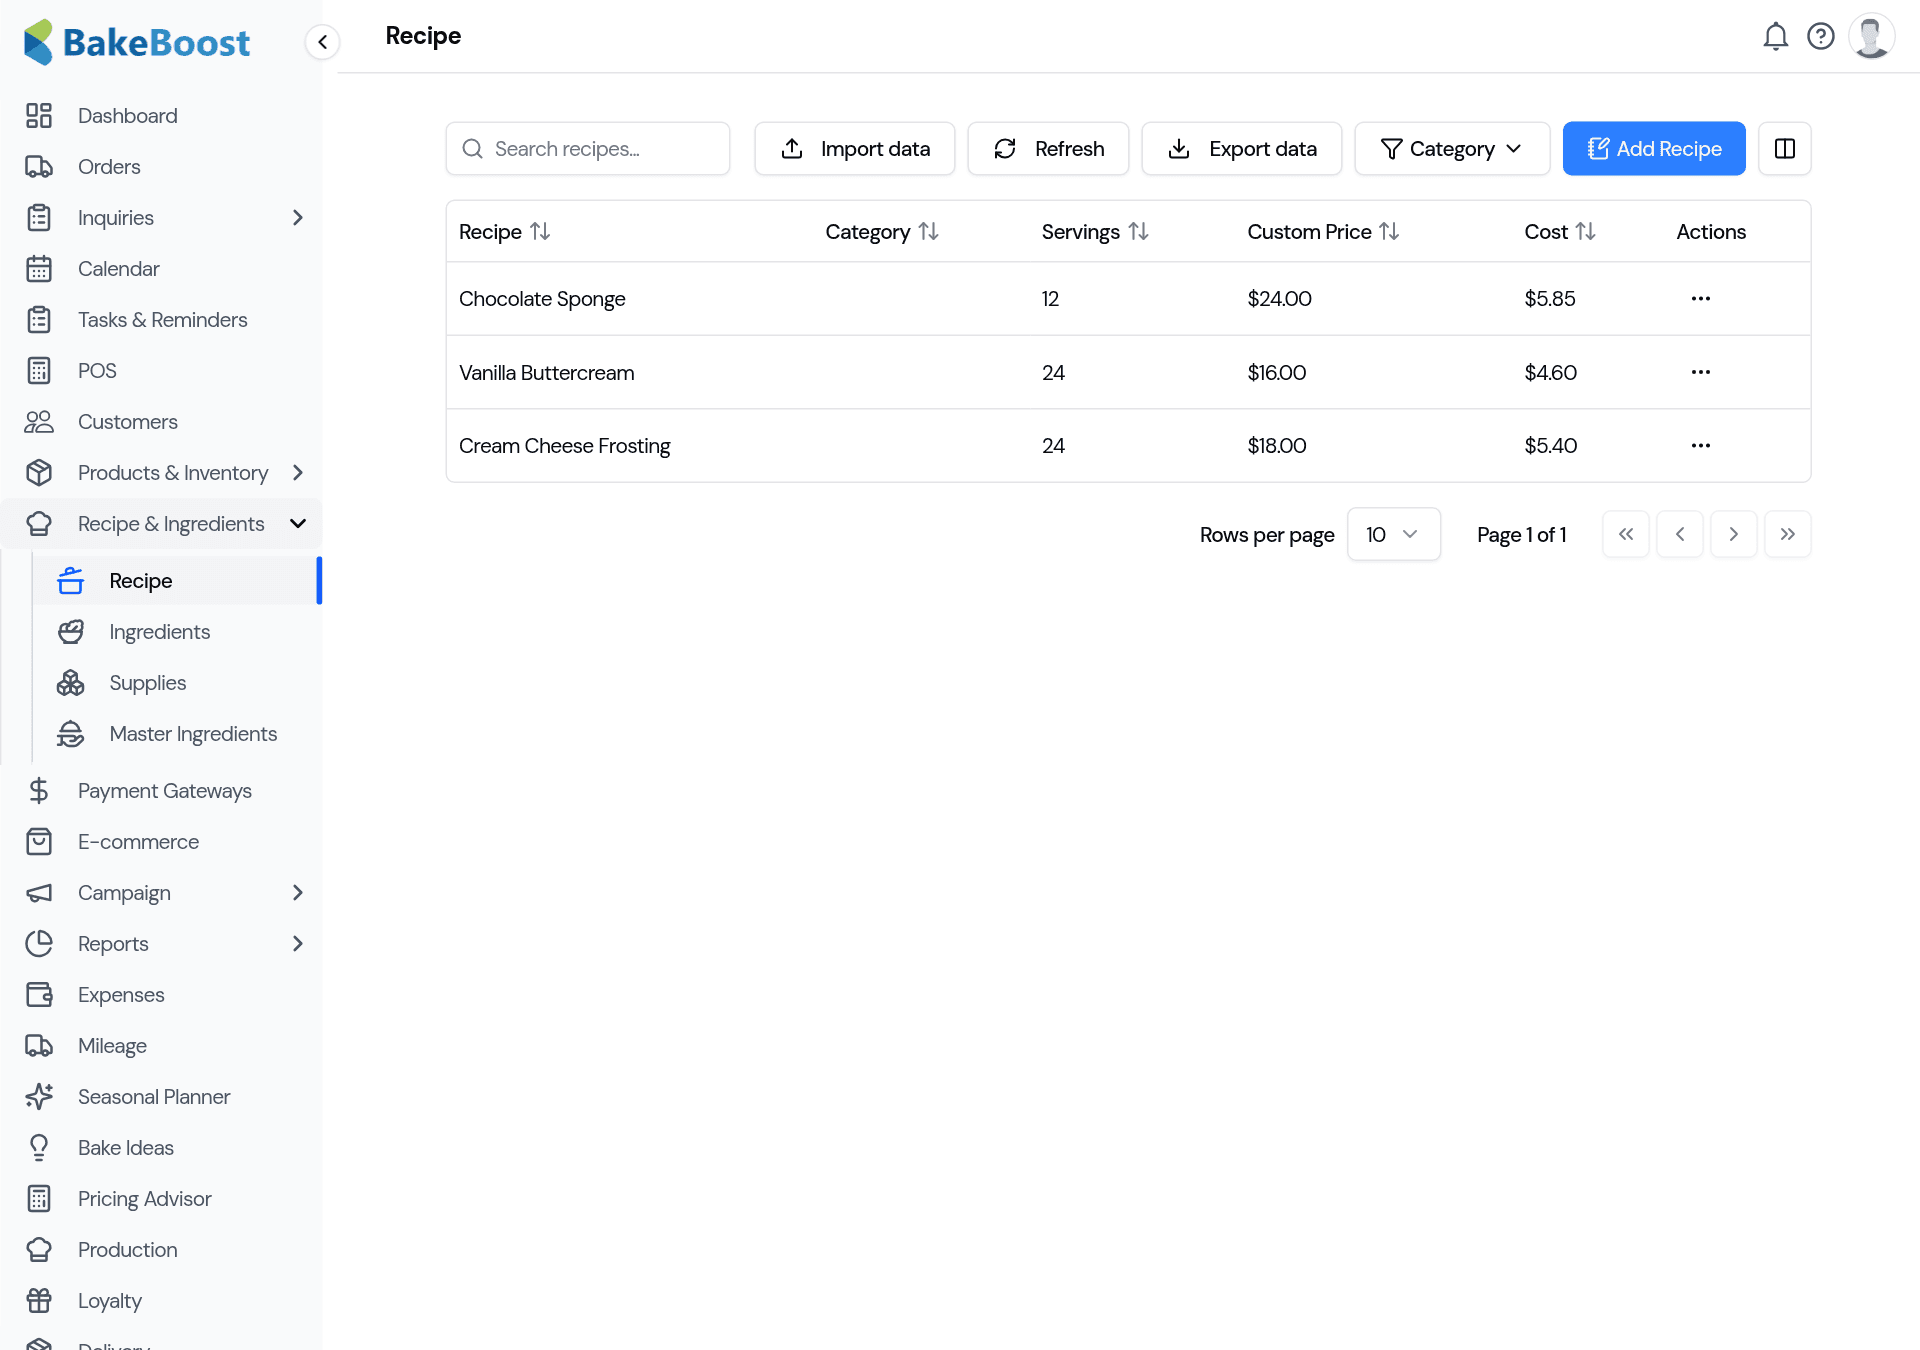
Click Add Recipe and:
- Give it a name, a category and how many servings it makes.
- Add your ingredients from the library, each with the quantity the recipe uses.
- Add the method and any storage notes to keep everything in one place.
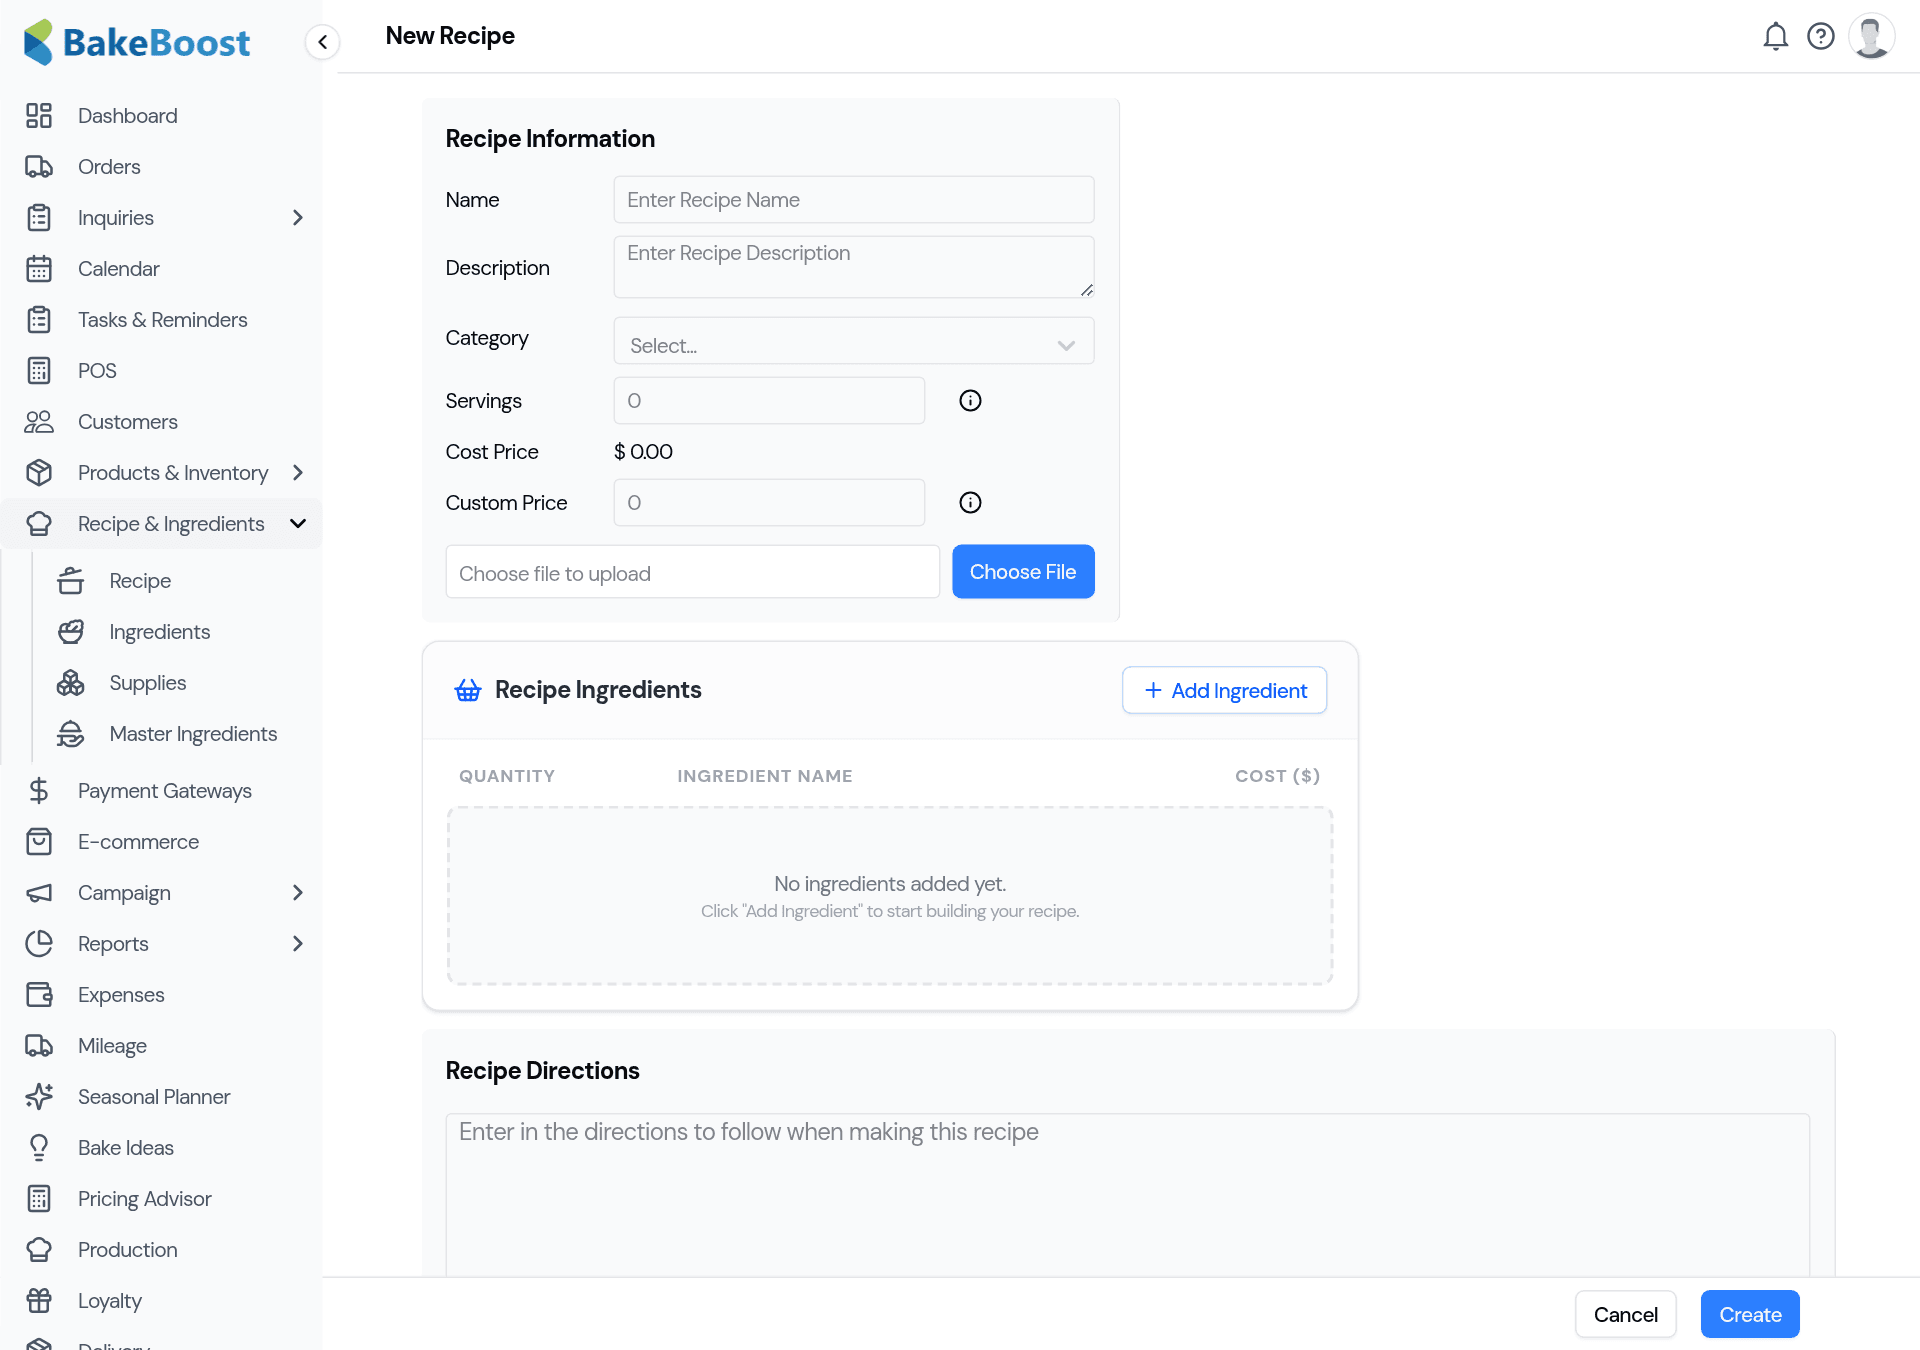
As you add ingredients, Bake Boost totals the cost and shows a cost per serving — worked out from the ingredient prices you entered. Set a custom price and you can see your margin immediately.
4. See a recipe's cost
Open a recipe to see the full breakdown: each ingredient, the quantity used, and what it costs — adding up to the recipe's total cost and cost per serving.
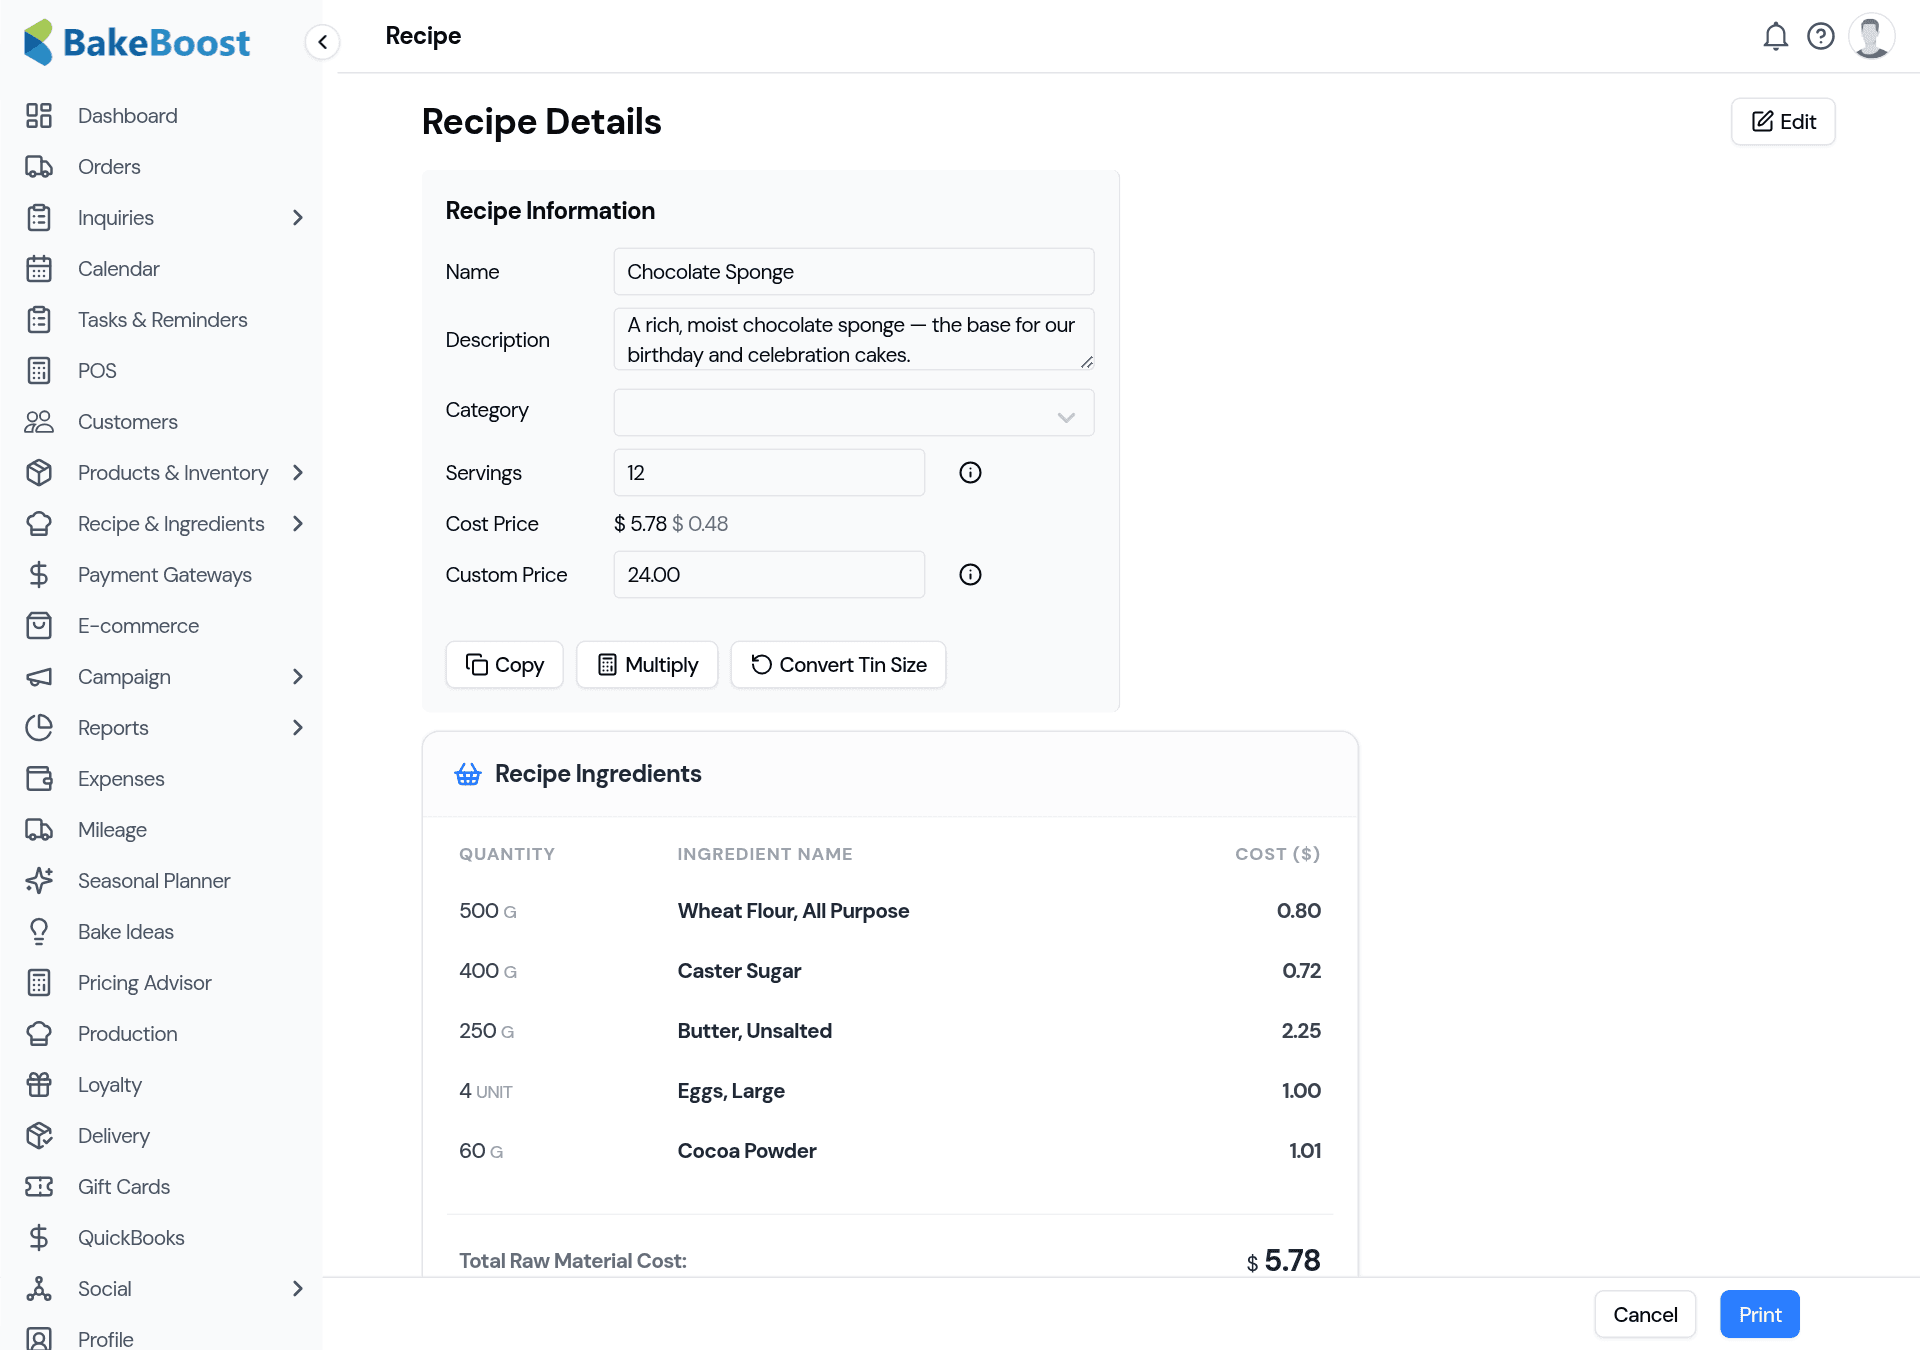
Handy tools on this screen:
- Copy — duplicate a recipe to make a variation without starting over.
- Multiply — scale the whole recipe up or down for a bigger or smaller batch.
- Convert Tin Size — recalculate the quantities for a different tin.
5. Turn a recipe into a priced product
The real pay-off: when you create a Recipe-type product in your catalogue, it draws its cost straight from the recipe. Price the product with a markup and your selling price is tied to what the bake actually costs — and if an ingredient gets more expensive, the cost follows. (See Products and your catalogue.)
Good to know
- Enter costs once. Ingredient prices live in one place and feed every recipe that uses them.
- Recipes cost themselves. Add the ingredients and quantities; Bake Boost works out the total cost and the cost per serving.
- Supplies count too. Boxes and boards are part of the cost — record them so your margins are honest.
- Start from Master Ingredients. A ready-made library saves you typing in the basics.
- Costs flow to your prices. Recipe-priced products keep your margins accurate as ingredient prices change.
- Turning cost into a price? See How much should I charge for a cake?
Last updated July 23, 2026