
AI Seasonal Planner
The big picture
Every bakery has its calendar — Valentine's, Mother's Day, Halloween, Thanksgiving, Christmas, local festivals — and the orders that come with them. The hard part is planning early enough. The Seasonal Planner does that for you:
Pick "Generate" → get a timeline of upcoming occasions → act on each one (draft a campaign, add prep tasks).
It combines two things:
- A holiday calendar for your region — so it's useful from day one, even if you're brand new.
- Your own sales history — so the advice is personalised ("November is your strongest month"), not generic.
1. Generate your plan
Open Seasonal Planner in the sidebar and click Generate my seasonal plan.
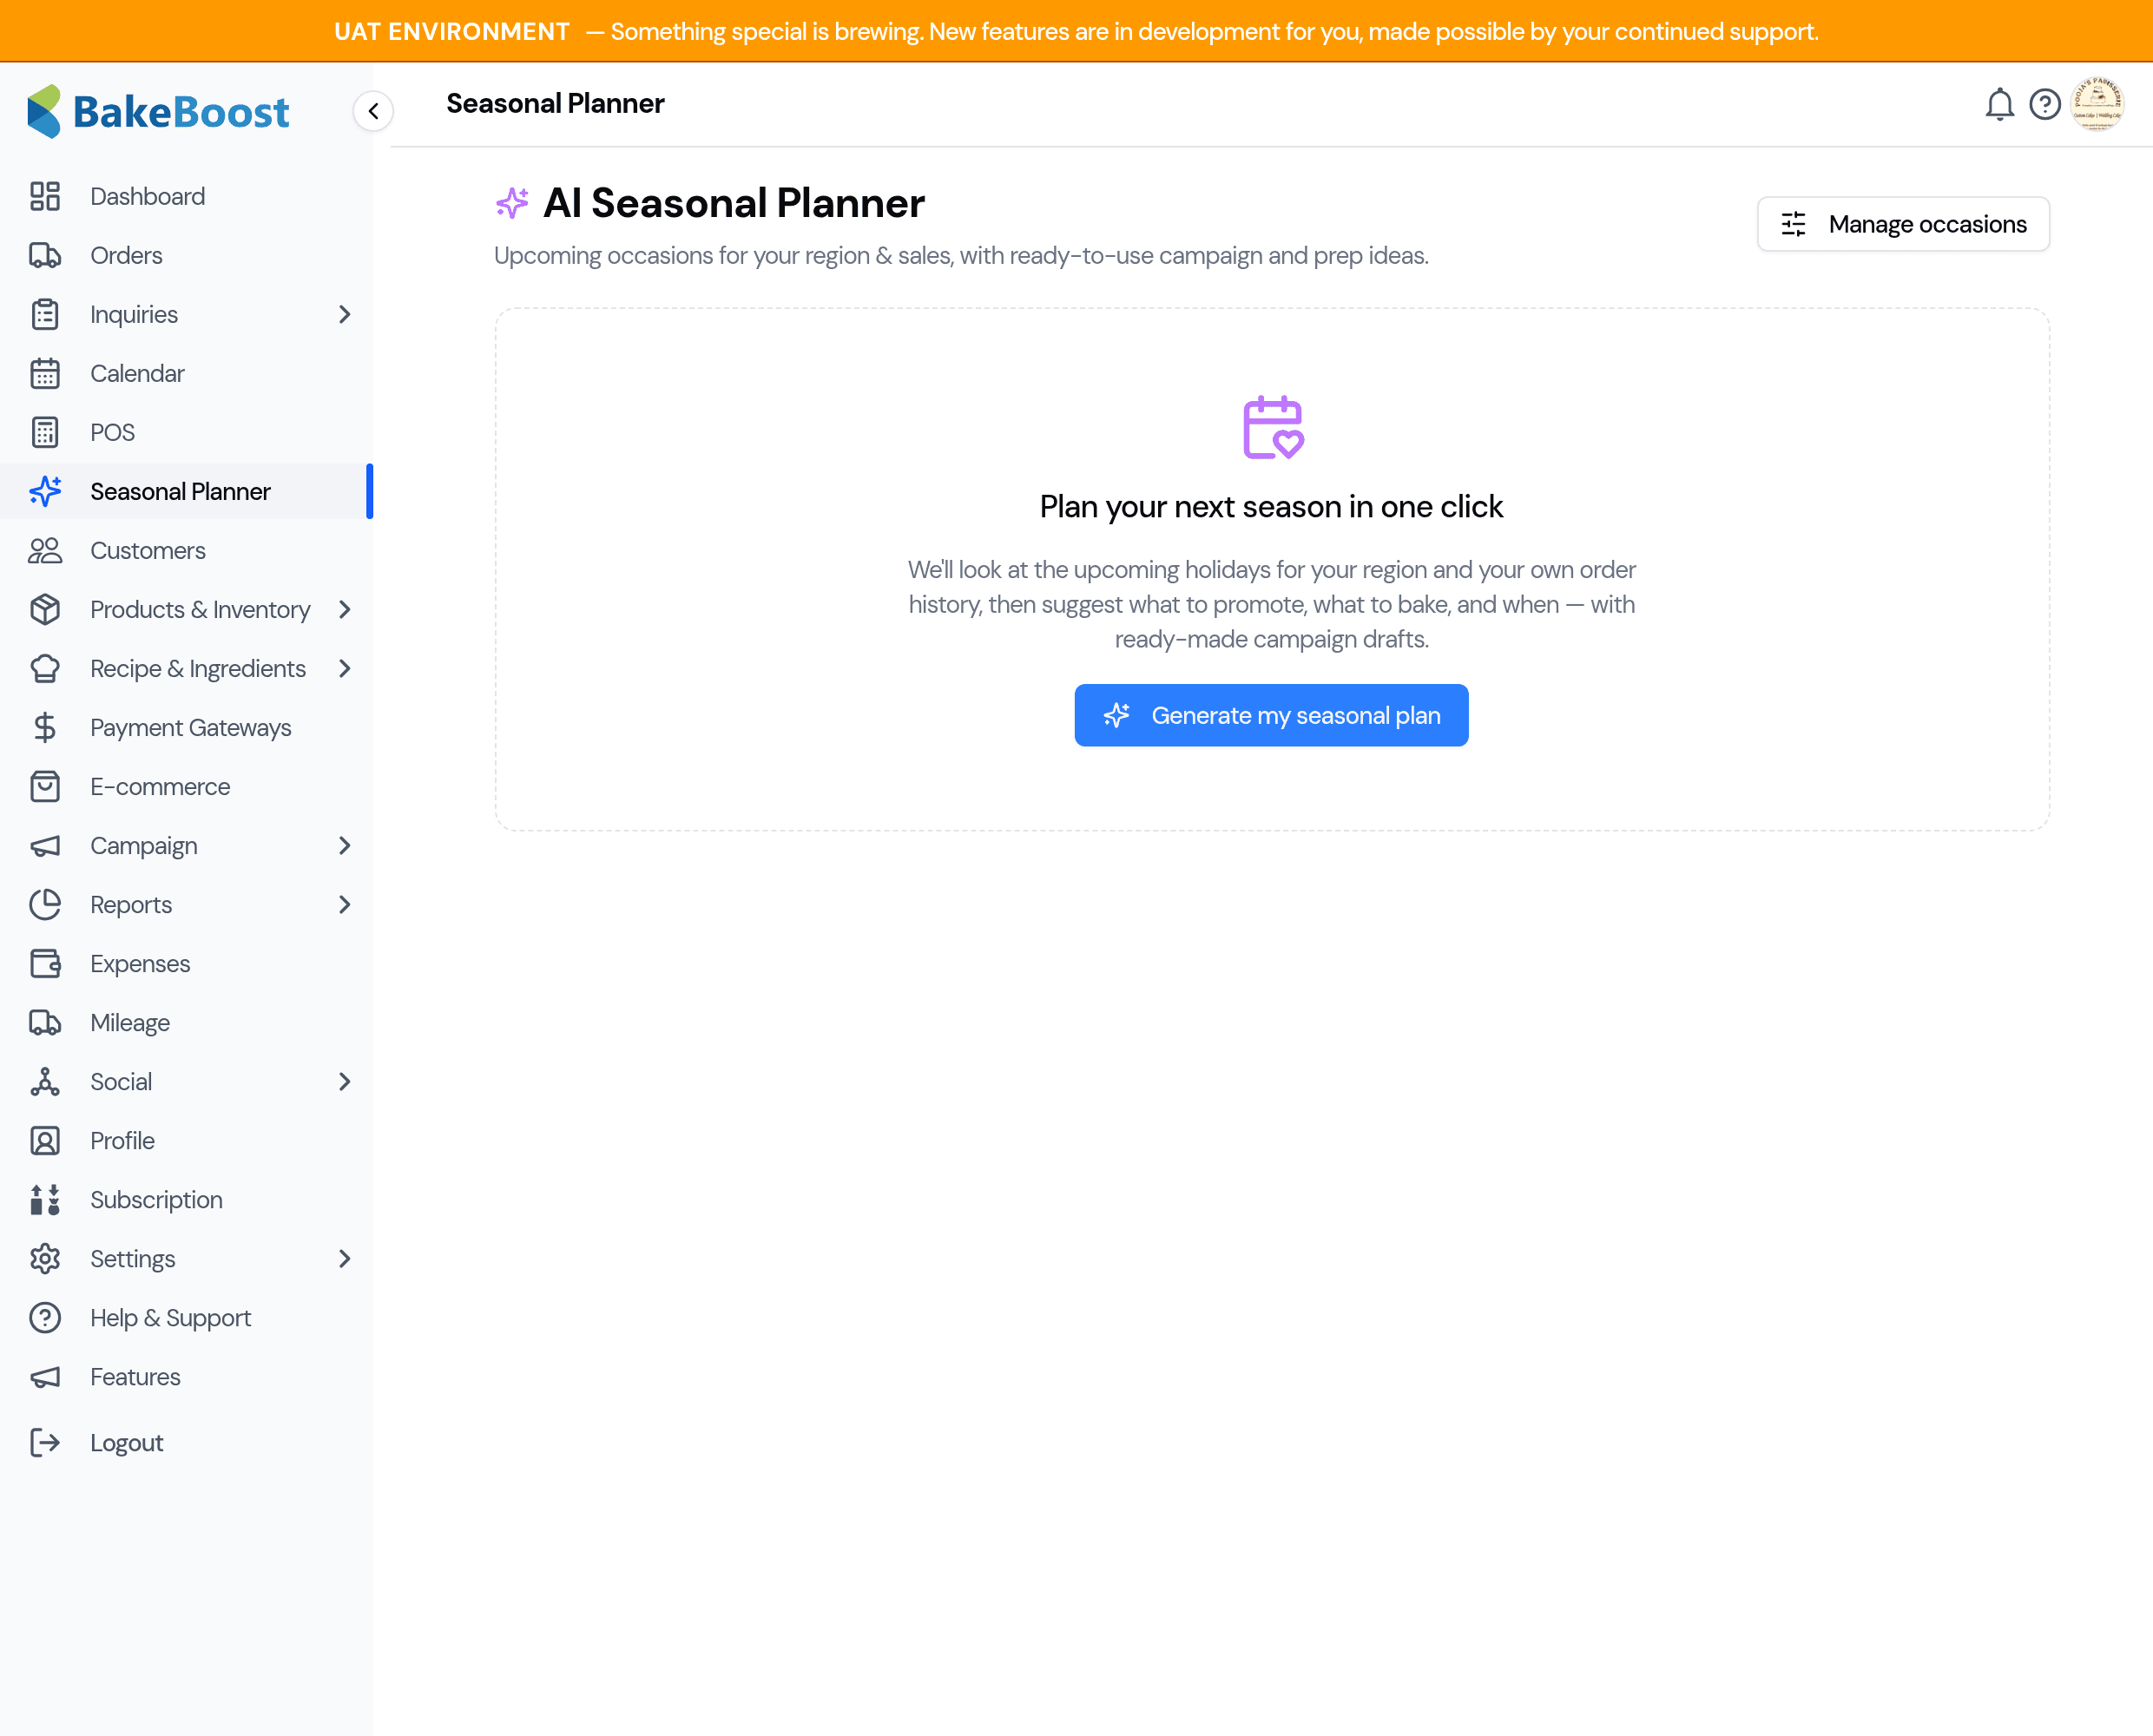
It takes a few seconds while the AI reads your upcoming occasions, your product list, and your order history. Your plan is then saved, so re-opening the page is instant and free — you only use a little of your monthly AI allowance when you click Generate or Regenerate.
2. Your seasonal timeline
You'll see a card for each upcoming occasion, in date order — the soonest first.
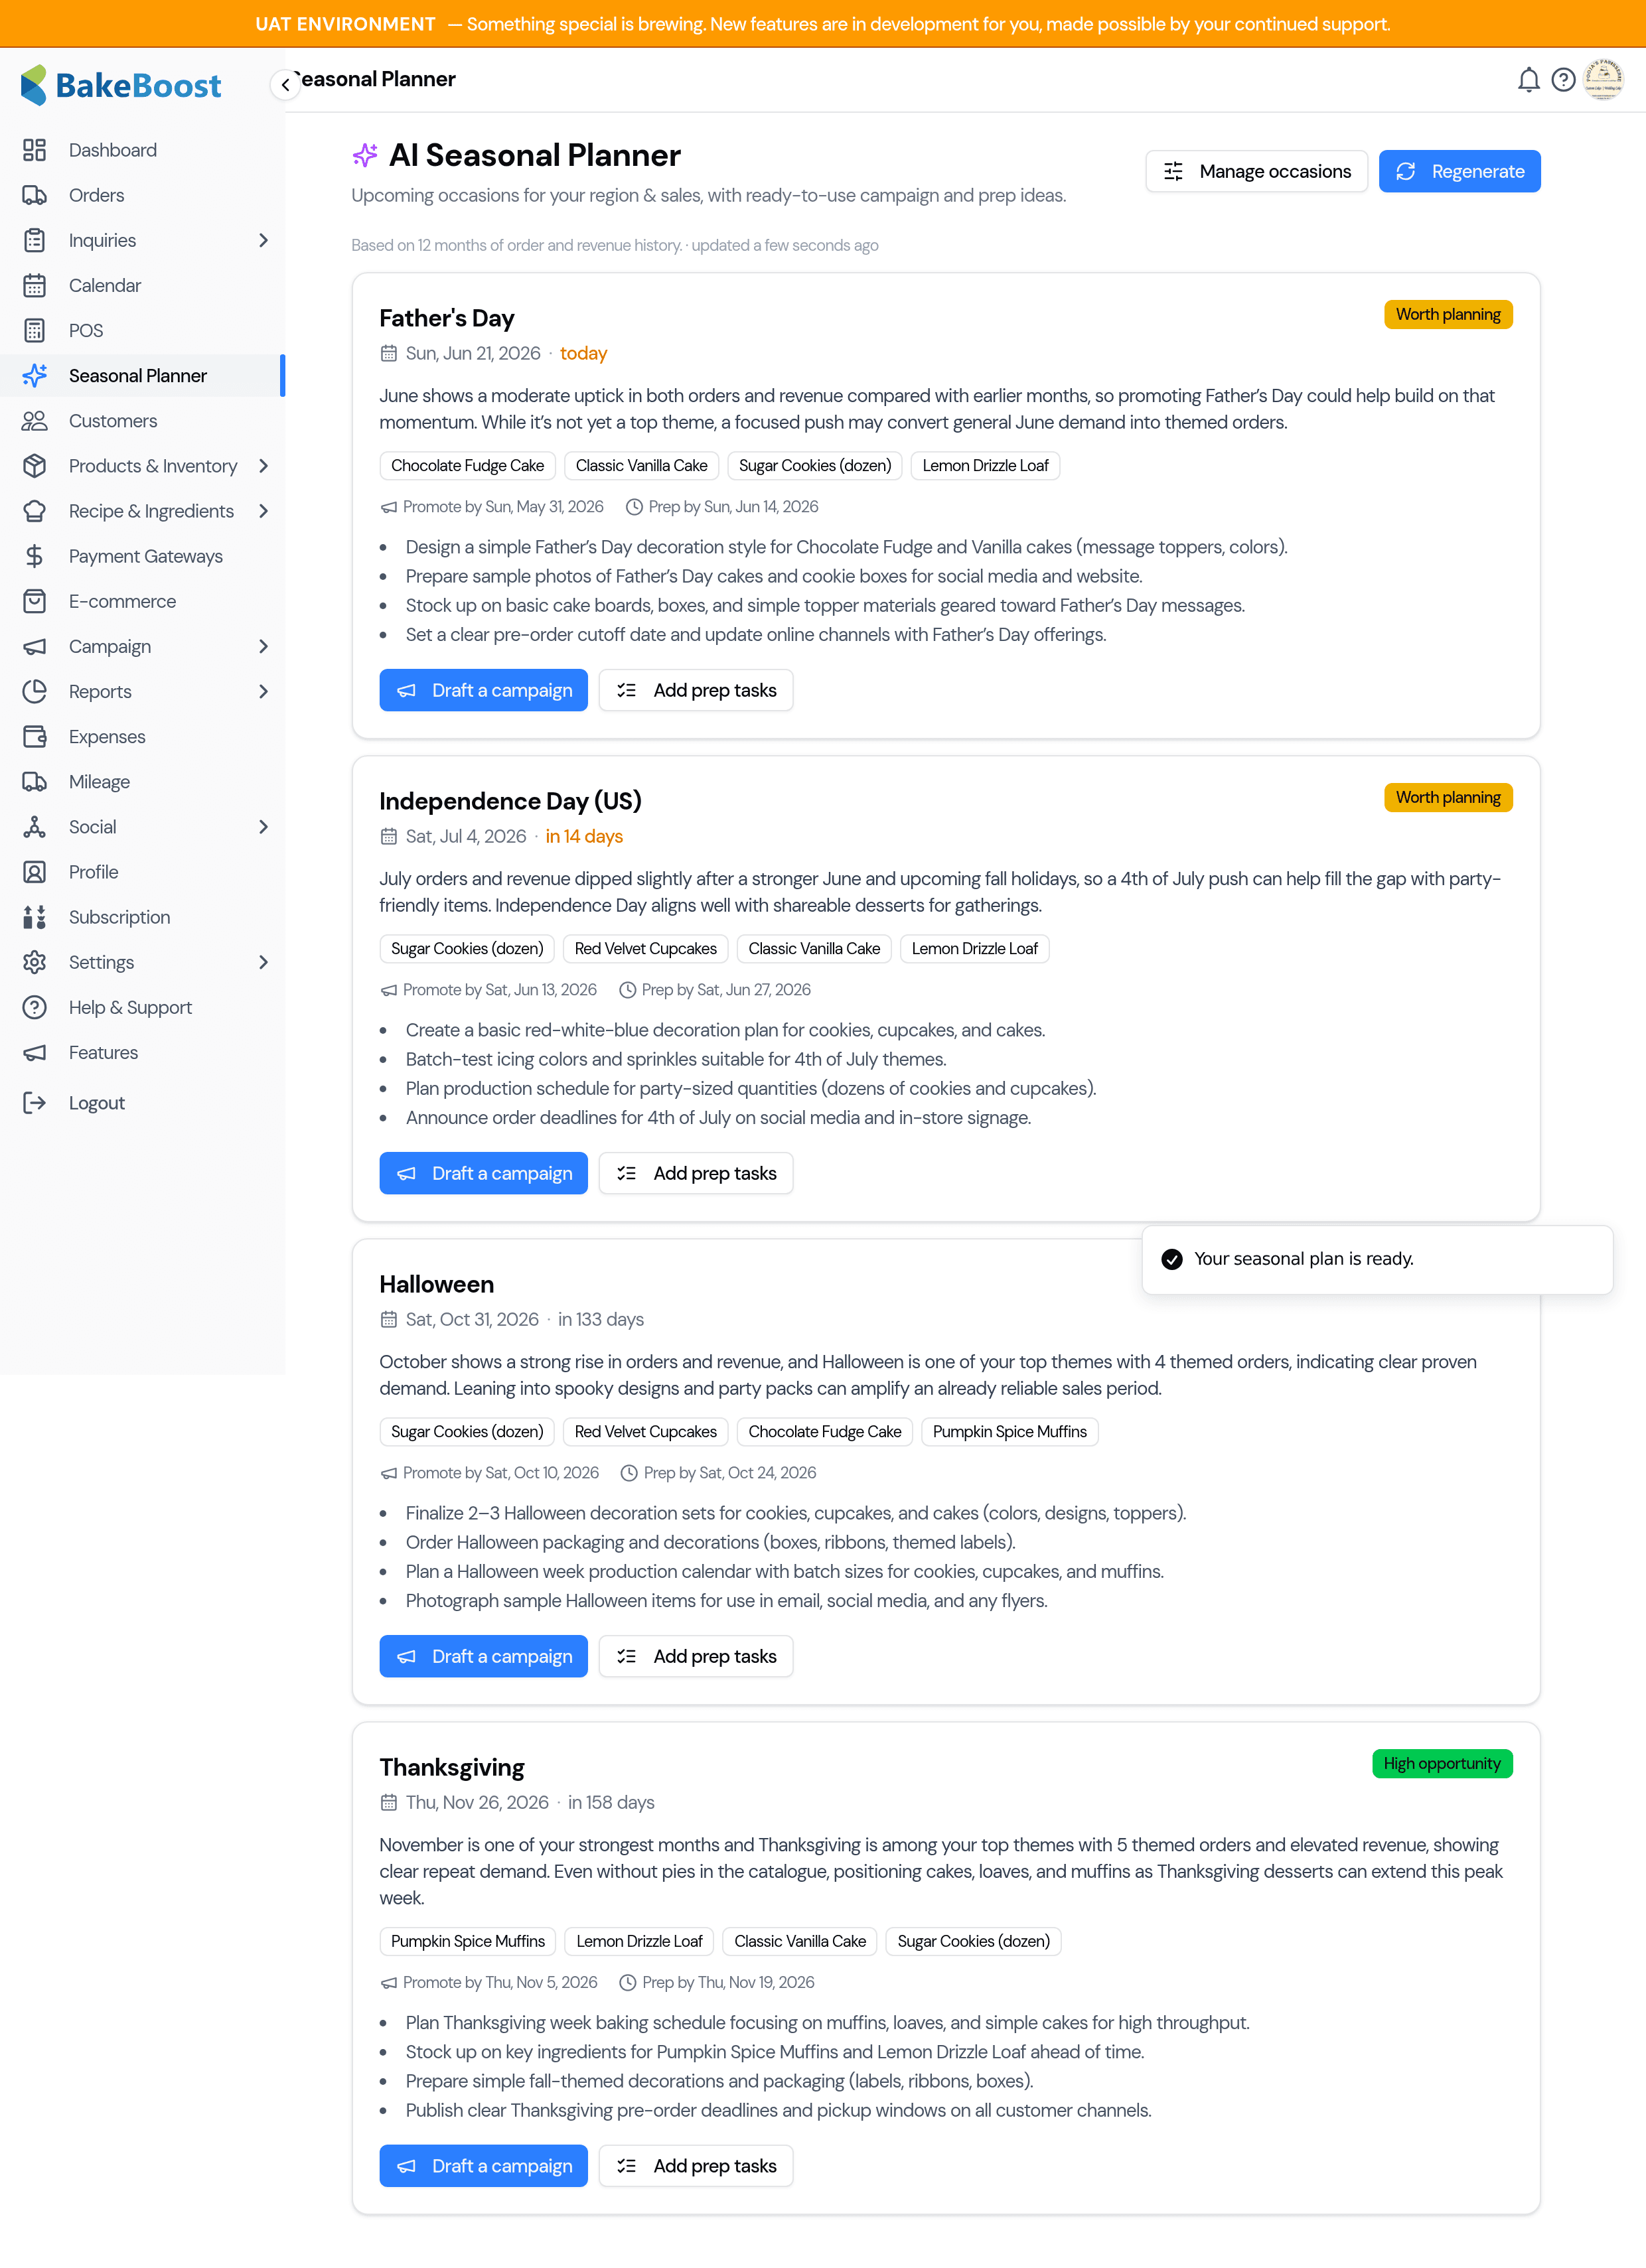
Each card is colour-tagged by how big the opportunity looks for your shop:
- High opportunity — your history shows a real spike around this time.
- Worth planning — a solid occasion to prepare for.
- Optional — minor for most bakeries; keep it or hide it.
3. Reading an opportunity
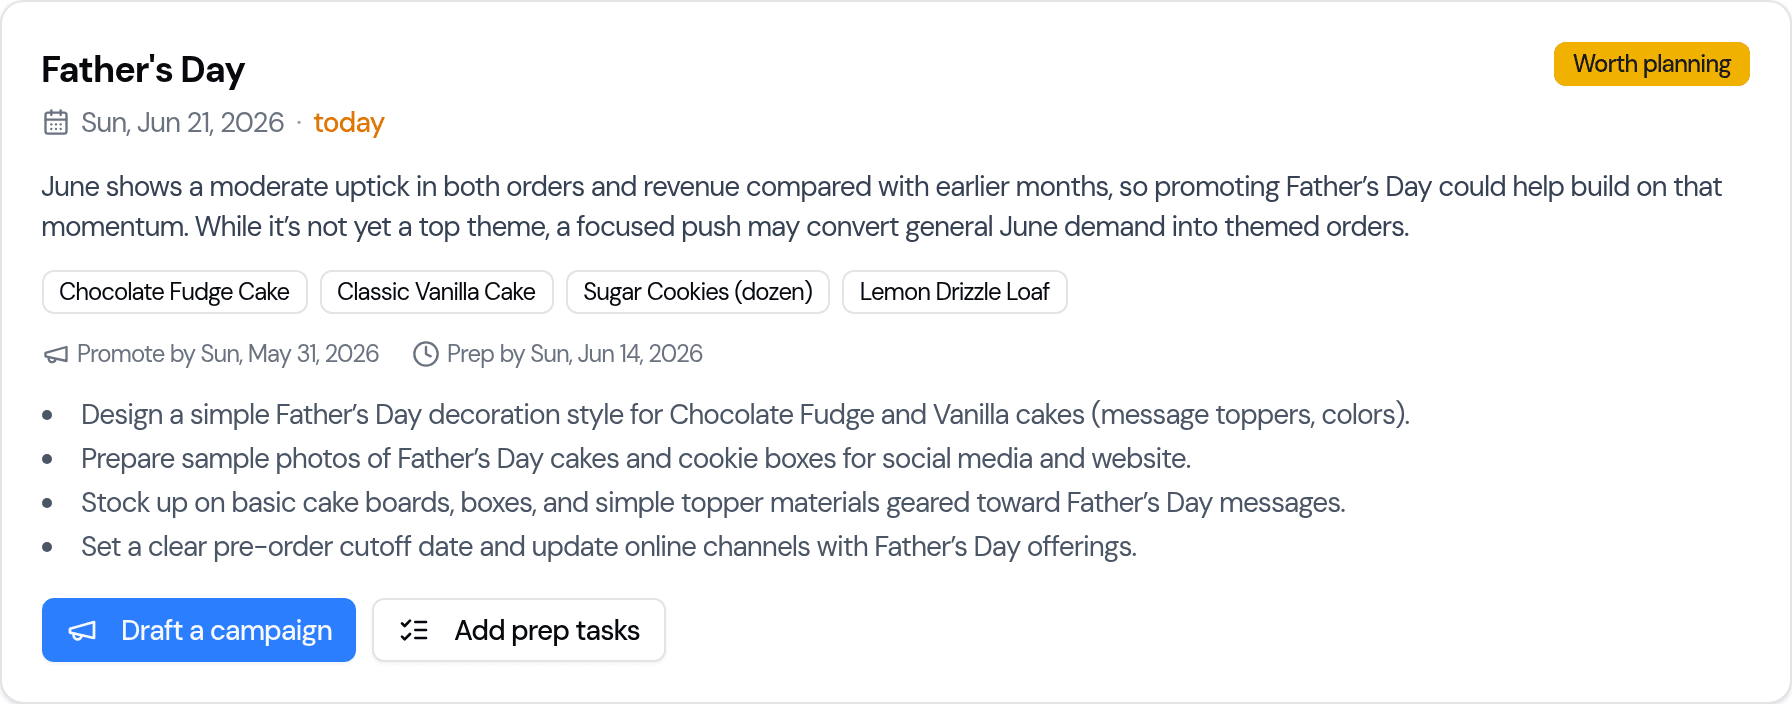
Every card gives you:
- The date and a countdown — so you can see what's close.
- Why it matters — a short, plain reason, backed by your own numbers where they support it.
- Recommended products — drawn from your catalogue, so they're things you actually sell.
- Promote by and Prep by dates — when to start marketing, and when to start baking.
- A prep checklist — the production steps to get ready.
4. Turn a plan into action
Two buttons on each card save you the busywork:
- Draft a campaign — creates a ready-to-edit marketing email (subject and body already written for that occasion) and drops you straight into the campaign editor. Review it, pick your audience, and send.
- Add prep tasks — saves the checklist into your task templates, so you can drop them onto an order's job sheet later.
5. Make it yours
Click Manage occasions (top of the page) to tailor the calendar to your shop. Everything here is private to your account — your changes never affect anyone else.
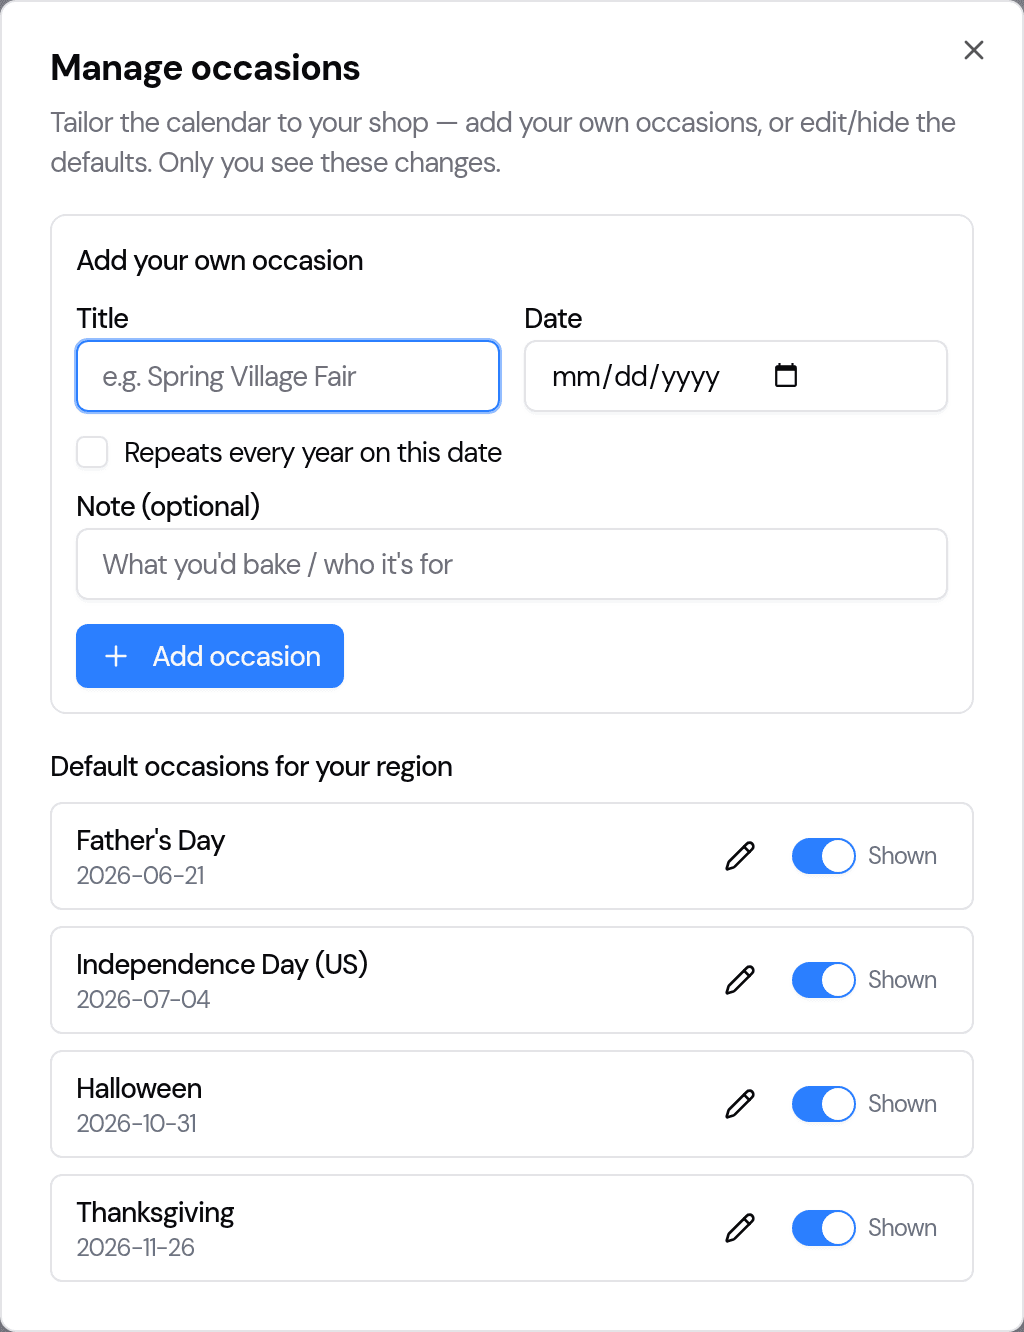
You can:
- Add your own occasions — a local fair, a school term-end, a market day. Tick Repeats every year for ones that come round annually.
- Edit a default — tap the pencil to change its date or name for your shop (handy when a date moves, or you call it something different).
- Hide a default — flip the toggle off for occasions you don't run, so they stop cluttering your timeline.
After changing your occasions, click Regenerate to refresh the plan.
6. Keeping it fresh
- Your plan looks ahead about six months. As dates pass, Regenerate to pull in what's next.
- Generate and Regenerate each use a small part of your monthly AI allowance; simply re-opening the page does not.
Tips
- Start with the High opportunity cards — they're where your history says the money is.
- Use Draft a campaign as a starting point, then add your own voice before you send.
- Add your local occasions once — the planner will factor them in every time from then on.
- Trust the Promote by dates: starting your marketing a few weeks out is what turns a busy date into a booked-out one.
Last updated June 21, 2026